INSTALLATION
Removal / installation · Vehicles built from Jun 2009
Versions by build date: Jun 2006 – Sep 2006 Oct 2006 – May 2009 from Jun 2009
| 1.
INSTALL FRONT SUSPENSION LOWER NO. 1 ARM |
 |
Install the front lower arm bushing stopper.
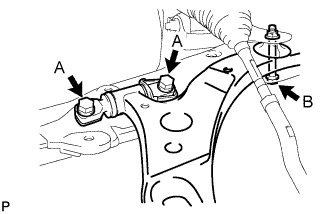
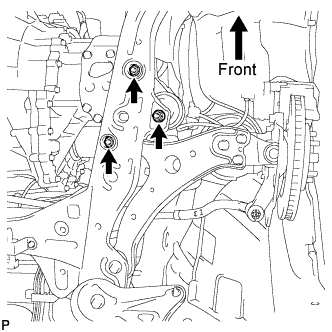
Install the front suspension lower No. 1 arm to the front frame assembly with the 3 bolts and the nut, but do not tighten them yet.
- Tighten the 3 bolts.
-
Torque:
- Bolt A:
- 200 N*m{
2,040 kgf*cm
, 148 ft.*lbf
}
- Bolt B:
- 206 N*m{
2,100 kgf*cm
, 152 ft.*lbf
}
| 2.
INSTALL ENGINE MOUNTING INSULATOR |
|
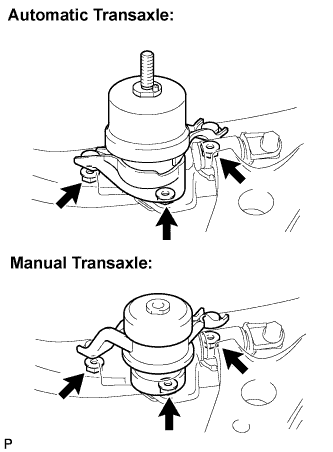
- Install the engine mounting insulator with the 3 nuts and temporarily tighten the 3 nuts.
| 3.
INSTALL ENGINE ASSEMBLY WITH TRANSAXLE |
|
- HINT:
- Refer to the instructions for installation of the engine assembly (Click here for 2AZ-FE, Click here for 2GR-FE).
| 4.
FULLY TIGHTEN ENGINE MOUNTING INSULATOR |
|
- Fully tighten the 3 nuts.
-
Torque:
- 87 N*m{
887 kgf*cm
, 64 ft.*lbf
}
| 5.
INSTALL FRONT WHEELS |
|
-
Torque:
- 103 N*m{
1,050 kgf*cm
, 76 ft.*lbf
}
| 6.
PLACE FRONT WHEELS FACING STRAIGHT AHEAD |
|
| 7.
CONNECT CABLE TO NEGATIVE BATTERY TERMINAL |
|
| 8.
INSPECT AND ADJUST FRONT WHEEL ALIGNMENT |
|
(Click here)