REMOVAL
Removal / installation · Vehicles built Oct 2006 – May 2009
Versions by build date: Jun 2006 – Sep 2006 Oct 2006 – May 2009 from Jun 2009
- HINT:
- Use the same procedures for the RHD and LHD.
- The procedures listed below are for the LHD.
| 1.
PRECAUTION |
 |
Click here.
| 2.
DISCONNECT CABLE FROM NEGATIVE BATTERY TERMINAL |
|
| 3.
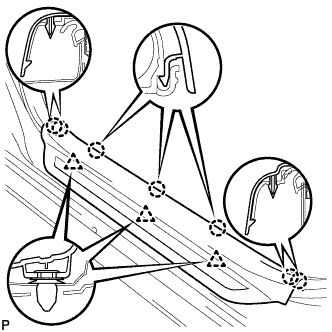
REMOVE FRONT DOOR SCUFF PLATE LH
|
|
- Disengage the 7 claws and 3 clips, and remove the front door scuff plate LH.
| 4.
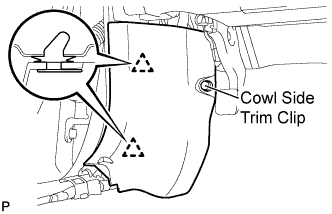
REMOVE COWL SIDE TRIM SUB-ASSEMBLY LH
|
|
- Remove the cowl side trim clip.
Disengage the 2 clips and remove the cowl side trim sub-assembly LH.
| 5.
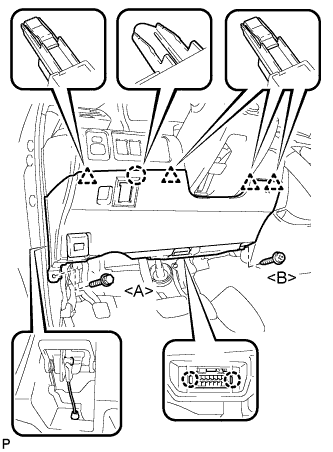
REMOVE LOWER NO. 1 INSTRUMENT PANEL FINISH PANEL LH
|
|
- Remove the bolt <A> and the screw <B>.
Disengage the 2 claws and the DLC3.
Disconnect the hood lock control cable assembly.
Disengage the claw and the 4 clips.
Remove the air hose, disconnect the connector, and then remove the lower No. 1 instrument panel finish panel.
| 6.
REMOVE NO. 1 INSTRUMENT PANEL SUB-ASSEMBLY (for LHD)
|
|
- Disengage the 3 claws and the 2 clips.
Disconnect each connector and remove the No. 1 instrument panel sub-assembly.
| 7.
REMOVE NO. 1 INSTRUMENT PANEL SUB-ASSEMBLY (for RHD)
|
|
- Disengage the 3 claws and the 2 clips.
Disconnect the connector and remove the No. 1 instrument panel sub-assembly.
| 8.
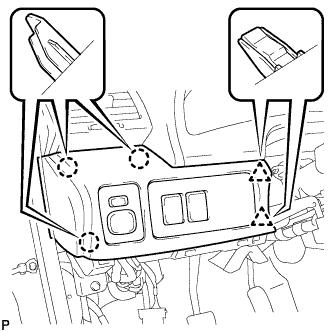
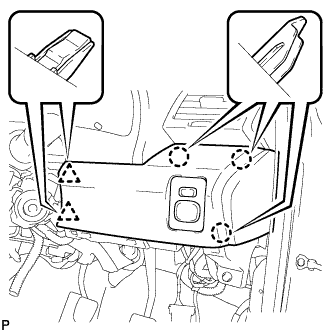
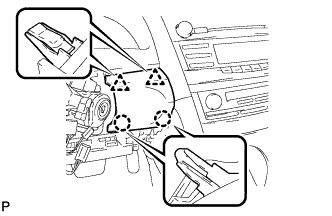
REMOVE LOWER INSTRUMENT PANEL FINISH PANEL
|
|
- Disengage the 2 claws and 2 clips, and then remove the lower instrument panel finish panel.
| 9.
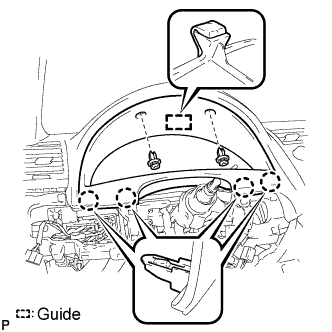
REMOVE INSTRUMENT CLUSTER FINISH PANEL SUB-ASSEMBLY
|
|
- Remove the 2 clips.
Disengage the guide and 4 claws, and then remove the instrument cluster finish panel sub-assembly.
| 10.
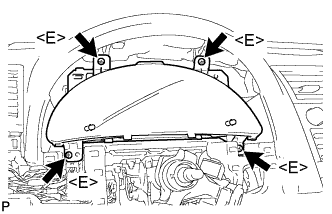
REMOVE COMBINATION METER ASSEMBLY
|
|
- Remove the 4 screws <E>.
Disconnect each connector and remove the combination meter assembly.
| 11.
DISCONNECT CONNECTORS |
|
Disconnect the clutch start switch connector.
Disconnect the clutch switch connector (with cruise control).
| 12.
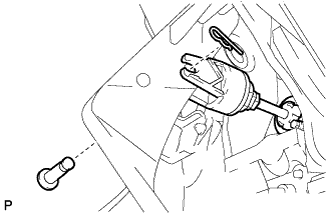
REMOVE CLUTCH MASTER CYLINDER PUSH ROD CLEVIS PIN |
|
- Remove the clip and pin.
| 13.
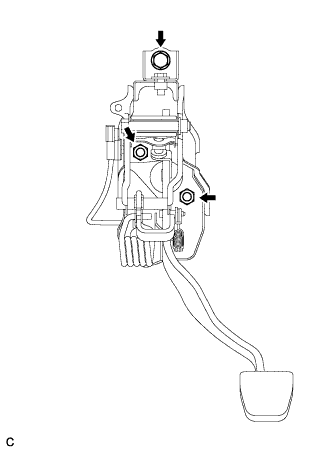
REMOVE CLUTCH PEDAL SUPPORT SUB-ASSEMBLY (for LHD) |
|
- Remove the bolt, 2 nuts and clutch pedal support assembly.
| 14.
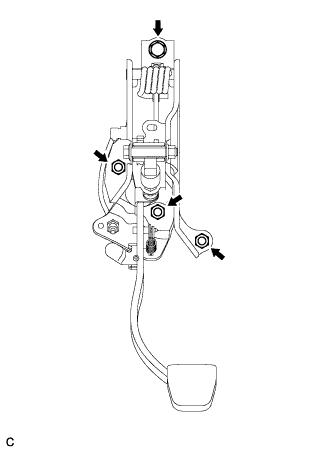
REMOVE CLUTCH PEDAL SUPPORT SUB-ASSEMBLY (for RHD) |
|
- Remove the bolt, 3 nuts, and clutch pedal support assembly.
| 15.
REMOVE TORSION SPRING |
|
While the clutch pedal is fully depressed, remove the torsion spring.
| 16.
REMOVE PEDAL WITH HOOK SPRING |
|
Remove the pedal with hook spring.
| 17.
REMOVE CLUTCH PEDAL SUB-ASSEMBLY |
|
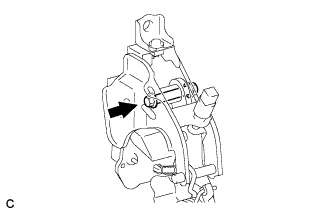
- Remove the pedal shaft and nut.
Remove the clutch pedal from the clutch pedal support.
| 18.
REMOVE CLUTCH PEDAL SPRING HOLDER |
|
Remove the clutch pedal spring holder from the clutch pedal support.
| 19.
REMOVE CLUTCH PEDAL PAD |
|
Remove the clutch pedal pad from the clutch pedal.
| 20.
REMOVE CLUTCH PEDAL BUSHING |
|
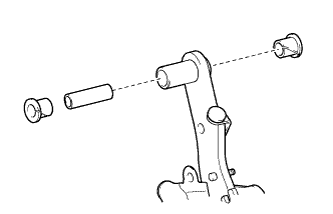
- Remove the 2 pedal bushings and pedal shaft collar from the clutch pedal.
| 21.
REMOVE NO. 1 CLUTCH PEDAL CUSHION (for LHD) |
|
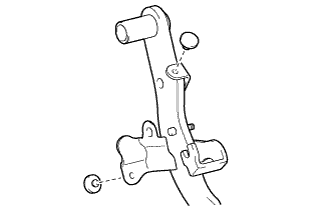
- Using needle-nose pliers, remove the 2 No. 1 clutch pedal cushions from the clutch pedal.
| 22.
REMOVE NO. 1 CLUTCH PEDAL CUSHION (for RHD) |
|
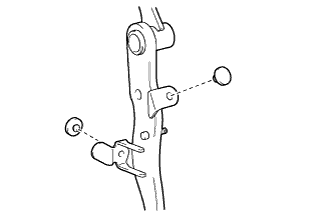
- Using needle-nose pliers, remove the 2 No. 1 clutch pedal cushions from the clutch pedal.
| 23.
REMOVE CLUTCH PEDAL TURNOVER BUSHING (for LHD) |
|
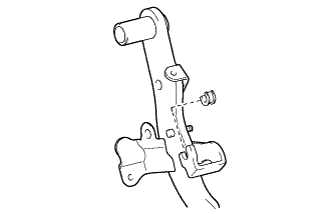
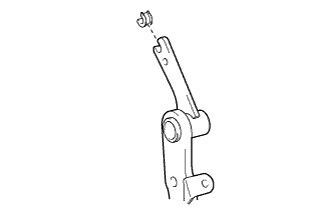
- Remove the turnover bushing from the clutch pedal.
| 24.
REMOVE CLUTCH PEDAL TURNOVER BUSHING (for RHD) |
|
- Remove the turnover bushing from the clutch pedal.
| 25.
REMOVE CLUTCH MASTER CYLINDER PUSH ROD CLEVIS BUSHING |
|
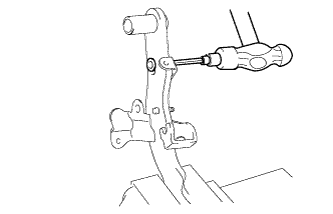
- Using an 8 mm hexagon wrench and a hammer, remove the clevis bushing from the clutch pedal.