Door Oscillator Circuit
Circuit diagnosis · Vehicles built from Oct 2006
DESCRIPTION
The door oscillator is built into the driver door and passenger door. The oscillator forms its own action area around its door and detects the presence of the electrical key.WIRING DIAGRAM
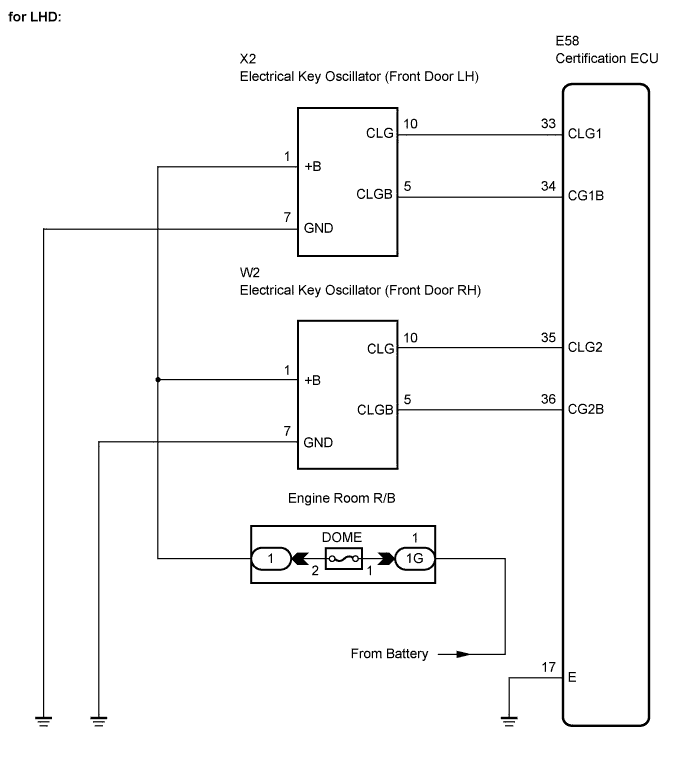

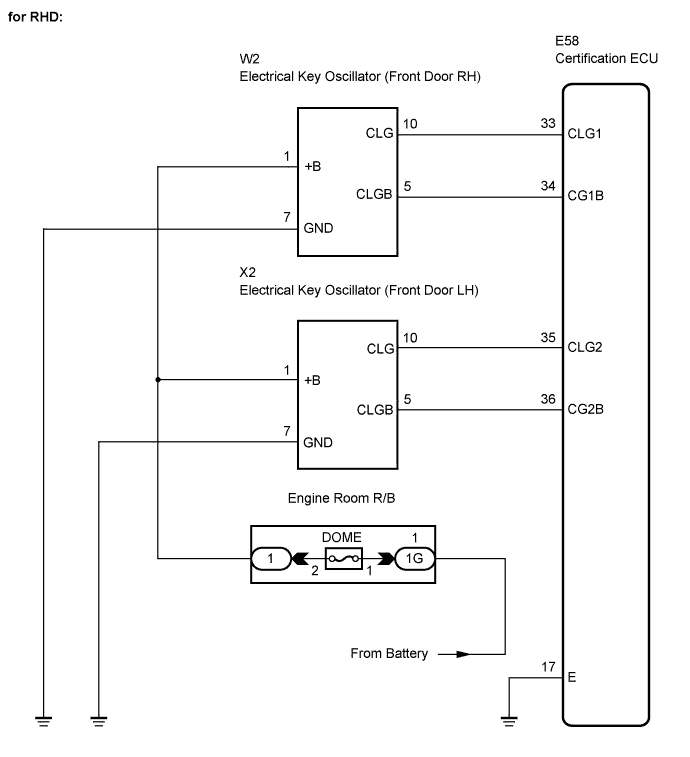
INSPECTION PROCEDURE
| 1. INSPECT ELECTRICAL KEY OSCILLATOR |

Disconnect the oscillator connectors.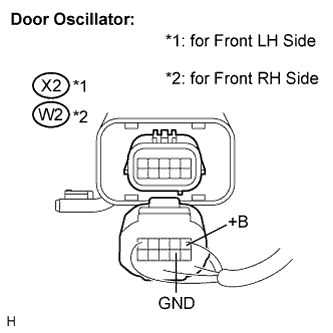
Measure the voltage according to the value(s) in the table below.
- Standard voltage:
- for Front LH Side:
Tester Connection (Symbols)
Condition
Specified Condition
X2-1 (+B) - X2-7 (GND)
Always
10 to 14 V
- for Front RH Side:
Tester Connection (Symbols)
Condition
Specified Condition
W2-1 (+B) - W2-7 (GND)
Always
10 to 14 V
|
|
||||

| OK | |
 |
| 2. CHECK HARNESS AND CONNECTOR (ELECTRICAL KEY OSCILLATOR - CERTIFICATION ECU) |
Disconnect the E58 ECU connector.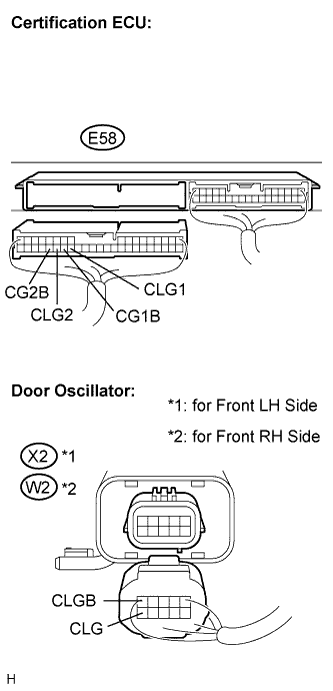
Measure the resistance according to the value(s) in the table below.
- Standard resistance:
- for LHD (Front LH Side):
Tester Connection (Symbols)
Condition
Specified Condition
E58-33 (CLG1) - X2-10 (CLG)
Always
Below 1 Ω
E58-34 (CG1B) - X2-5 (CLGB)
Always
Below 1 Ω
E58-33 (CLG1) - Body ground
Always
10 kΩ or higher
E58-34 (CG1B) - Body ground
Always
10 kΩ or higher
- for LHD (Front RH Side):
Tester Connection (Symbols)
Condition
Specified Condition
E58-35 (CLG2) - W2-10 (CLG)
Always
Below 1 Ω
E58-36 (CG2B) - W2-5 (CLGB)
Always
Below 1 Ω
E58-35 (CLG2) - Body ground
Always
10 kΩ or higher
E58-36 (CG2B) - Body ground
Always
10 kΩ or higher
- for RHD (Front RH Side):
Tester Connection (Symbols)
Condition
Specified Condition
E58-33 (CLG1) - W2-10 (CLG)
Always
Below 1 Ω
E58-34 (CG1B) - W2-5 (CLGB)
Always
Below 1 Ω
E58-33 (CLG1) - Body ground
Always
10 kΩ or higher
E58-34 (CG1B) - Body ground
Always
10 kΩ or higher
- for RHD (Front LH Side):
Tester Connection (Symbols)
Condition
Specified Condition
E58-35 (CLG2) - X2-10 (CLG)
Always
Below 1 Ω
E58-36 (CG2B) - X2-5 (CLGB)
Always
Below 1 Ω
E58-35 (CLG2) - Body ground
Always
10 kΩ or higher
E58-36 (CG2B) - Body ground
Always
10 kΩ or higher
|
|
||||
| OK | |
|
| 3. CHECK AND REPLACE ELECTRICAL KEY OSCILLATOR (CHECK OPERATION OF OSCILLATOR) |
Replace the door oscillator.
Check that the entry LOCK/UNLOCK function operates normally.
- OK:
- Entry LOCK/UNLOCK function operates normally.
|
|
||||
| NG | |
|
| 4. PERFORM ACTIVE TEST USING INTELLIGENT TESTER |
Reconnect the ECU and the oscillator connectors.
Connect the intelligent tester to the DLC3.
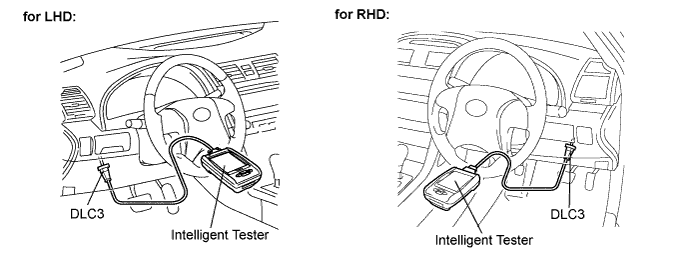
Turn the engine switch on (IG).
Following the display on the tester, select "ACTIVE TEST".
Entry and Start (Certification ECU): Tester Display
Test Part
Control Range
Diagnostic Note
D Transmitter
Driver side electrical key oscillator
ON/OFF
-
P Transmitter
Passenger side electrical key oscillator
ON/OFF
-
Measure the frequency according to the value(s) in the table below.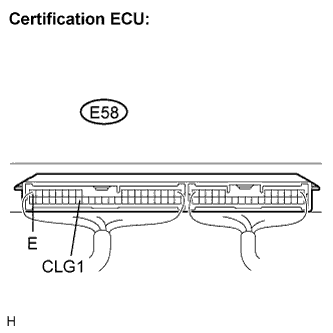
- Standard:
Tester Connection (Symbols)
Condition
Specified Condition
E58-33 (CLG1) - E58-17 (E)
During ACTIVE TEST
Frequency is generated (higher than 0 Hz)
E58-35 (CLG2) - E58-17 (E)
During ACTIVE TEST
Frequency is generated (higher than 0 Hz)
|
|
||||
| OK | ||
 |
||
| ||