INSTALLATION
Removal / installation · Vehicles built from Jun 2009
Versions by build date: Jun 2006 – Sep 2006 Oct 2006 – May 2009 from Jun 2009
| 1.
INSTALL STOP LIGHT SWITCH |
 |
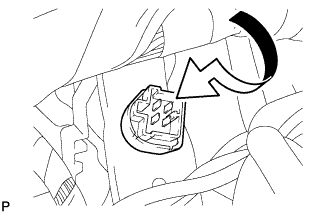
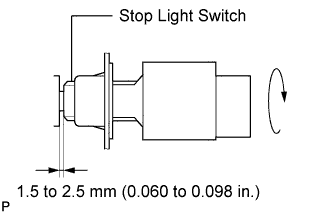
- Insert the stop light switch until the body hits the cushion.
- NOTICE:
- When inserting the stop light switch, support the pedal from behind so that the pedal is not pushed in.
- Make a quarter turn clockwise to install the stop light switch.
-
Torque:
- 1.5 N*m{
15 kgf*cm
, 13 in.*lbf
}
or less
- NOTICE:
- When inserting the stop light switch, support the pedal from behind so that the pedal is not pushed in.
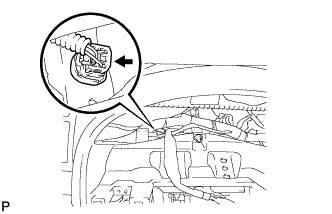
- Connect the stop light switch connector.
Check the protrusion of the rod (Click here).
| 2.
INSTALL COMBINATION METER
|
|
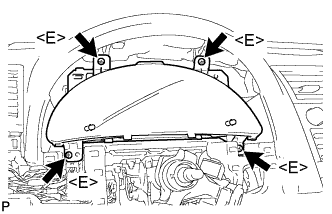
- Connect each connector.
Install the combination meter assembly with the 4 screws <E>.
| 3.
INSTALL INSTRUMENT CLUSTER FINISH PANEL SUB-ASSEMBLY
|
|
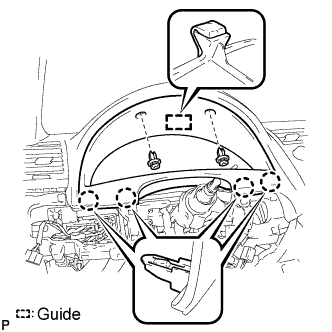
- Engage the guide and the 4 claws.
Install the instrument cluster finish panel sub-assembly with the 2 clips.
| 4.
INSTALL LOWER INSTRUMENT PANEL FINISH PANEL (w/o Smart Entry and Start System)
|
|
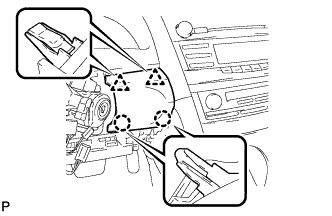
- Engage the 2 claws and 2 clips to install the lower instrument panel finish panel.
| 5.
INSTALL LOWER INSTRUMENT PANEL FINISH PANEL (w/ Smart Entry and Start System)
|
|
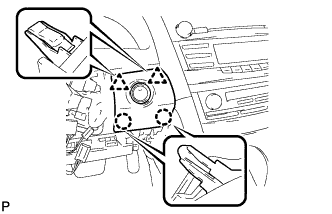
- Connect the connector.
Engage the 2 claws and 2 clips to install the lower instrument panel finish panel.
| 6.
INSTALL NO. 1 INSTRUMENT PANEL SUB-ASSEMBLY
|
|
Connect each connector.
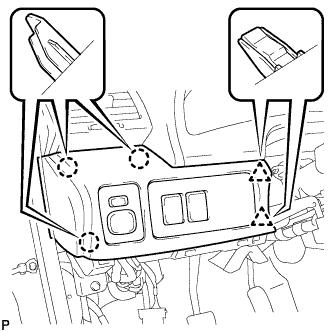
- Engage the 3 claws and 2 clips to install the No. 1 instrument panel sub-assembly.
| 7.
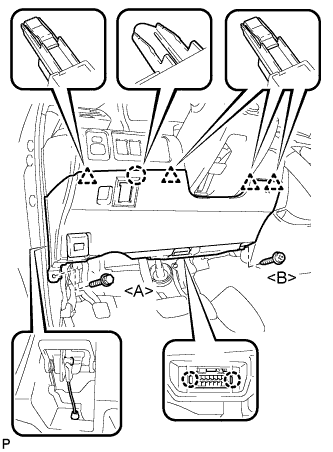
INSTALL LOWER NO. 1 INSTRUMENT PANEL FINISH PANEL LH
|
|
- Install the air hose and connect the connector.
Engage the 2 claws and the DLC3.
Engage the claw and the 4 clips.
Install the lower No. 1 instrument panel finish panel with the screw <B> and bolt <A>.
| 8.
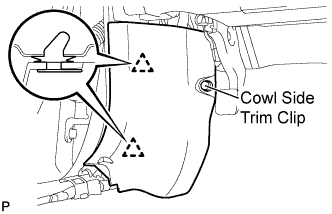
INSTALL COWL SIDE TRIM SUB-ASSEMBLY LH
|
|
- Engage the 2 clips.
Install the cowl side trim sub-assembly LH with the cowl side trim clip.
| 9.
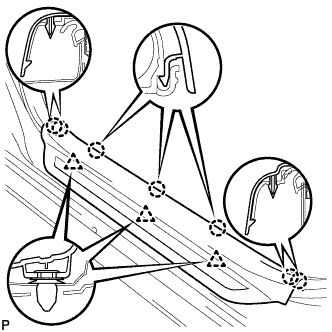
INSTALL FRONT DOOR SCUFF PLATE LH
|
|
- Engage the 7 claws and 3 clips, then install the front door scuff plate LH.