REMOVAL
Removal / installation · Vehicles built Oct 2006 – May 2009
Versions by build date: Oct 2006 – May 2009 from Jun 2009
| 1.
EJECT MAP DISC |
 |
Turn the ignition switch on (ACC).
Push the "OPEN/CLOSE" button.
Push the "MAP" button to eject the map disc.
| 2.
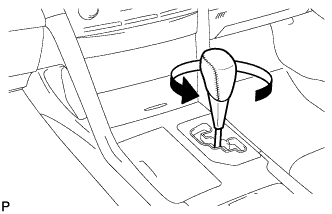
REMOVE SHIFT LEVER KNOB SUB-ASSEMBLY
|
|
- Turn the shift lever knob counterclockwise and remove the shift lever knob sub-assembly.
| 3.
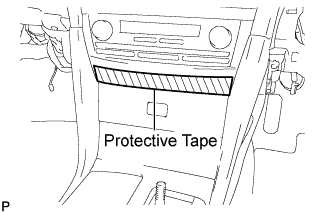
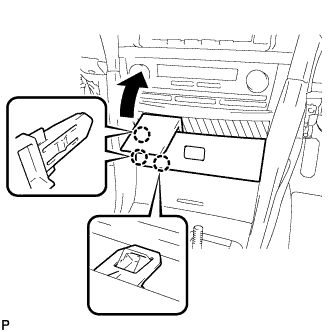
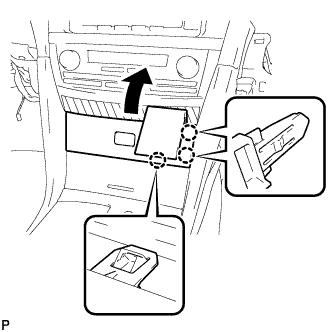
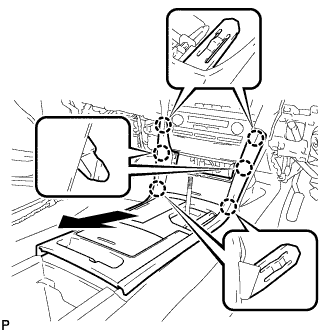
REMOVE UPPER CONSOLE PANEL FRONT GARNISH
|
|
- Apply protective tape to the area shown in the illustration.
- Using a moulding remover, disengage the 3 claws as shown in the illustration.
- Using a moulding remover, disengage the 3 claws and remove the upper console panel front garnish as shown in the illustration.
Disconnect each connector.
| 4.
REMOVE UPPER CONSOLE PANEL SUB-ASSEMBLY
|
|
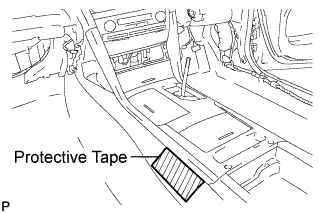
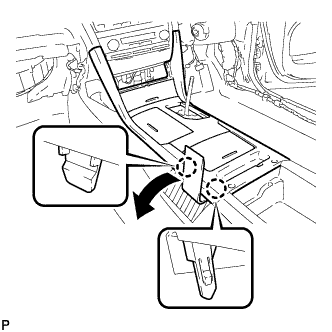
- Apply protective tape to the area shown in the illustration.
- Using a moulding remover, disengage the 2 claws as shown in the illustration.
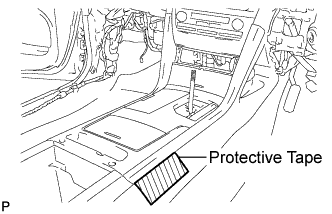
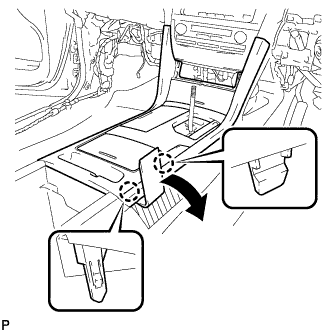
- Apply protective tape to the area shown in the illustration.
- Using a moulding remover, disengage the 2 claws as shown in the illustration.
- Disengage the 6 claws and remove the upper console panel sub-assembly as shown in the illustration.
Disconnect the connector.
| 5.
REMOVE INSTRUMENT PANEL NO. 2 REGISTER ASSEMBLY
|
|
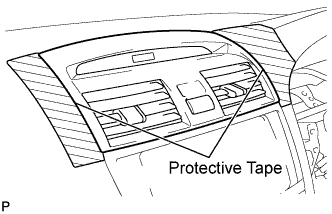
- Apply protective tape to the areas shown in the illustration.
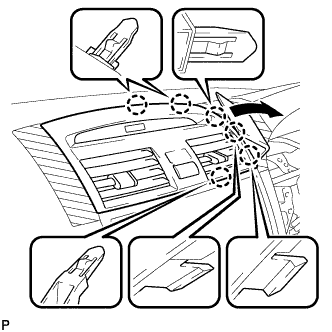
- Using a moulding remover, disengage the 6 claws as shown in the illustration.
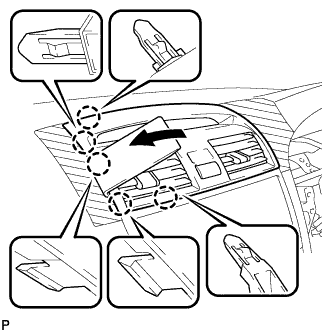
- Using a moulding remover, disengage the 5 claws as shown in the illustration.
Disconnect each connector and remove the instrument panel No. 2 register assembly.
| 6.
REMOVE NAVIGATION RECEIVER WITH HEATER CONTROL PANEL ASSEMBLY |
|
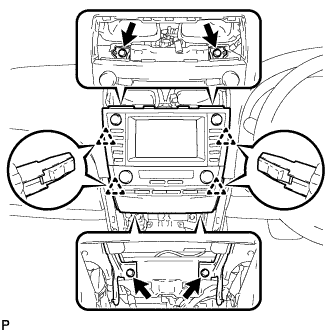
- Remove the 4 bolts.
Pull the navigation receiver with heater control panel assembly toward the rear of the vehicle and disengage the 4 clips.
Disconnect each connector and remove the navigation receiver with heater control panel assembly.
| 7.
REMOVE RADIO NO. 1 BRACKET |
|
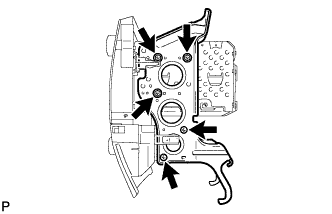
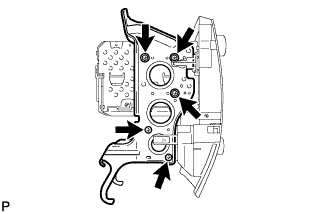
- Remove the 3 bolts, 2 screws and radio No. 1 bracket.
| 8.
REMOVE RADIO NO. 2 BRACKET |
|
- Remove the 3 bolts, 2 screws and radio No. 2 bracket.
| 9.
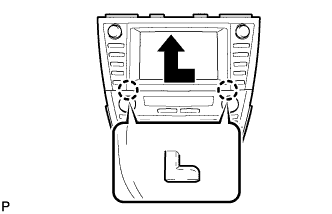
REMOVE NAVIGATION RECEIVER ASSEMBLY |
|
- Remove the navigation receiver assembly as shown in the illustration.