Removal / installation · Vehicles built Oct 2006 – May 2009
Versions by build date: Oct 2006 – May 2009from Jun 2009
1.
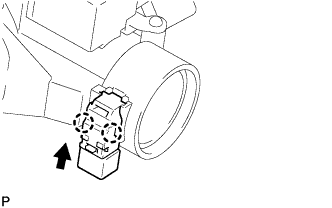
INSTALL UNLOCK WARNING SWITCH ASSEMBLY
Engage the 2 claws to install the unlock warning switch assembly to the steering lock sub-assembly.
2.
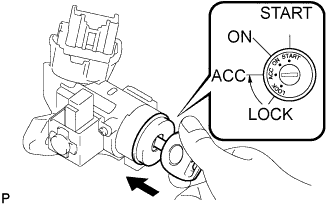
INSTALL IGNITION SWITCH LOCK CYLINDER ASSEMBLY
Make sure that the ignition switch lock cylinder assembly is in the ACC position.
Install the ignition switch lock cylinder assembly to the steering lock sub-assembly.
Make sure that the ignition switch lock cylinder assembly is securely installed.
3.
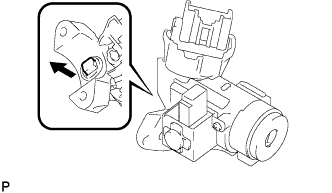
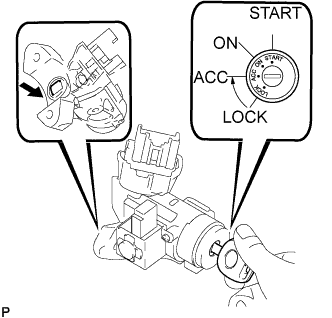
INSPECT STEERING LOCK OPERATION
Check that the steering lock mechanism is activated when the key is removed.
Check that the steering lock mechanism is deactivated when the key is inserted and turned to the ACC position.
HINT:
If there is any abnormality, replace the ignition switch lock cylinder assembly.
4.
INSTALL STEERING COLUMN UPPER WITH SWITCH BRACKET ASSEMBLY
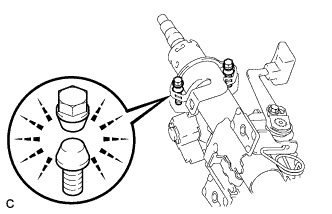
Temporarily install the assembled steering lock and its bracket to the steering column assembly with 2 new tapered-head bolts.
Tighten the 2 tapered-head bolts until the bolt heads break off.
5.
INSTALL TRANSPONDER KEY AMPLIFIER
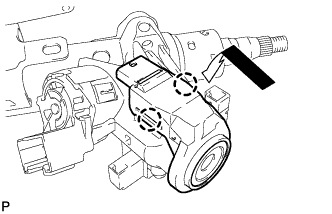
Align the transponder key amplifier with the upper bracket. Tilt the amplifier slightly and slide it into position.
Push the transponder key amplifier to install it to the upper bracket.
NOTICE:
Do not push the amplifier with excessive force.
6.
INSTALL STEERING COLUMN ASSEMBLY
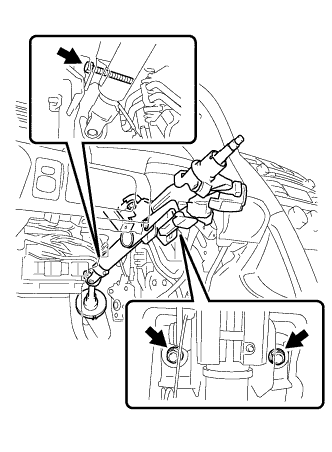
Install the steering column assembly with the bolt and 2 nuts.
Torque:
21 N*m{
214 kgf*cm
, 16 ft.*lbf
}
Connect the connectors and engage the wire harness clamps to the steering column assembly.
7.
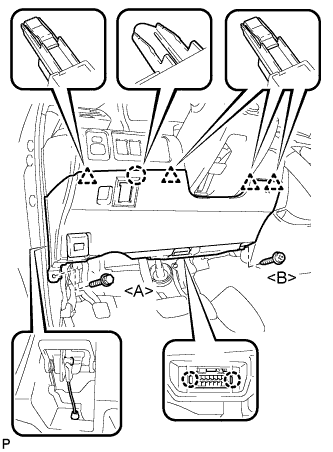
INSTALL NO. 1 AIR DUCT
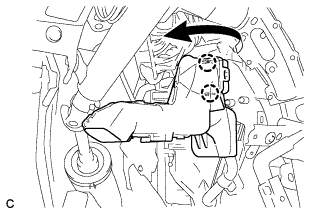
Engage the 2 claws to install the No. 1 air duct.
8.
PLACE FRONT WHEELS FACING STRAIGHT AHEAD
9.
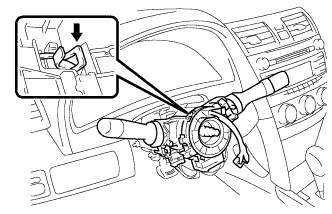
INSTALL TURN SIGNAL SWITCH ASSEMBLY WITH SPIRAL CABLE SUB-ASSEMBLY
Install the turn signal switch assembly with spiral cable sub-assembly to the steering column assembly with the clamp.
Connect the connectors to the turn signal switch assembly with spiral cable sub-assembly.
10.
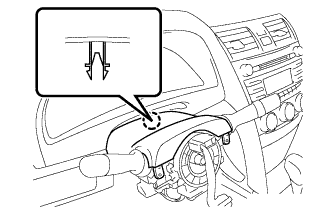
INSTALL UPPER STEERING COLUMN COVER
Engage the claw to install the upper steering column cover.
11.
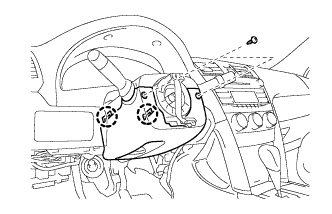
INSTALL LOWER STEERING COLUMN COVER
Engage the 2 claws to install the lower steering column cover.
Install the 2 screws.
Torque:
2.0 N*m{
20 kgf*cm
, 18 in.*lbf
}
12.
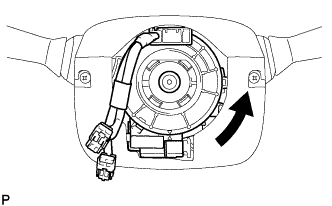
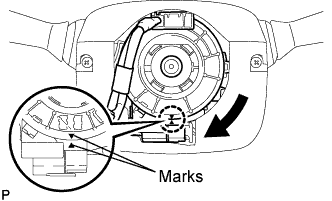
ADJUST SPIRAL CABLE SUB-ASSEMBLY
Check that the ignition switch is off.
Check that the battery negative (-) cable is disconnected.
CAUTION:
Wait for 90 seconds after disconnecting the cable to prevent airbag deployment.
Rotate the spiral cable counterclockwise slowly by hand until it feels firm.
NOTICE:
Do not turn the spiral cable by the airbag wire harness.
Rotate the spiral cable clockwise approximately 2.5 turns to align the marks.
NOTICE:
Do not turn the spiral cable by the airbag wire harness.
HINT:
The spiral cable will rotate approximately 2.5 turns to both the left and right from the center.
13.
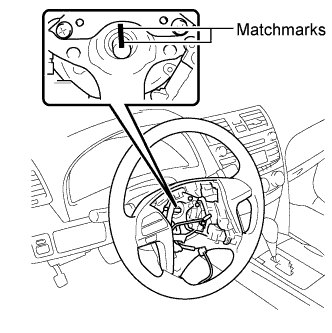
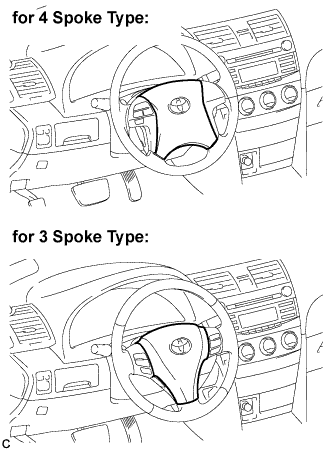
INSTALL STEERING WHEEL ASSEMBLY
Align the matchmarks on the steering wheel assembly and steering main shaft.
Install the steering wheel assembly set nut.
Torque:
50 N*m{
510 kgf*cm
, 37 ft.*lbf
}
Connect the connectors to the spiral cable sub-assembly.
14.
INSPECT STEERING WHEEL CENTER POINT
15.
INSTALL STEERING PAD
Check that the ignition switch is off.
Check that the battery negative (-) cable is disconnected.
CAUTION:
Wait for 90 seconds after disconnecting the cable to prevent airbag deployment.
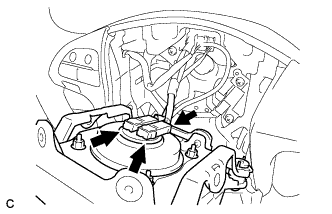
Support the steering pad with one hand.
Connect the 2 airbag connectors to the steering pad.
NOTICE:
When handling the airbag connector, take care not to damage the airbag wire harness.
Connect the horn connector to the steering pad.
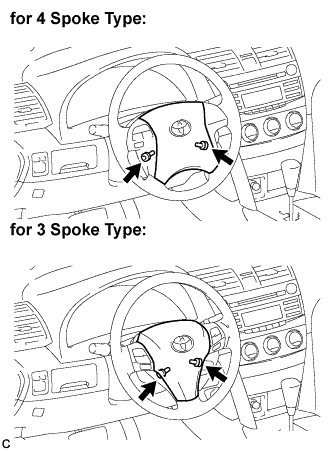
Confirm that the circumference groove of the "TORX" screw fits in the screw case, and place the steering pad onto the steering wheel assembly.
Using a "TORX" socket (T30), tighten the 2 "TORX" screws.
Torque:
8.8 N*m{
90 kgf*cm
, 78 in.*lbf
}
16.
INSPECT STEERING PAD
With the steering pad installed on the vehicle, perform a visual check. If there are any defects as mentioned below, replace the steering pad with a new one:
Cuts, minute cracks or marked discoloration on the steering pad top surface or in the grooved portion.
Make sure that the horn sounds.
HINT:
If the horn does not sound, inspect the horn system (Click here).
17.
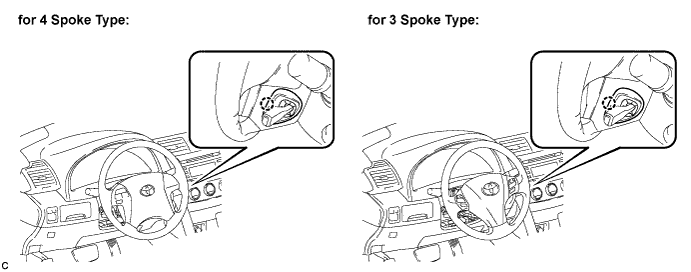
INSTALL LOWER NO. 2 STEERING WHEEL COVER
Engage the claw and install the No. 2 lower steering wheel cover.
18.
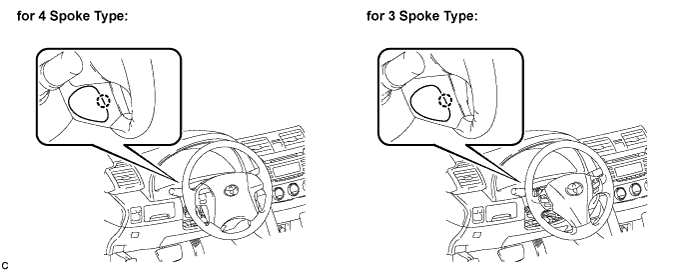
INSTALL LOWER NO. 3 STEERING WHEEL COVER
Engage the claw and install the No. 3 lower steering wheel cover.