2006-2011 Camry Aurion · Service Manual ENGINE

Fuel Pump Control Circuit

Circuit diagnosis · Vehicles built Jun 2006 – May 2009

Versions by build date: Jun 2006 – May 2009 from Jun 2009

DESCRIPTION

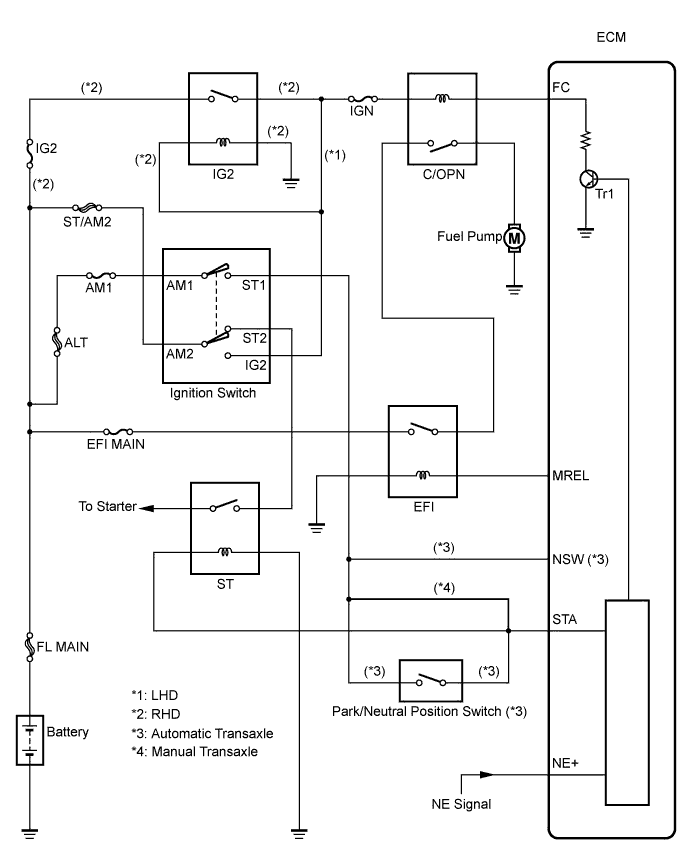
In the diagram below, when the engine is cranked, current flows from terminal ST1 (STR) of the ignition switch (power source control ECU) to the starter relay (Marking: ST) coil and current also flows to terminal STA of the ECM (STA signal).
When the STA signal and NE signal are input to the ECM, Tr is turned ON, current flows to the coil of the circuit opening relay (Marking: C/OPN), the relay switches on, power is supplied to the fuel pump and the fuel pump operates.
While the NE signal is generated (engine running), the ECM keeps Tr ON (circuit opening relay ON) and the fuel pump also keeps operating.
A145186E02

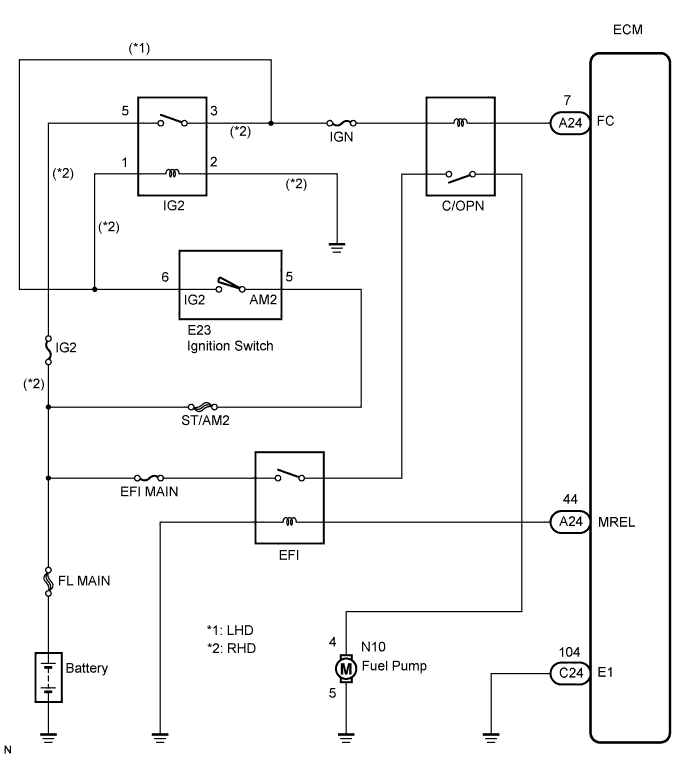
WIRING DIAGRAM

A142858E02

INSPECTION PROCEDURE


1. PERFORM ACTIVE TEST USING INTELLIGENT TESTER (OPERATE C/OPN RELAY)
  1. Connect the intelligent tester to the DLC3.

  1. Turn the ignition switch to the ON position and turn the tester on.

  1. Select the following menu items: Powertrain / Engine and ECT / Active Test / Control the Fuel Pump / Speed.

  1. Check whether the fuel pump operation sound occurs when performing the Active Test on the tester.
    OK:
    Fuel pump operating sound occurs.


NG
Go to step 2
OK

PROCEED TO NEXT CIRCUIT INSPECTION SHOWN IN PROBLEM SYMPTOMS TABLE

2. CHECK ECM POWER SOURCE CIRCUIT


NG
REPAIR OR REPLACE ECM POWER SOURCE CIRCUIT
OK


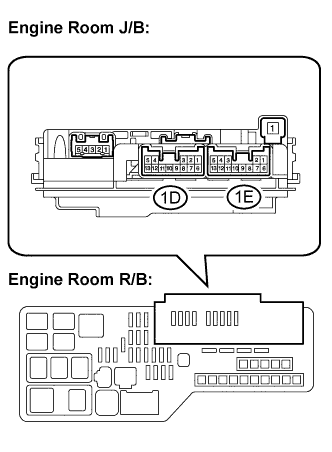
3. INSPECT ENGINE ROOM J/B (C/OPN RELAY)

  1. A138918E02
    Remove the engine room J/B from the engine room R/B.

  1. Inspect the C/OPN relay.

    1. Measure the C/OPN relay resistance.

      Standard resistance:
      Tester Connection
      Specified Condition
      1E-7 - 1E-13
      10 kΩ or higher
      Below 1 Ω
      (Apply battery voltage between terminals 1D-12 and 1E-8)

  1. Reinstall the engine room J/B.


NG
REPLACE ENGINE ROOM J/B
OK


4. INSPECT ECM (FC VOLTAGE)

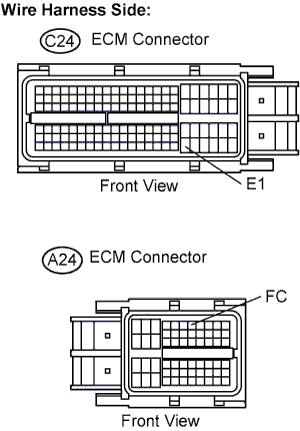
  1. A106902E07
    Disconnect the A24 and C24 ECM connectors.

  1. Turn the ignition switch to the ON position.

  1. Measure the voltage according to the value(s) in the table below.

    Standard voltage:
    Tester Connection
    Specified Condition
    FC (A24-7) - E1 (C24-104)
    9 to 14 V

  1. Reconnect the ECM connectors.


NG
REPAIR OR REPLACE HARNESS OR CONNECTOR (ECM - BATTERY)
OK


5. INSPECT FUEL PUMP


NG
REPLACE FUEL PUMP
OK


6. CHECK HARNESS AND CONNECTOR (C/OPN RELAY - FUEL PUMP - BODY GROUND)

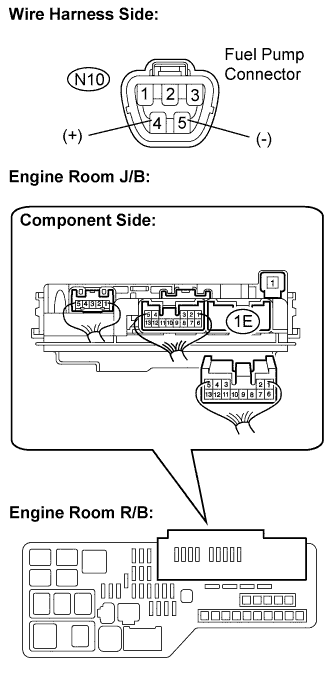
  1. A138923E01
    Check the harness and the connectors between the engine room J/B and the fuel pump.
    1. Remove the engine room J/B from the engine room R/B.

    2. Disconnect the 1E engine room J/B connector.

    3. Disconnect the N10 fuel pump connector.

    4. Measure the resistance according to the value(s) in the table below.

      Standard resistance (Check for open):
      Tester Connection
      Specified Condition
      1E-13 - Fuel pump (N10-4)
      Below 1 Ω

      Standard resistance (Check for short):
      Tester Connection
      Specified Condition
      1E-13 or Fuel pump (N10-4) - Body ground
      10 kΩ or higher

  1. Check the harness and the connectors between the fuel pump and body ground.

    1. Disconnect the N10 fuel pump connector.

    2. Measure the resistance according to the value(s) in the table below.

      Standard resistance (Check for open):
      Tester Connection
      Specified Condition
      Fuel pump (N10-5) - Body ground
      Below 1 Ω

  1. Reconnect the fuel pump connector.

  1. Reconnect the engine room J/B connector.

  1. Reinstall the engine room J/B.


NG
REPAIR OR REPLACE HARNESS OR CONNECTOR
OK

REPLACE ECM


← VC Output Circuit (from Jun 2009)Fuel Pump Control Circuit (from Jun 2009) →