REMOVAL
Removal / installation · Vehicles built Jun 2006 – May 2009
Versions by build date: Jun 2006 – May 2009 from Jun 2009
| 1.
REMOVE LUGGAGE COMPARTMENT DOOR COVER |
 |
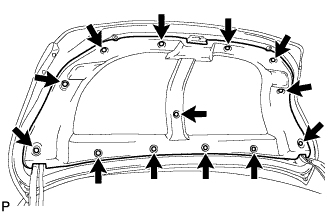
- Using a clip remover, remove the 13 clips and luggage compartment door cover.
| 2.
REMOVE LUGGAGE COMPARTMENT DOOR LOCK CYLINDER ASSEMBLY |
|
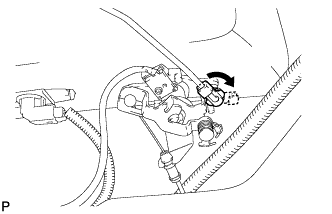
- Disconnect the rod.
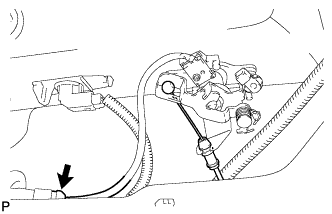
- Disconnect the cable and connector.
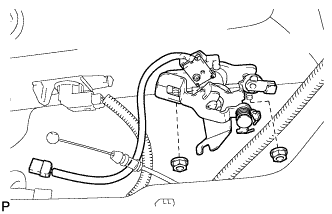
- Remove the 2 nuts and luggage compartment door lock cylinder assembly.
| 3.
REMOVE LUGGAGE COMPARTMENT DOOR OUTSIDE GARNISH SUB-ASSEMBLY |
|
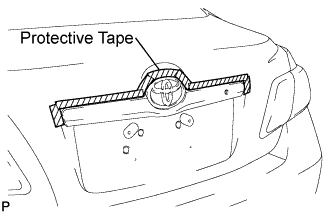
- Put protective tape around the luggage compartment door outside garnish sub-assembly.
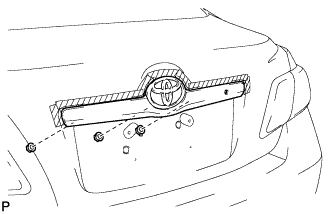
- Remove the 3 nuts.
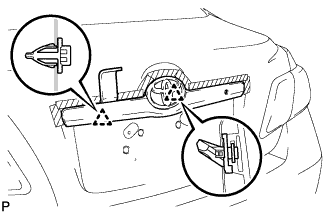
- Using a moulding remover, disengage the 2 clips and remove the luggage compartment door outside garnish sub-assembly.
| 4.
REMOVE LUGGAGE COMPARTMENT DOOR EMBLEM |
|
- HINT:
- When removing the emblem, heat the luggage compartment door outside garnish sub-assembly and emblem using a heat light.
- Heating temperature :
Item
|
Temperature
|
Luggage compartment door outside garnish sub-assembly
|
40 to 60°C (104 to 140°F)
|
Emblem
|
20 to 30°C (68 to 86°F)
|
- NOTICE:
- Do not heat the luggage compartment door outside garnish sub-assembly and emblem excessively.
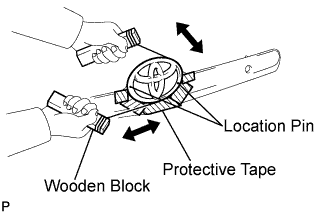
Put protective tape around the emblem.
- Insert a piano wire between the luggage compartment door outside garnish sub-assembly and emblem.
Tie objects that can serve as handles (for example, wooden blocks) to both wire ends.
Pull the piano wire and scrape off the double-sided tape that holds the emblem to the luggage compartment door outside garnish sub-assembly.
- NOTICE:
- If reusing the emblem, take care not to damage the emblem.
- Be careful not to damage the luggage compartment door outside garnish sub-assembly.
Remove the emblem.