2.
INSTALL FUEL SUCTION TUBE ASSEMBLY WITH PUMP AND GAUGE
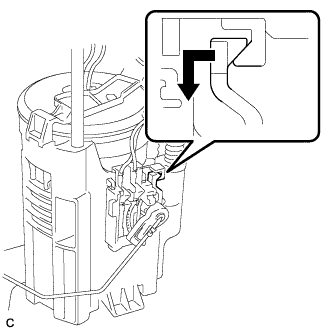
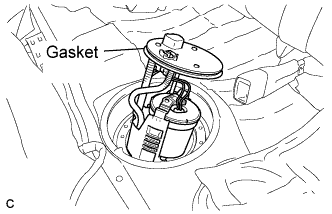
Install a new gasket to the fuel suction tube.
Install the fuel suction tube.
NOTICE:
Do not damage the fuel pump filter.
Be careful that the arm of the sender gauge does not bend.
3.
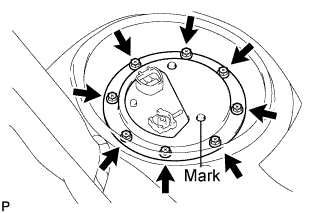
INSTALL FUEL TANK VENT TUBE SET PLATE
Align the mark of the set plate with the fuel suction tube.
Install the set plate with the 8 bolts.
Torque:
5.9 N*m{
60 kgf*cm
, 52 in.*lbf
}
4.
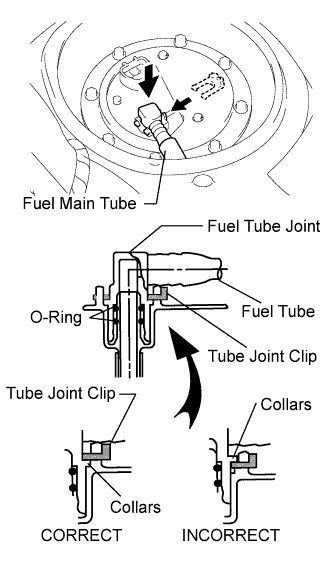
CONNECT FUEL PUMP TUBE SUB-ASSEMBLY
Install the fuel pump tube with the tube joint clip.
NOTICE:
Check that there are no scratches or foreign objects on the connecting part.
Check that the fuel tube joint is inserted securely.
Check that the tube joint clip is on the collar of the fuel tube joint.
After installing the tube joint clip, check that the fuel tube joint cannot be pulled off.
5.
CONNECT CABLE TO NEGATIVE BATTERY TERMINAL
6.
INSTALL REAR FLOOR SERVICE HOLE COVER
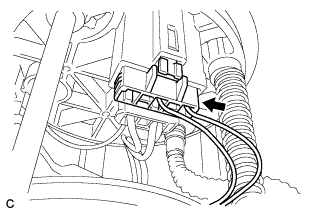
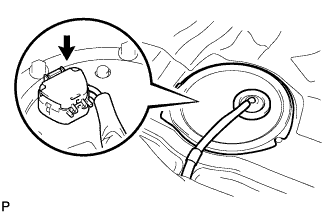
Connect the fuel pump connector.
Install the rear floor service hole cover with new butyl tape.
7.
INSPECT FOR FUEL LEAK
Check fuel pump operation.
Connect the intelligent tester to the DLC3.
Turn the ignition switch on (IG) and push the intelligent tester main switch on.
NOTICE:
Do not start the engine.
Select the following menus: Powertrain / Engine / Active Test / Control the Fuel Pump /Speed.
Check for pressure in the fuel inlet tube from the fuel line. Check that sound of fuel flowing in the fuel tank can be heard. If no sound can be heard, check the engine room J/B (C/OPN relay), fuel pump, ECM and wiring connector.
Check for fuel leaks.
Check that there are no fuel leaks anywhere on the system after performing maintenance. If there is a fuel leak, repair or replace parts as necessary.