REMOVAL
Removal / installation · Vehicles built from Jun 2009
Versions by build date: Jun 2006 – Sep 2006 Oct 2006 – May 2009 from Jun 2009
- HINT:
- Use the same procedure for the RH side and LH side.
- The procedure listed below are for the LH side.
| 1.
PRECAUTION |
 |
- CAUTION:
- Be sure to read "PRECAUTION" thoroughly before servicing (Click here).
| 2.
DISCONNECT CABLE FROM NEGATIVE BATTERY TERMINAL |
|
- CAUTION:
- Wait for 90 seconds after disconnecting the cable to prevent airbag deployment.
| 3.
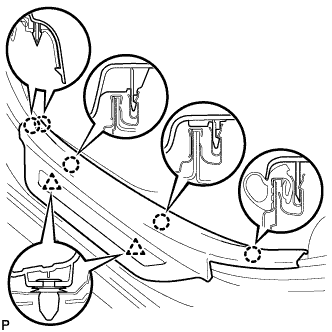
REMOVE REAR DOOR SCUFF PLATE
|
|
- Disengage the 5 claws and 2 clips, and remove the rear door scuff plate LH.
| 4.
REMOVE REAR DOOR OPENING TRIM WEATHERSTRIP |
|
| 5.
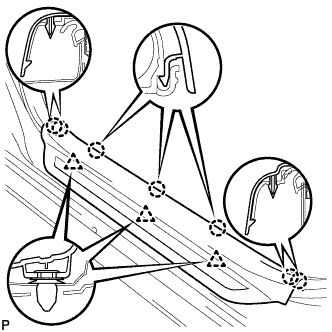
REMOVE FRONT DOOR SCUFF PLATE
|
|
- Disengage the 7 claws and 3 clips, and remove the front door scuff plate LH.
| 6.
REMOVE FRONT DOOR OPENING TRIM WEATHERSTRIP |
|
| 7.
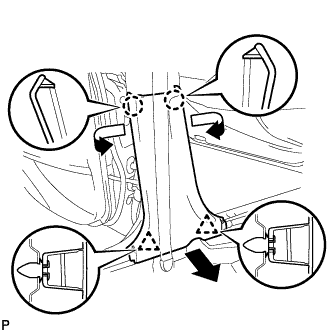
REMOVE LOWER CENTER PILLAR GARNISH
|
|
- Disengage the 2 claws and 2 clips, and remove the lower center pillar garnish LH.
| 8.
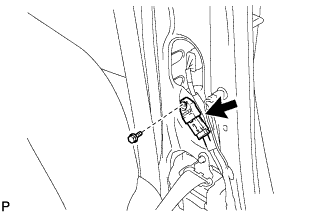
REMOVE SIDE AIRBAG SENSOR |
|
- Remove the bolt and side airbag sensor from the body.
Disconnect the connector from side airbag sensor.
- NOTICE:
- When handling the airbag connector, take care not to damage the airbag wire harness.