AIR Cleaner Assembly
Engine Mechanical
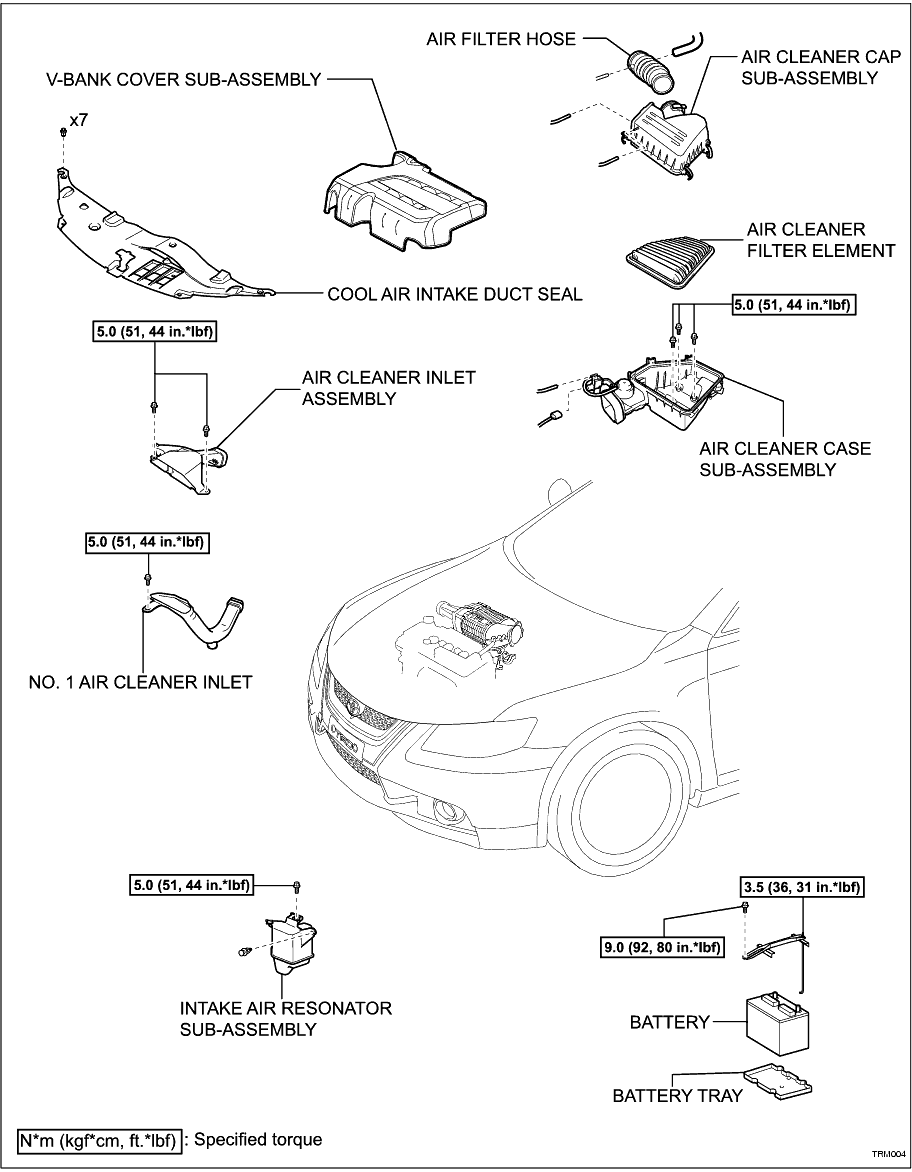
REMOVAL
1. REMOVE COOL AIR INTAKE DUCT SEAL
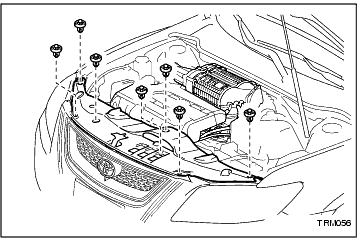
(a) Remove the 7 clips and intake duct seal.
-
2. REMOVE V-BANK COVER SUB-ASSEMBLY
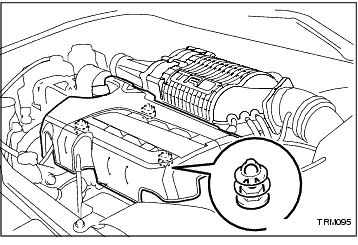
(a) Hold the front of the V-bank cover sub-assembly and raise it to disengage the 2 clips on the front of the cover. Continue to raise the cover to disengage the clip on the rear of the cover and remove the cover.
-
3. REMOVE AIR CLEANER CAP SUB-ASSEMBLY
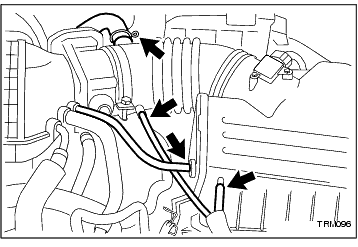
(a) Disconnect the 3 vacuum hoses and No. 2 ventilation hose.
-
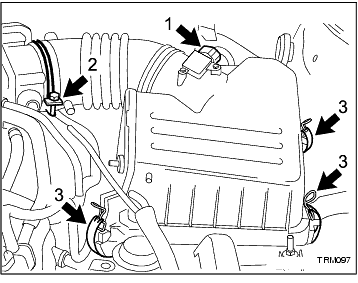
(b) Disconnect the mass air flow meter connector (1).
-
(c) Disconnect the hose band (2).
-
(d) Disconnect the 3 bands (3), and remove the air cleaner cap sub-assembly by unattaching the 2 rear hooks.
-
(e) Remove the air cleaner filter element.
-
4. REMOVE AIR CLEANER CASE SUB-ASSEMBLY
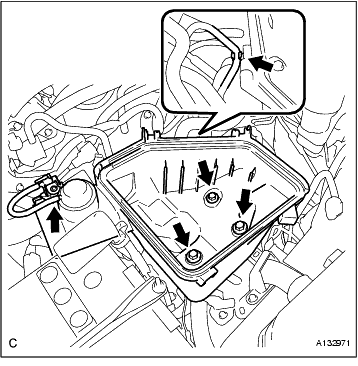
(a) Disconnect the vacuum hose and hose clamp.
-
(b) Remove the 3 bolts and air cleaner case sub-assembly.
-
5. REMOVE AIR CLEANER INLET ASSEMBLY
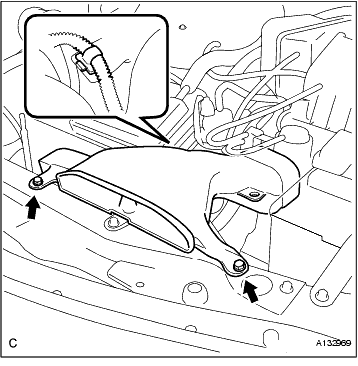
(a) Remove the 2 bolts, clamp and air cleaner inlet assembly.
-
6. REMOVE NO. 1 AIR CLEANER INLET
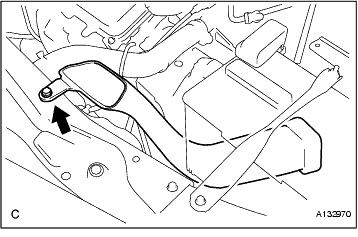
(a) Remove the bolt and No. 1 air cleaner inlet.
-
7. REMOVE BATTERY
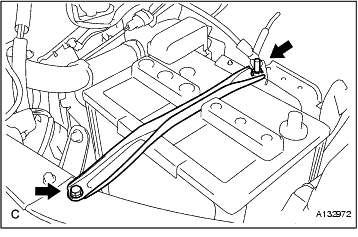
(a) Disconnect the battery cables.
-
(b) Loosen the nut, and remove the bolt and battery clamp.
-
(c) Remove the battery and battery tray.
-
8. REMOVE INTAKE AIR RESONATOR SUB-ASSEMBLY
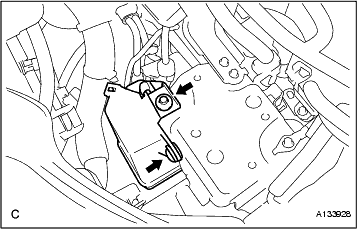
(a) Remove the clip, bolt and intake air resonator sub-assembly.
-
INSTALLATION
1. INSTALL INTAKE AIR RESONATOR SUB-ASSEMBLY
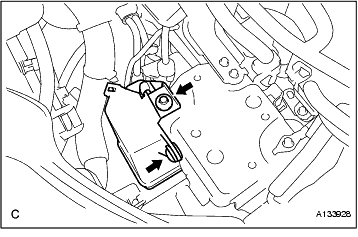
(a) Install the intake air resonator sub-assembly with the bolt and clip.
Torque:
5.0 N*m
(51 kgf*cm,
44 in.*lbf)
-
2. INSTALL BATTERY
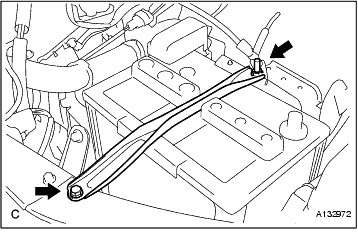
(a) Install the battery and battery tray.
-
(b) Install the battery clamp with the bolt and nut.
Torque:
Bolt
9.0 N*m
(92 kgf*cm,
80 in.*lbf)
Nut
3.5 N*m
(36 kgf*cm,
31 in.*lbf)
-
(c) Install the battery cables.
Torque:
6.9 N*m
(70 kgf*cm,
61 in.*lbf)
-
3. INSTALL NO. 1 AIR CLEANER INLET
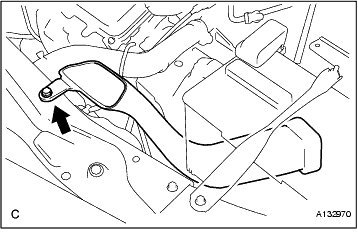
(a) Install the No. 1 air cleaner inlet with the bolt.
Torque:
5.0 N*m
(51 kgf*cm,
44 in.*lbf)
-
4. INSTALL AIR CLEANER INLET ASSEMBLY
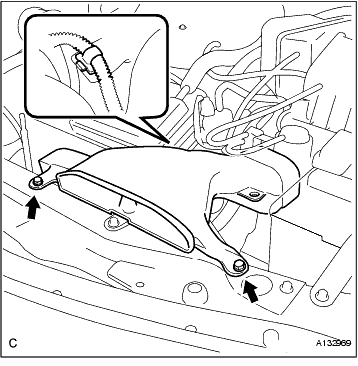
(a) Install the air cleaner assembly inlet assembly with the clamp and 2 bolts.
Torque:
5.0 N*m
(51 kgf*cm,
44 in.*lbf)
-
5. INSTALL AIR CLEANER CASE SUB-ASSEMBLY
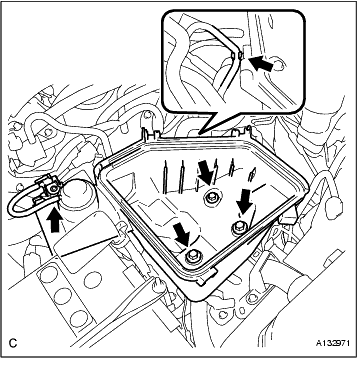
(a) Install the air cleaner case sub-assembly with the 3 bolts.
Torque:
5.0 N*m
(51 kgf*cm,
44 in.*lbf)
-
(b) Connect the vacuum hose and hose clamp.
-
6. INSTALL AIR CLEANER CAP SUB-ASSEMBLY
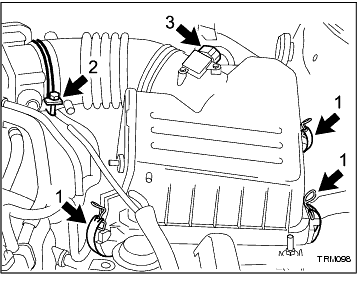
(a) Install the air cleaner filter element.
-
(b) Install the air cleaner cap sub-assembly while engaging the 2 rear hooks.
-
(c) Connect the 3 bands (1).
-
(d) Connect the hose band (2).
-
(e) Connect the mass air flow meter connector (3).
-
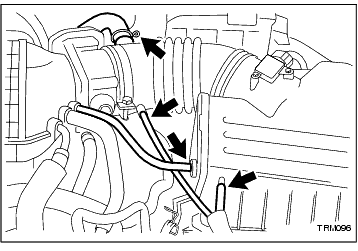
(f) Connect the 3 vacuum hoses and No. 2 ventilation hose.
-
7. INSTALL V-BANK COVER SUB-ASSEMBLY
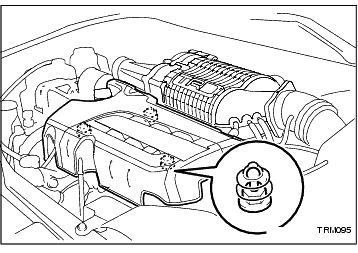
(a) Align the 3 retainers and install the V-bank cover sub-assembly securely.
-
8. INSTALL COOL AIR INTAKE DUCT SEAL
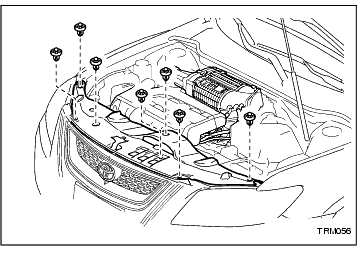
(a) Install the intake duct seal with the 7 clips.
-