Exhaust Pipe
Exhaust
COMPONENTS
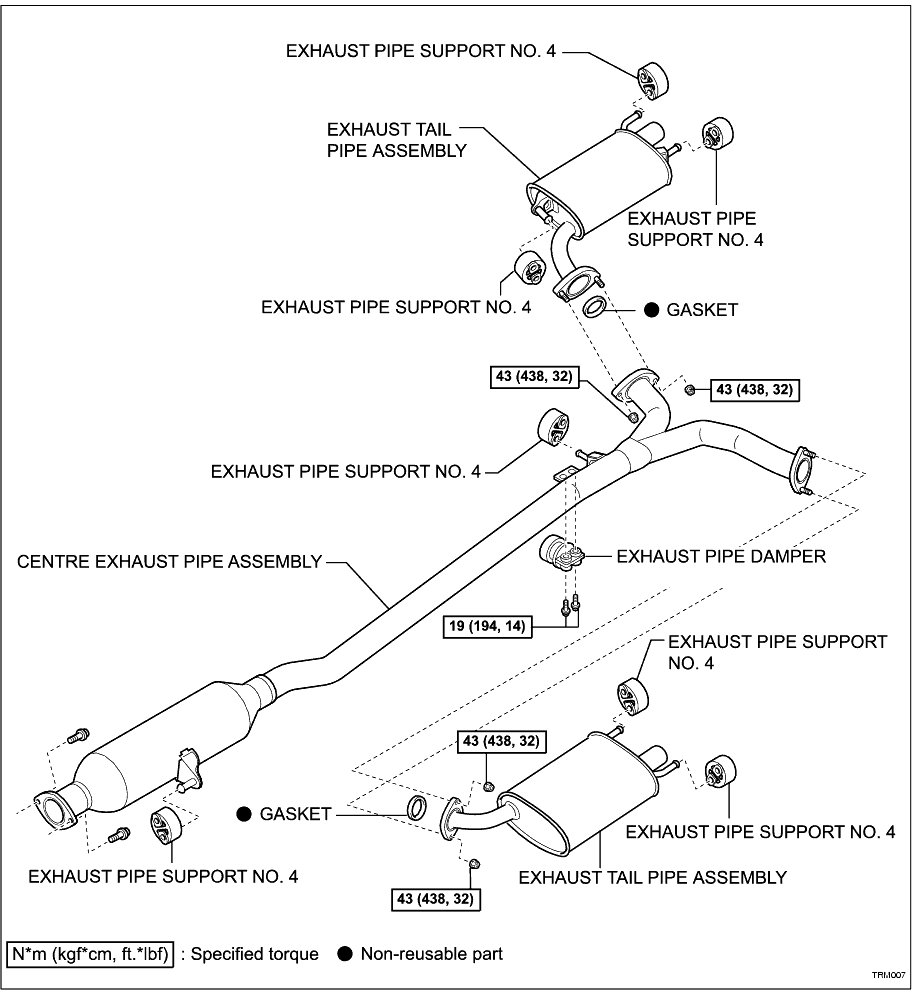
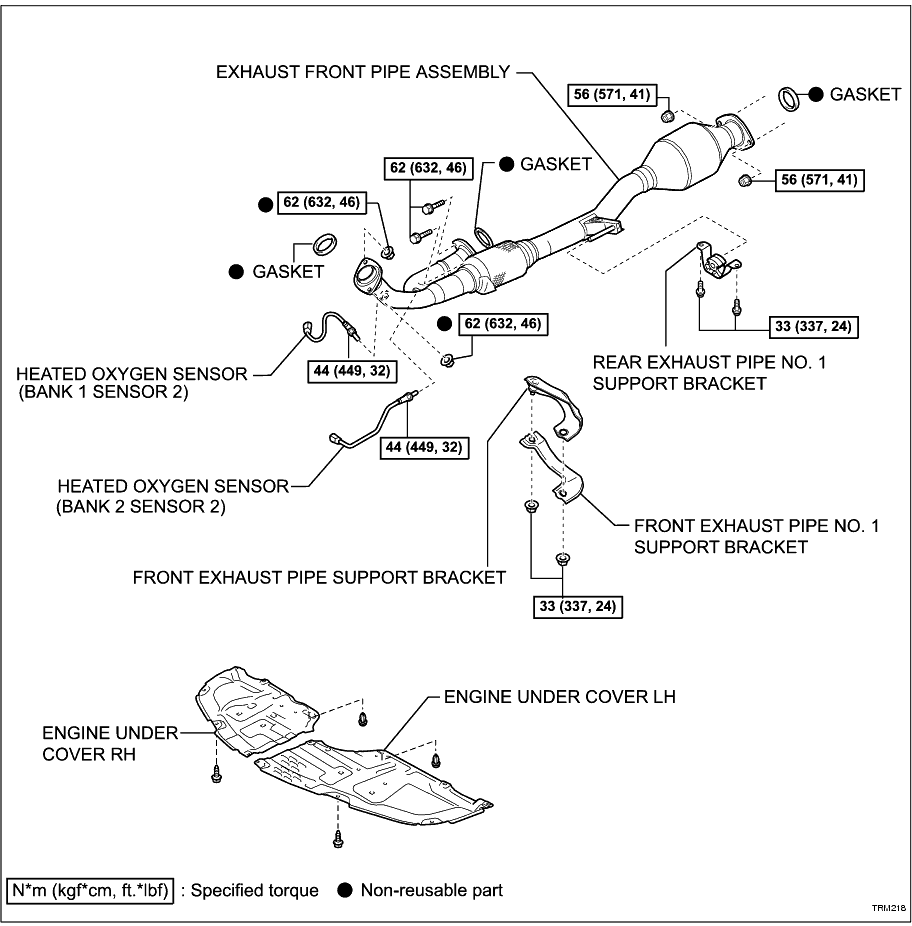
REMOVAL
1. REMOVE EXHAUST TAIL PIPE ASSEMBLY
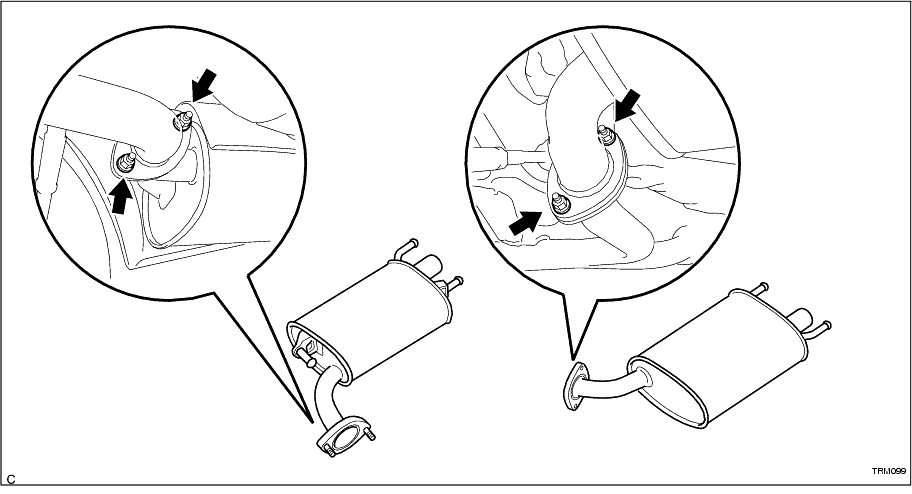
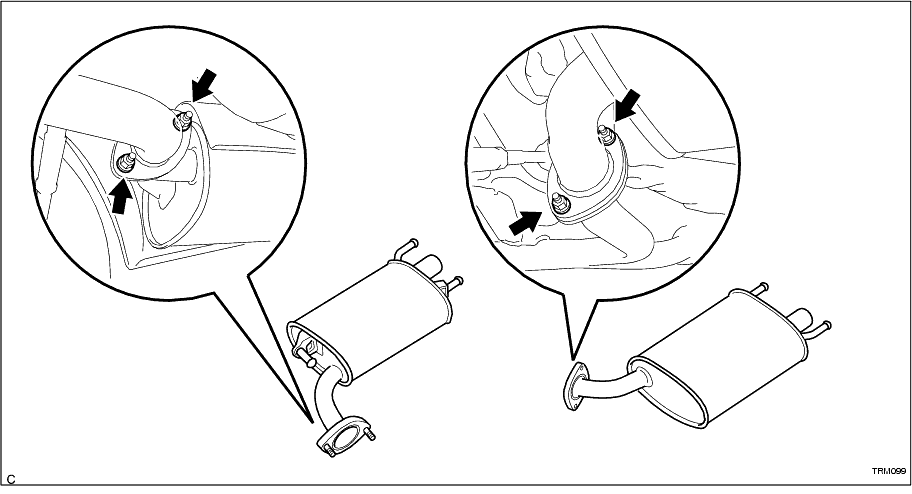
(a) Remove the 4 nuts and 2 exhaust tail pipes.
-
(b) Remove the 2 gaskets from the exhaust tail pipes.
-
2. REMOVE CENTRE EXHAUST PIPE ASSEMBLY
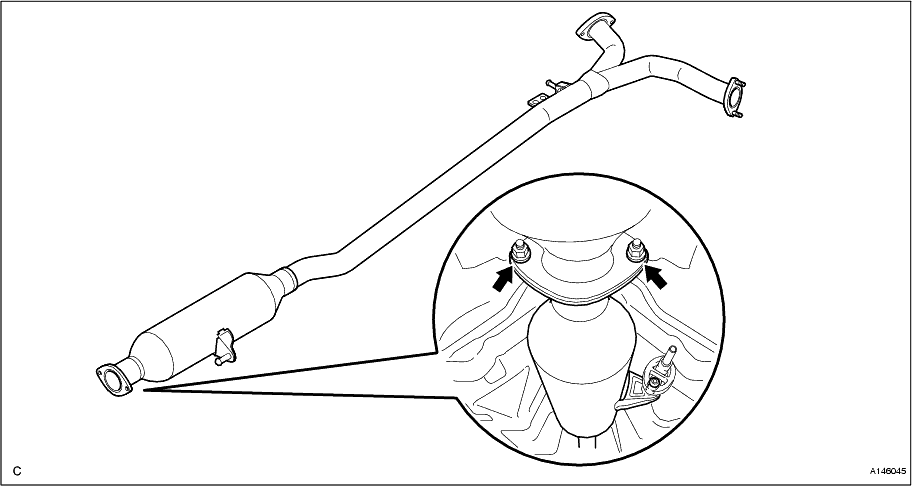
(a) Remove the 2 bolts, 2 nuts and exhaust centre pipe assembly.
-
(b) Remove the gasket from the exhaust front pipe assembly.
-
3. REMOVE EXHAUST PIPE DAMPER
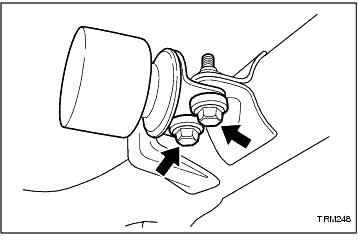
(a) Remove the 2 bolts and the exhaust pipe damper.
-
4. REMOVE ENGINE UNDER COVER LH
5. REMOVE ENGINE UNDER COVER RH
6. REMOVE FRONT EXHAUST PIPE NO. 1 SUPPORT BRACKET
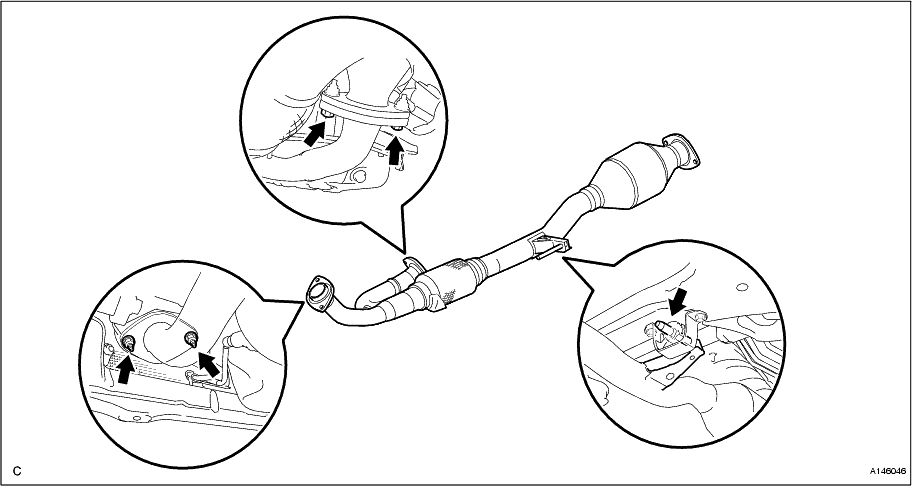
(a) Remove the 2 nuts and front support brackets.
-
7. REMOVE EXHAUST FRONT PIPE ASSEMBLY
(a) Disconnect the 2 heated oxygen sensor (bank 1, 2 sensor 2) connectors.
-
(b) Remove the 2 nuts from the exhaust front pipe (left bank exhaust manifold side).
-
(c) Remove the 2 bolts from the exhaust front pipe (right bank exhaust pipe manifold side).
-
(d) Remove the exhaust front pipe.
-
(e) Remove the 2 gaskets from the exhaust front pipe.
-
8. REMOVE HEATED OXYGEN SENSOR (for Bank 1)
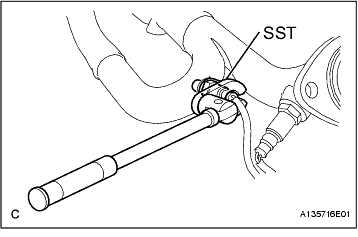
(a) Using SST, remove the oxygen sensor.
SST
09224-00010
-
9. REMOVE HEATED OXYGEN SENSOR (for Bank 2)
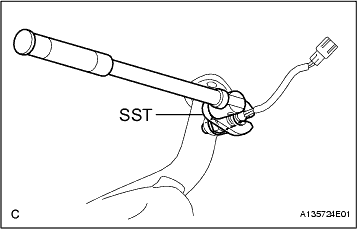
(a) Using SST, remove the oxygen sensor.
SST
09224-00010
-
10. REMOVE REAR EXHAUST PIPE NO. 1 SUPPORT BRACKET
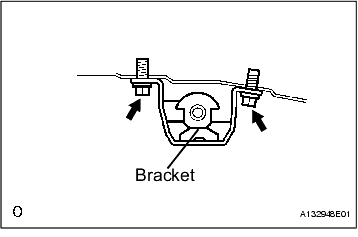
(a) Remove the 2 bolts and rear support bracket.
-
INSTALLATION
1. INSTALL REAR EXHAUST PIPE NO. 1 SUPPORT BRACKET
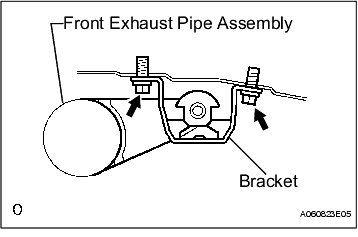
(a) Install the rear support bracket with the 2 bolts.
Torque:
33 N*m
(337 kgf*cm,
24 ft.*lbf)
NOTICE:
Install the bracket with the longer side facing the exhaust pipe.
-
2. INSTALL HEATED OXYGEN SENSOR (for Bank 2)
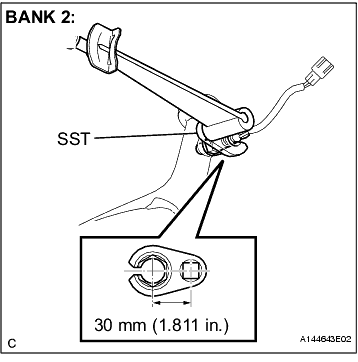
(a) Using SST, install the heated oxygen sensor.
SST
09224-00010
Torque:
39 N*m
(398 kgf*cm,
29 ft.*lbf)
NOTICE:
• Use a torque wrench with a fulcrum length of 250 mm (9.84 in.).
• This torque value is effective when the SST is parallel to the torque wrench.
-
3. INSTALL HEATED OXYGEN SENSOR (for Bank 1)
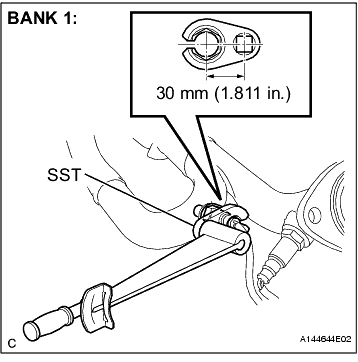
(a) Using SST, install the heated oxygen sensor.
SST
09224-00010
Torque:
39 N*m
(398 kgf*cm,
29 ft.*lbf)
NOTICE:
• Use a torque wrench with a fulcrum length of 250 mm (9.84 in.).
• This torque value is effective when the SST is parallel to the torque wrench.
-
4. INSTALL EXHAUST FRONT PIPE ASSEMBLY
(a) Install 2 new gaskets to the exhaust front pipe.
-
(b) Install the exhaust front pipe to the exhaust manifolds with the 2 nuts and 2 bolts.
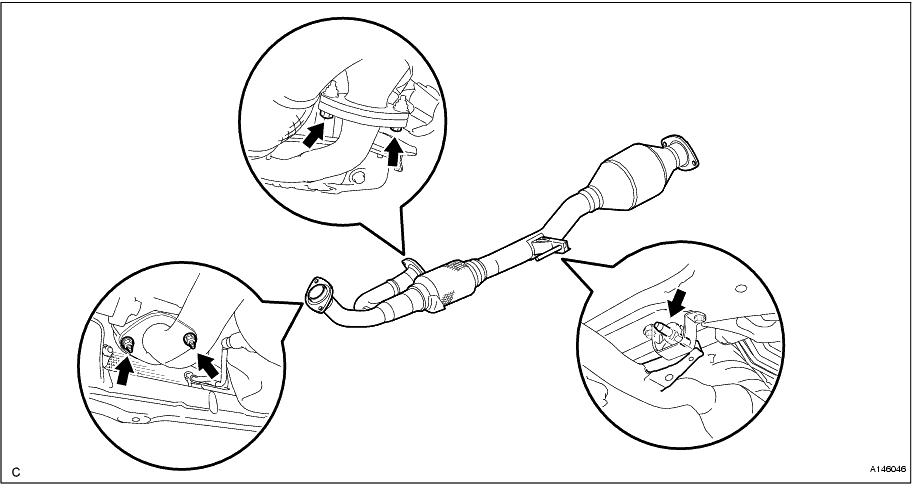
Torque:
62 N*m
(632 kgf*cm,
46 ft.*lbf)
-
5. INSTALL FRONT EXHAUST PIPE NO. 1 SUPPORT BRACKET
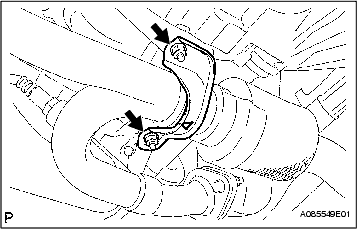
(a) Install the front support brackets with the 2 nuts.
Torque:
33 N*m
(337 kgf*cm,
24 ft.*lbf)
NOTICE:
Install the support brackets in the correct direction.
-
6. INSTALL ENGINE UNDER COVER RH.
7. INSTALL ENGINE UNDER COVER LH.
8. INSTALL EXHAUST PIPE DAMPER
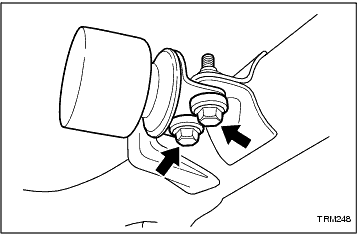
(a) Install the exhaust pipe damper with the 2 bolts.
Torque:
19 N*m
(194 kgf*cm,
14 ft.*lbf)
-
9. INSTALL CENTRE EXHAUST PIPE ASSEMBLY
(a) Install a new gasket to the centre exhaust pipe assembly.
-
(b) Install the centre exhaust pipe to the exhaust front pipe with the 2 nuts and 2 bolts.
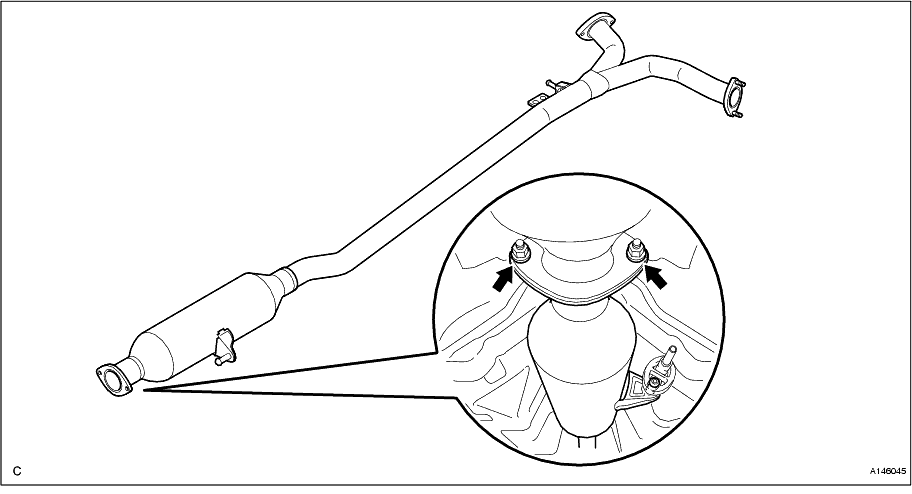
Torque:
56 N*m
(571 kgf*cm,
41 ft.*lbf)
-
10. INSTALL EXHAUST TAIL PIPE ASSEMBLY
(a) Install 2 new gaskets to the exhaust tail pipes.
-
(b) Install the 2 exhaust tail pipes with the 4 nuts.
Torque:
43 N*m
(438 kgf*cm,
32 ft.*lbf)
-
11. INSPECT FOR EXHAUST GAS LEAK