Rear Seat Assembly
Seat
COMPONENTS
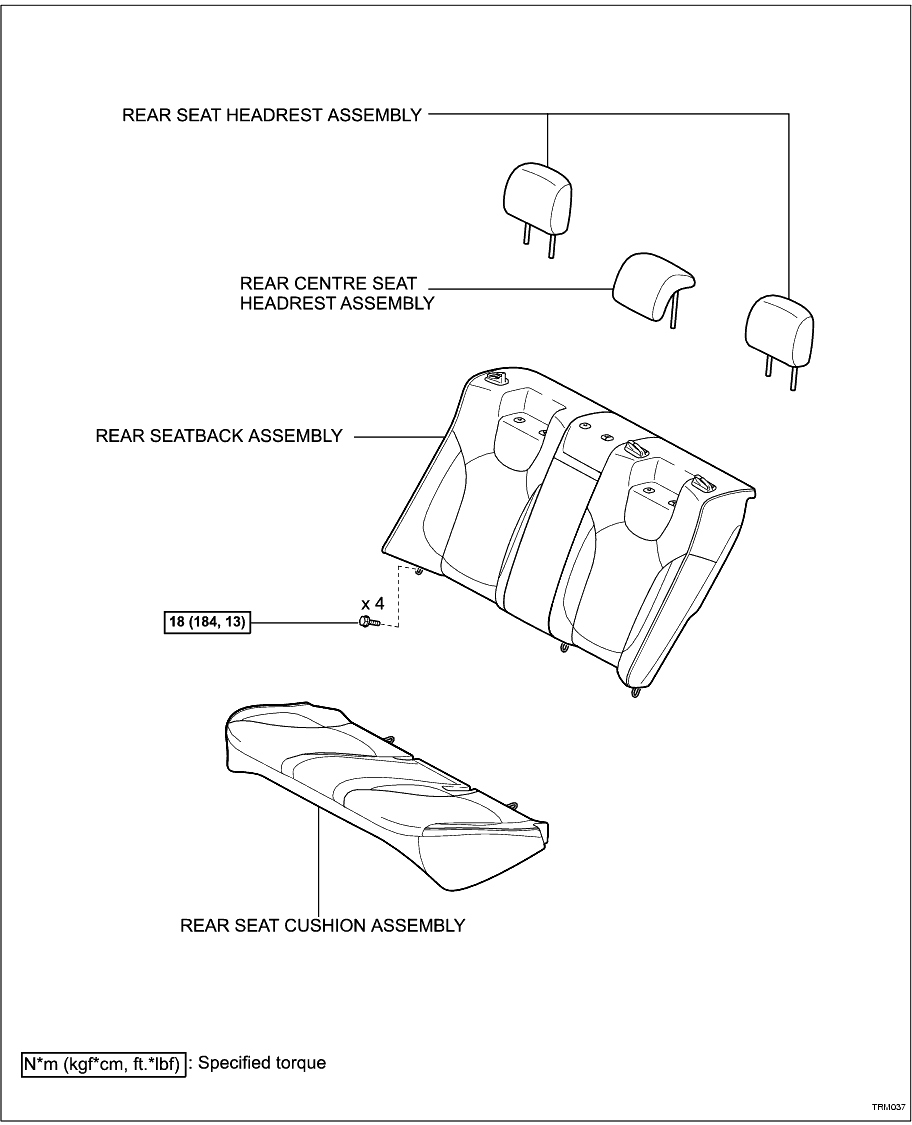
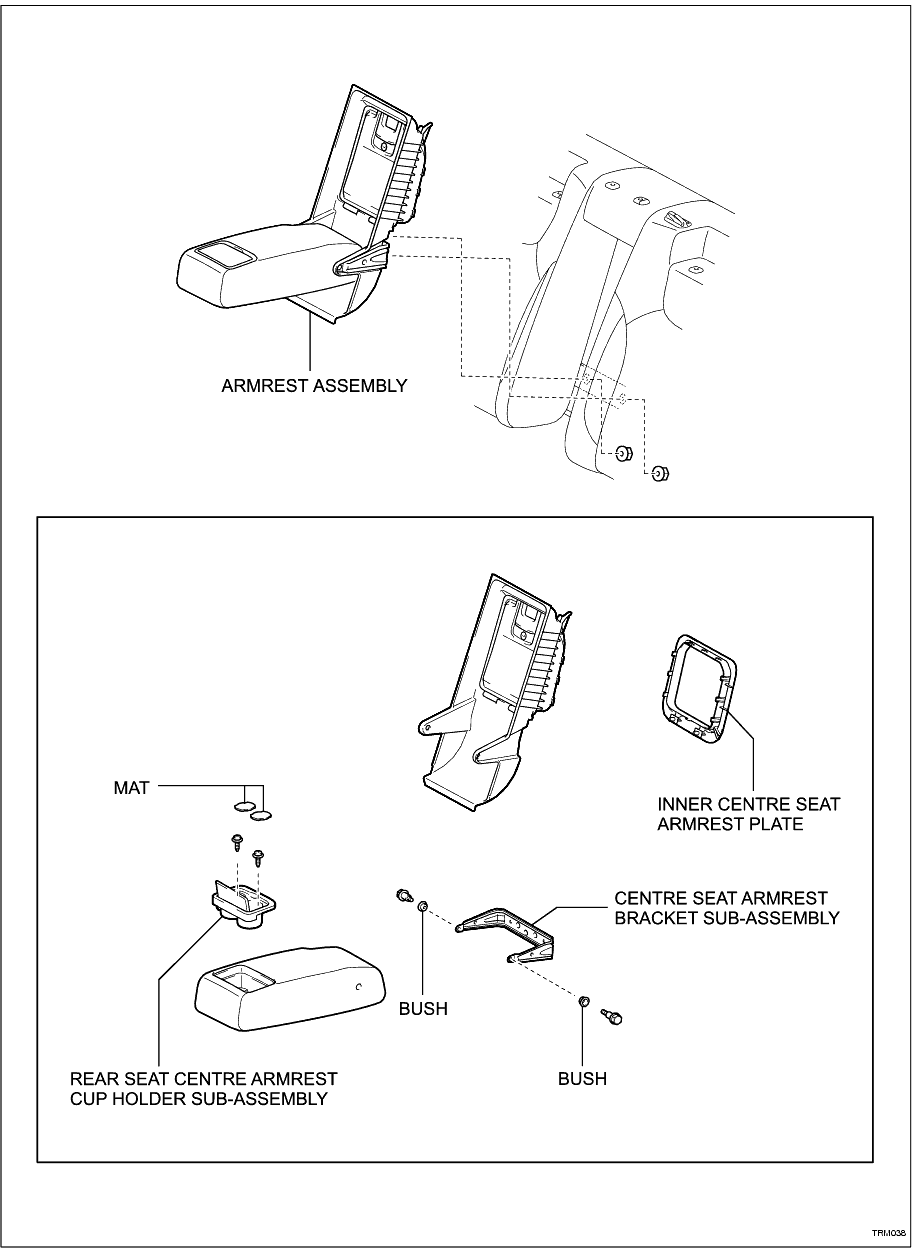
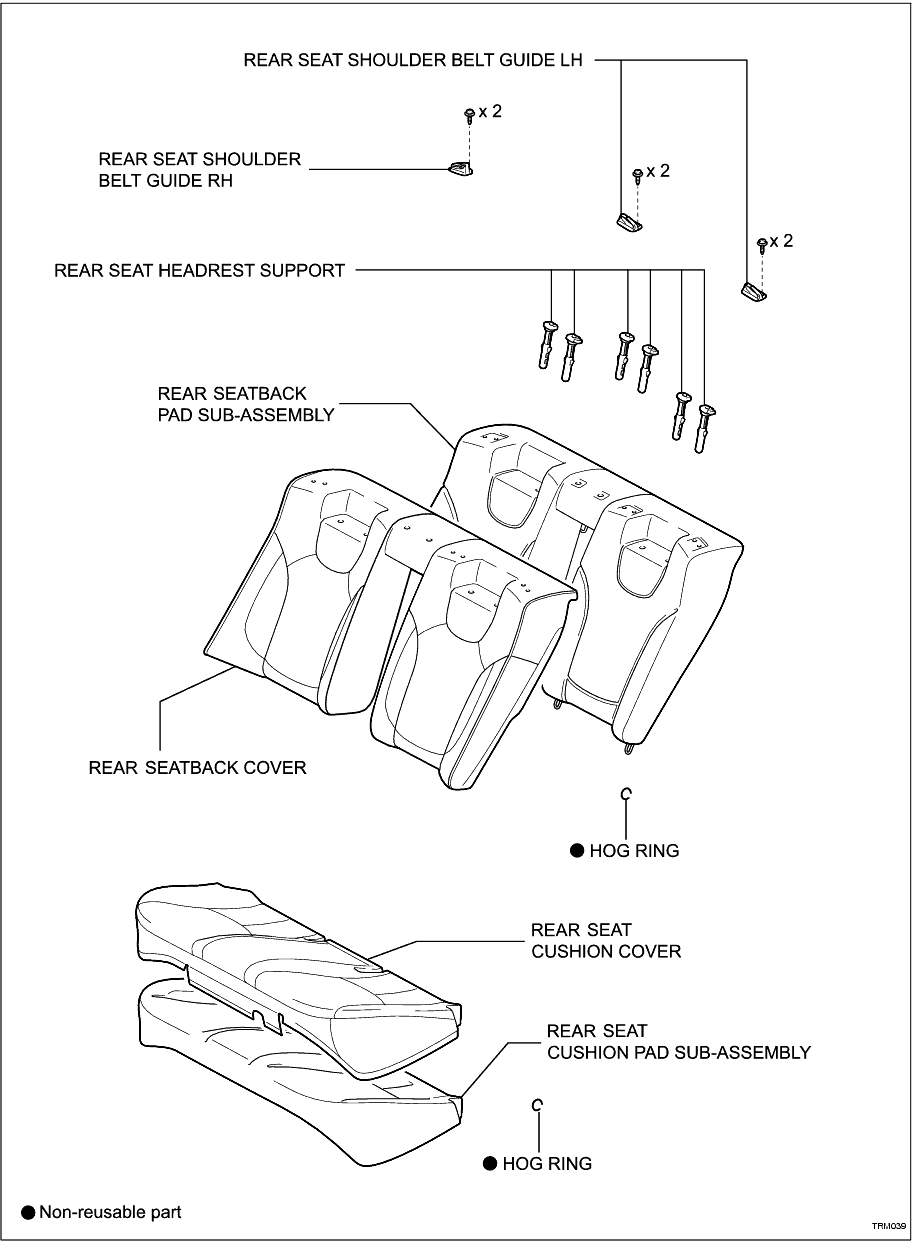
REMOVAL
1. REMOVE REAR SEAT CUSHION ASSEMBLY
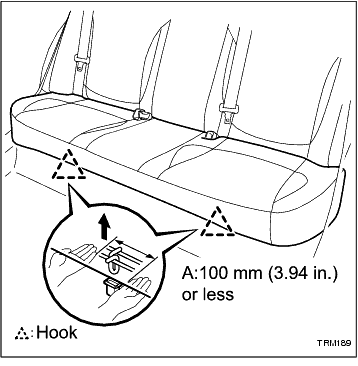
(a) Detach the 2 front hooks of the seat cushion from the vehicle body.
NOTICE:
Follow the instructions below carefully as the cushion frame can be easily deformed.
(1) Choose a hook to detach first. Place your hands near the hook as shown in the illustration. Then lift the seat cushion to detach the hook.
(2) Repeat the step above for the other hook.
-
(b) Remove the rear seat cushion assembly.
-
2. REMOVE REAR SEAT HEADREST ASSEMBLY
3. REMOVE REAR CENTRE SEAT HEADREST ASSEMBLY
4. REMOVE REAR SEATBACK ASSEMBLY
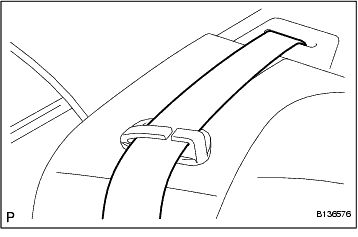
(a) Remove the 3 rear seat belts from the 3 rear seat shoulder belt guides.
-
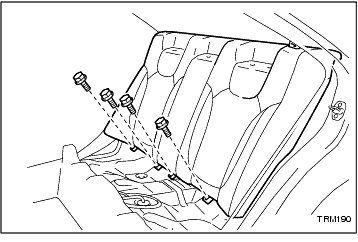
(b) Remove the 4 bolts and rear seatback assembly.
-
DISASSEMBLY
1. REMOVE REAR SEAT CUSHION COVER
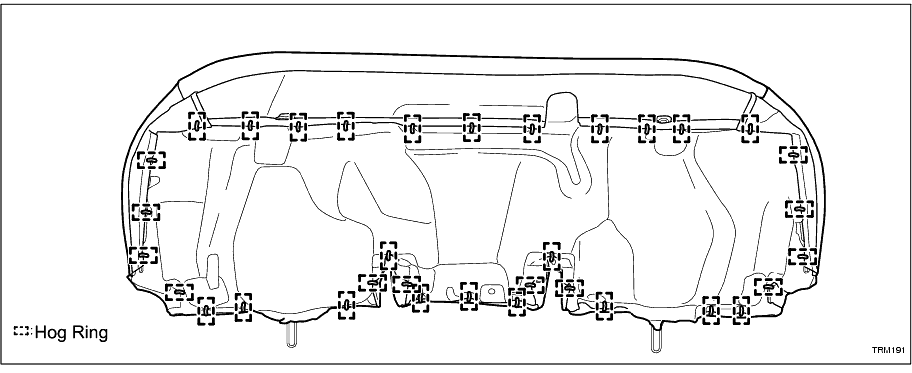
(a) Remove the 34 hog rings.
-
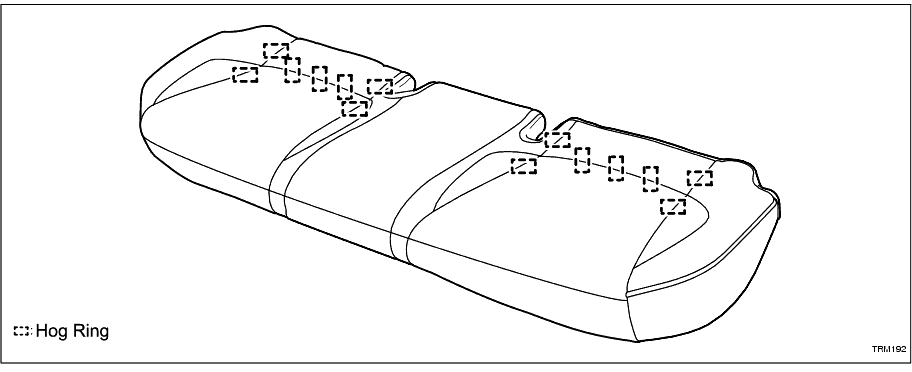
(b) Remove the 14 hog rings and rear seat cushion cover from the seat cushion frame (with pad).
-
2. REMOVE ARMREST ASSEMBLY
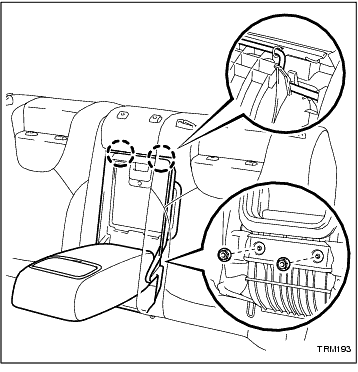
(a) Remove the 2 nuts.
-
(b) Disengage the 2 claws and remove the armrest assembly.
-
3. REMOVE CENTRE SEAT ARMREST BRACKET SUB-ASSEMBLY
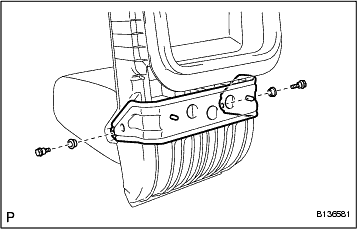
(a) Remove the 2 bolts and bushes.
-
(b) Remove the centre seat armrest bracket sub-assembly.
-
4. REMOVE REAR SEAT CENTRE ARMREST CUP HOLDER SUB-ASSEMBLY
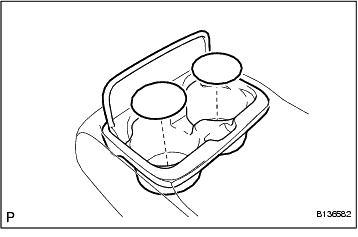
(a) Remove the 2 mats.
-
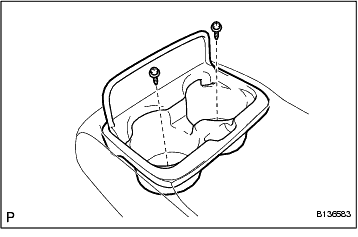
(b) Remove the 2 screws and rear seat centre armrest cup holder sub-assembly.
-
5. REMOVE INNER CENTRE SEAT ARMREST PLATE
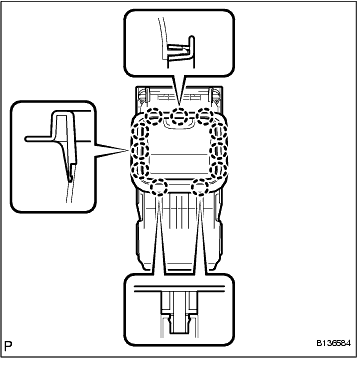
(a) Disengage the 11 claws and remove the inner centre seat armrest plate.
-
6. REMOVE REAR SEAT SHOULDER BELT GUIDE RH
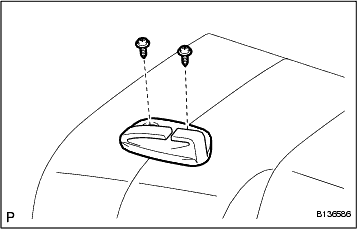
(a) Remove the 2 screws and rear seat shoulder belt guide RH.
-
7. REMOVE REAR SEAT SHOULDER BELT GUIDE LH
8. REMOVE REAR SEAT HEADREST SUPPORT
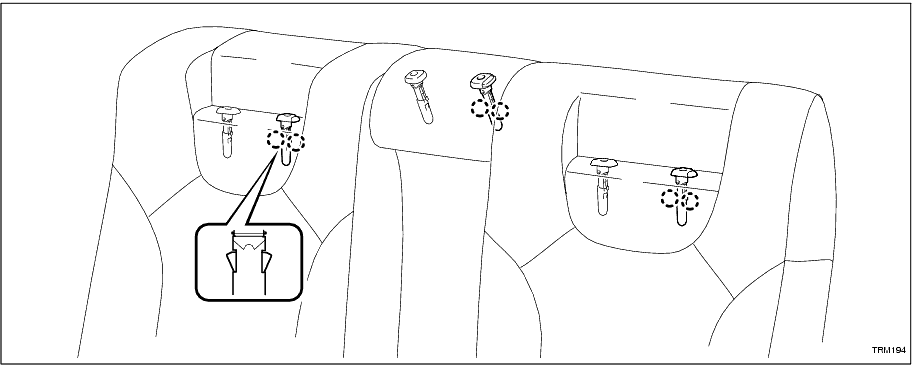
(a) Disengage the 6 claws and remove the 3 rear seat headrest supports.
-
9. REMOVE REAR SEAT HEADREST SUPPORT
10. REMOVE REAR SEATBACK COVER
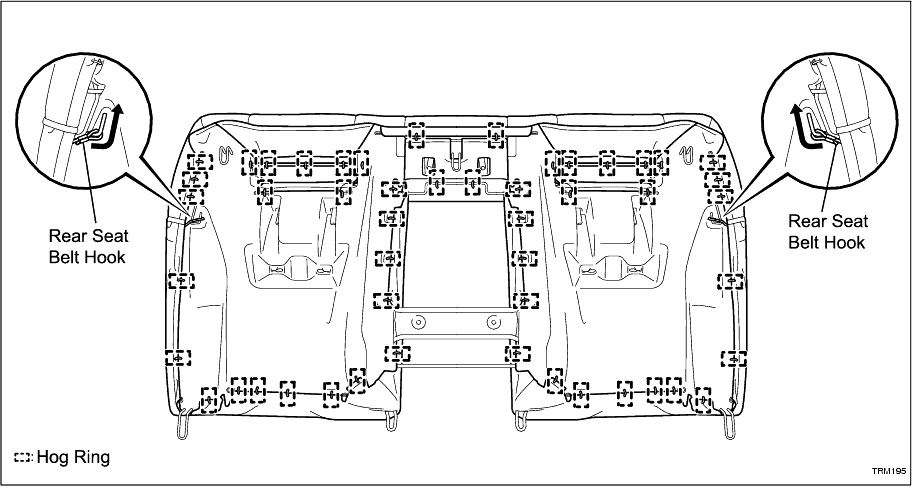
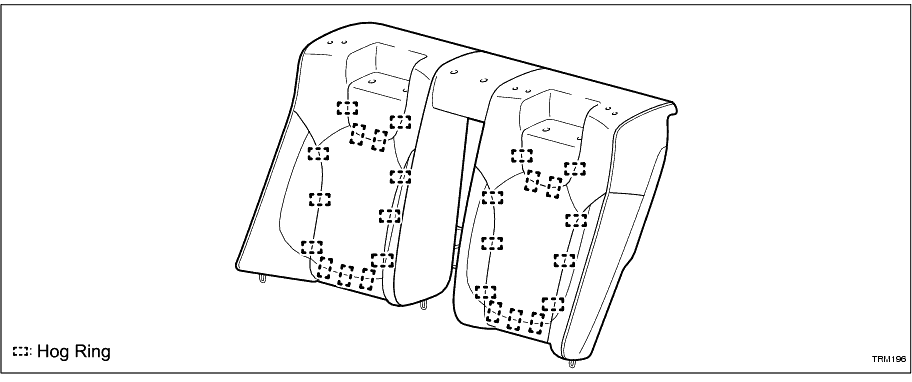
(a) Remove the 50 hog rings.
-
(b) Remove the 2 rear seat belt hooks.
-
(c) Remove the 26 hog rings and seatback cover from the seatback frame (with pad).
-
REASSEMBLY
1. INSTALL REAR SEAT BACK COVER
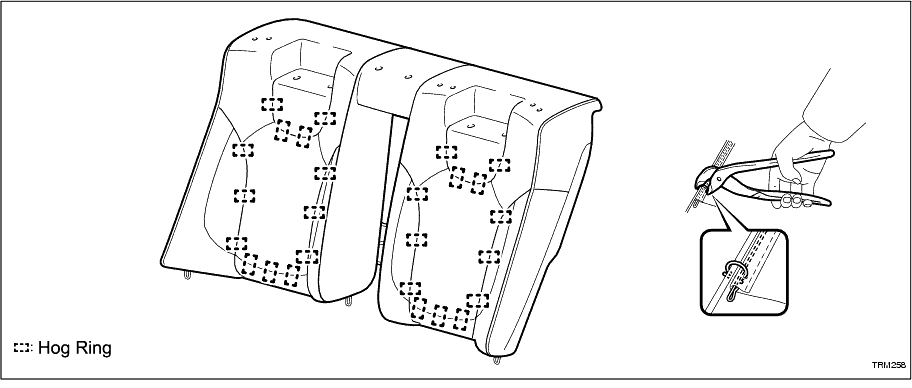
(a) Using hog ring pliers, install 26 new hog rings.
-
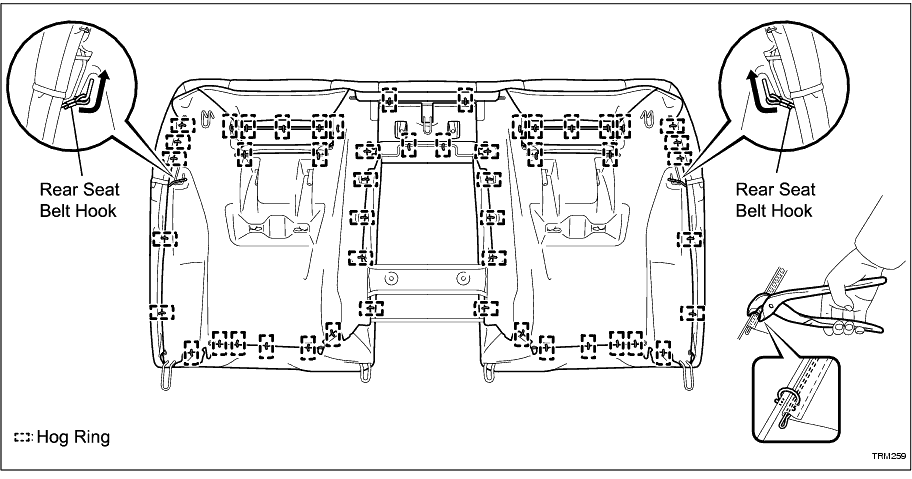
(b) Using hog ring pliers, install the rear seatback cover to the seatback frame (with pad) with 50 new hog rings.
-
(c) Install 2 rear seat belt hooks.
-
2. INSTALL REAR SEAT HEADREST SUPPORT
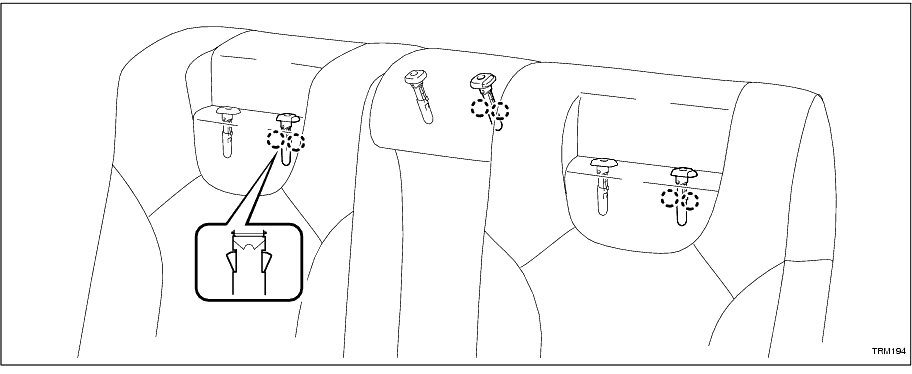
(a) Engage the 6 claws and install the 3 rear seat headrest supports.
-
3. INSTALL REAR SEAT HEADREST SUPPORT
4. INSTALL REAR SEAT SHOULDER BELT GUIDE RH
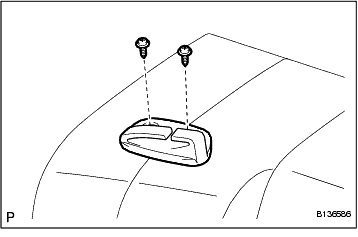
(a) Install the rear seat shoulder belt guide RH with the 2 screws.
-
5. INSTALL REAR SEAT SHOULDER BELT GUIDE LH
6. INSTALL INNER CENTRE SEAT ARMREST PLATE
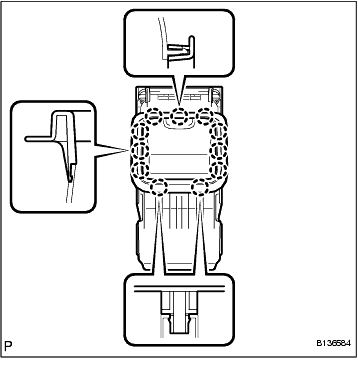
(a) Engage the 11 claws and install the centre seat inner armrest plate.
-
7. INSTALL CUP HOLDER
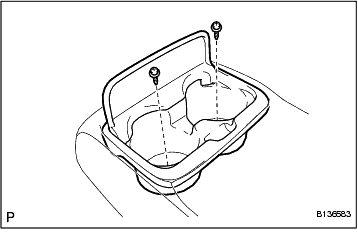
(a) Install the cup holder with the 2 screws.
-
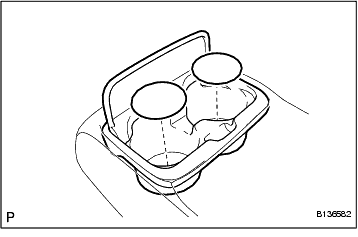
(b) Install the 2 mats.
-
8. INSTALL CENTRE SEAT ARMREST BRACKET SUB-ASSEMBLY
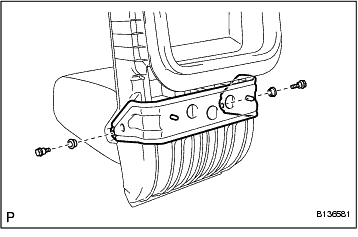
(a) Install the centre seat armrest bracket sub-assembly with the 2 bushes and 2 bolts.
-
9. INSTALL ARMREST ASSEMBLY
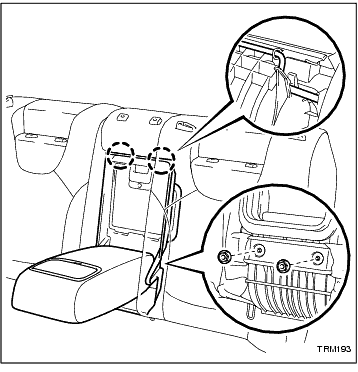
(a) Engage the 2 claws and install the armrest assembly with the 2 nuts.
-
10. INSTALL REAR SEAT CUSHION COVER
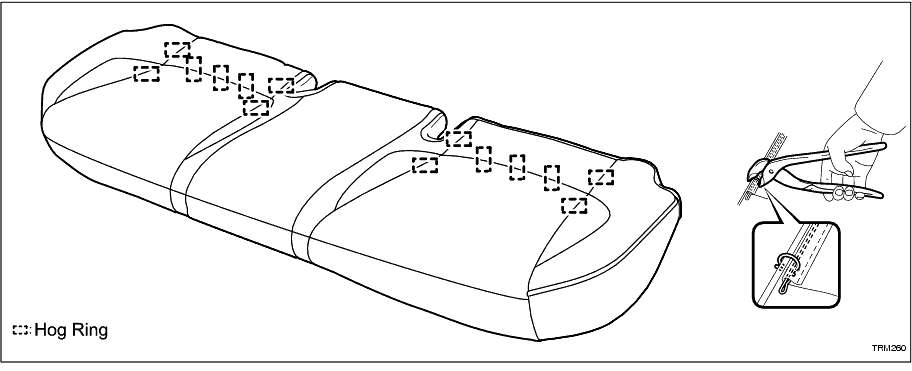
(a) Using hog ring pliers, install 14 new hog rings.
-
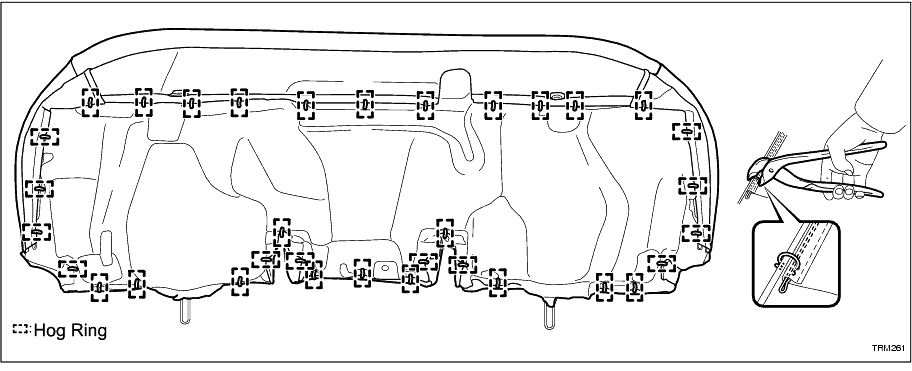
(b) Using hog ring pliers, install the rear seat cushion cover to the rear seat cushion pad with 34 new hog rings.
-
INSTALLATION
1. INSTALL REAR SEATBACK ASSEMBLY
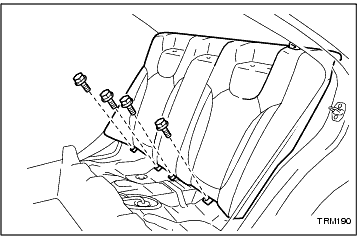
(a) Place the seatback in the cabin.
NOTICE:
Be careful not to damage the vehicle body.
-
(b) Install the rear seatback assembly with the 4 bolts.
Torque:
18 N*m
(184 kgf*cm,
13 ft.*lbf)
-
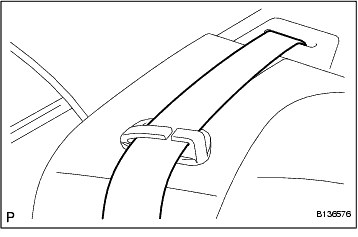
(c) Pass the 3 seat belts through and close the cap of the 2 rear seat shoulder belt guides.
-
(d) Install the floor anchor part with the bolt.
-
2. INSTALL REAR CENTRE SEAT HEADREST ASSEMBLY
3. INSTALL REAR SEAT HEADREST ASSEMBLY
4. INSTALL REAR SEAT CUSHION ASSEMBLY
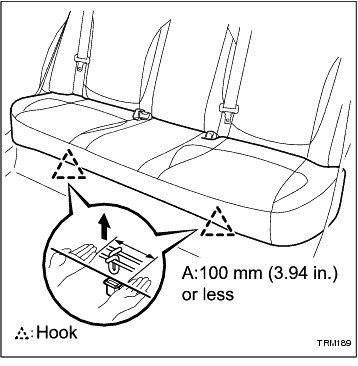
(a) Attach the 2 front hooks of the seat cushion to the vehicle body.
-
(b) Confirm the seat cushion is firmly installed.
NOTICE:
When installing the seat cushion, ensure the seat belt buckle is not under the seat cushion.
-