 |
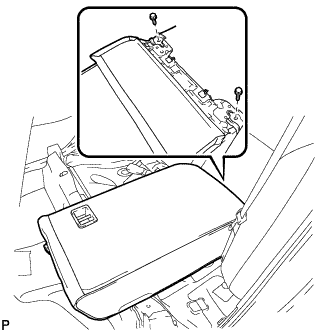
Remove the 2 bolts and separate type rear seatback assembly LH.
BACK WINDOW GLASS > REMOVAL |
| 1. PRECAUTION |
| 2. DISCONNECT CABLE FROM NEGATIVE BATTERY TERMINAL |
| 3. REMOVE REAR SEAT CUSHION ASSEMBLY |
| 4. REMOVE REAR SEAT HEADREST ASSEMBLY |
| 5. REMOVE REAR CENTER SEAT HEADREST ASSEMBLY |
| 6. REMOVE SEPARATE TYPE REAR SEATBACK ASSEMBLY LH (for Fold Down Seat Type) |
|
Remove the 2 bolts and separate type rear seatback assembly LH.
| 7. REMOVE SEPARATE TYPE REAR SEATBACK ASSEMBLY RH (for Fold Down Seat Type) |
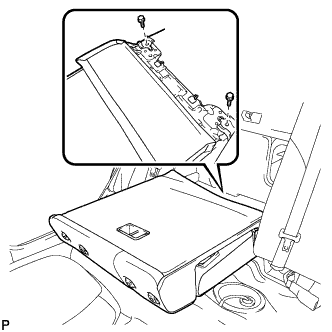 |
Remove the 2 bolts and separate type rear seatback assembly RH.
| 8. REMOVE REAR SIDE SEATBACK ASSEMBLY LH (for Fold Down Seat Type) |
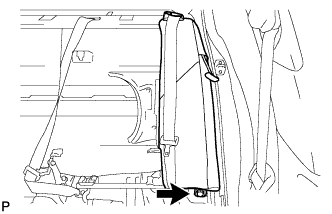 |
Remove the bolt and rear side seatback assembly LH.
| 9. REMOVE REAR SIDE SEATBACK ASSEMBLY RH (for Fold Down Seat Type) |
| 10. REMOVE REAR SEATBACK COVER (for Reclining Seat Type) |
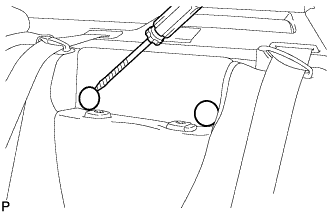 |
Using a screwdriver, detach the claws and remove the 2 rear seatback covers.
| 11. REMOVE SEPARATE TYPE REAR SEATBACK ASSEMBLY LH (for Reclining Seat Type) |
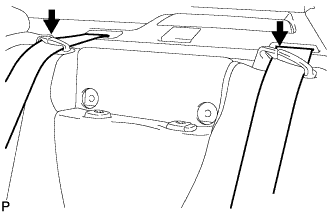 |
Separate the 2 rear seat belts.
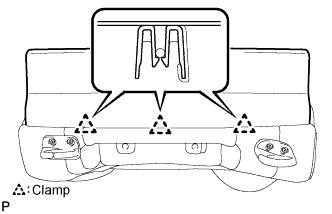 |
Disengage the 3 clamps and then separate the cover.
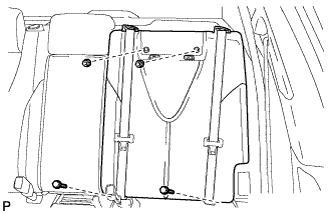 |
Remove the 2 bolts and 2 nuts and separate type rear seatback assembly LH.
| 12. REMOVE SEPARATE TYPE REAR SEATBACK ASSEMBLY RH (for Reclining Seat Type) |
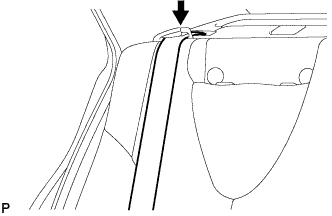 |
Separate the rear seat belt.
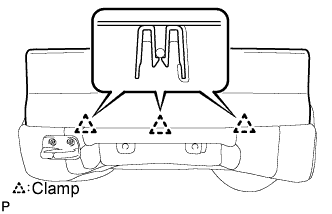 |
Disengage the 3 clamps and then separate the cover.
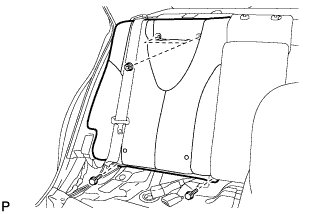 |
Remove the 2 bolts and 2 nuts and separate type rear seatback assembly RH.
| 13. REMOVE CENTER SEATBACK ASSEMBLY (for Reclining Seat Type) |
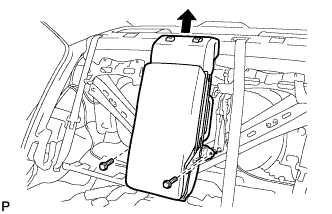 |
Remove the 2 bolts and center seatback assembly.
| 14. REMOVE REAR DOOR SCUFF PLATE LH |
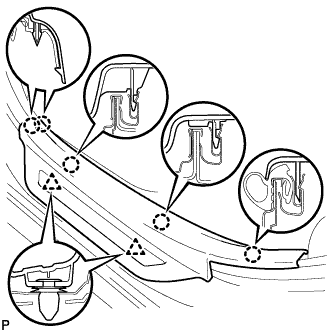 |
Disengage the 5 claws and 2 clips, and remove the rear door scuff plate LH.
| 15. REMOVE REAR DOOR OPENING TRIM WEATHERSTRIP LH |
| 16. REMOVE REAR DOOR SCUFF PLATE RH |
| 17. REMOVE REAR DOOR OPENING TRIM WEATHERSTRIP RH |
| 18. REMOVE RECLINING REMOTE CONTROL LEVER SUB-ASSEMBLY LH (for Reclining Seat Type) |
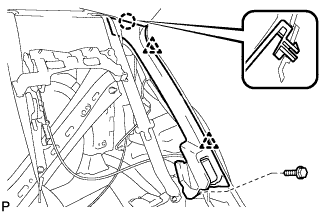 |
Remove the bolt.
Disengage the 2 clips and the claw and then separate the reclining remote control lever sub-assembly.
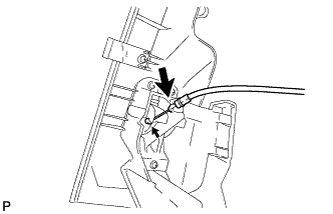 |
Separate the rear seat reclining control cable and remove the reclining remote control lever sub-assembly.
| 19. REMOVE RECLINING REMOTE CONTROL LEVER SUB-ASSEMBLY RH (for Reclining Seat Type) |
| 20. REMOVE ROOF SIDE INNER GARNISH LH |
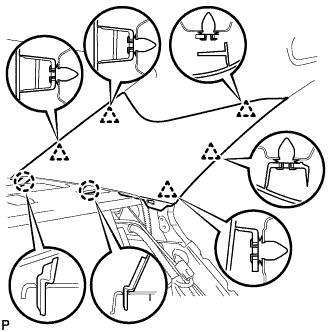 |
Disengage the 5 clips and 2 claws, and remove the roof side inner garnish LH.
| 21. REMOVE ROOF SIDE INNER GARNISH RH |
| 22. REMOVE CHILD RESTRAINT SEAT ANCHOR BRACKET SUB-ASSEMBLY LH |
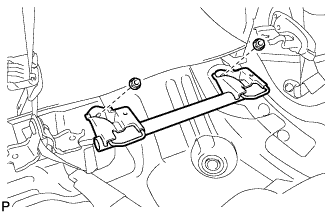 |
Remove the 2 nuts and child restraint seat anchor bracket sub-assembly.
| 23. DISCONNECT REAR SEAT INNER WITH CENTER BELT ASSEMBLY LH |
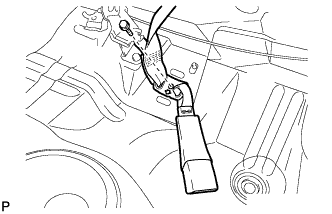 |
Remove the bolt and disconnect the floor end of the rear seat inner with center belt assembly LH.
| 24. DISCONNECT REAR SEAT OUTER BELT ASSEMBLY (for LH Side) |
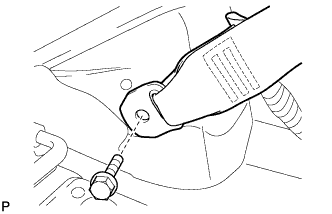 |
Remove the bolt and disconnect the floor end of the rear seat outer belt assembly.
| 25. DISCONNECT REAR SEAT OUTER BELT ASSEMBLY (for RH Side) |
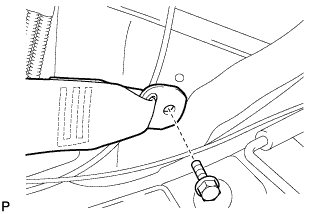 |
Remove the bolt and disconnect the floor end of the rear seat outer belt assembly.
| 26. REMOVE REAR SEAT SHOULDER BELT COVER |
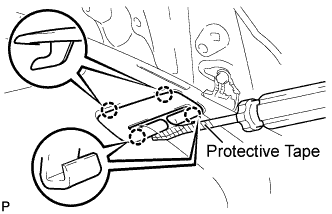 |
Using a screwdriver, disengage the 4 claws and remove the rear seat shoulder belt cover.
| 27. REMOVE REAR SEAT SHOULDER BELT HOLE COVER |
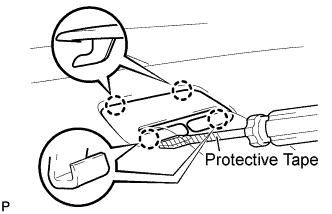 |
Using a screwdriver, disengage the 4 claws and remove the rear seat shoulder hole belt cover.
| 28. REMOVE PACKAGE TRAY TRIM PANEL ASSEMBLY (for Fold Down Seat Type) |
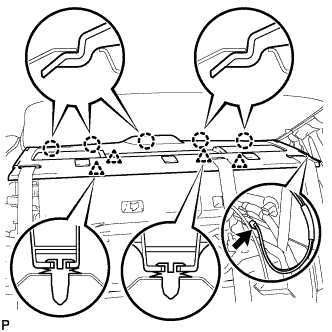 |
Disconnect the connector.
Disengage the 4 clips and the 5 claws.
Pass the 3 rear seat belt floor anchors through the package tray trim panel assembly then remove the package tray trim panel assembly.
| 29. REMOVE PACKAGE TRAY TRIM PANEL ASSEMBLY (for Reclining Seat Type) |
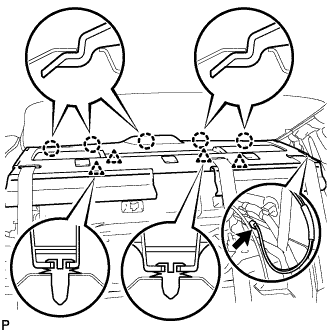 |
Disconnect the connector.
Disengage the 4 clips and the 5 claws.
Pass the 3 rear seat belt floor anchors through the package tray trim panel assembly then remove the package tray trim panel assembly.
| 30. REMOVE REAR ASSIST GRIP SUB-ASSEMBLY |
| 31. REMOVE SPOT LIGHT ASSEMBLY (w/ Sliding Roof) |
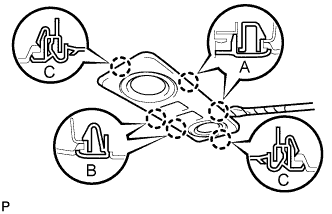 |
Using a screwdriver, disengage the 2 claws labeled A and 2 claws labeled B from the vehicle body.
Using a screwdriver, disengage the 2 claws labeled C and remove the spot light assembly from the headlining.
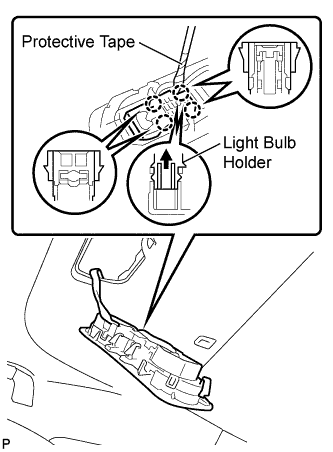 |
Using a screwdriver, disengage the 4 claws.
Pull the light bulb holder in the direction indicated by the arrow in the illustration to detach the claw. Then remove the spot light assembly from the light bulb holder.
| 32. REMOVE SUNSHADE TRIM HOLDER (w/ Rear Sunshade) |
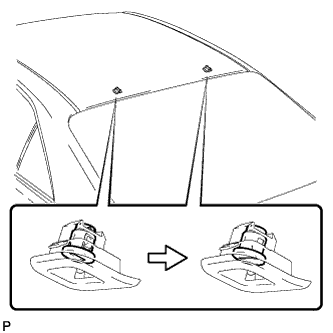 |
Using a screwdriver, turn the pin of each sunshade trim holder 90°.
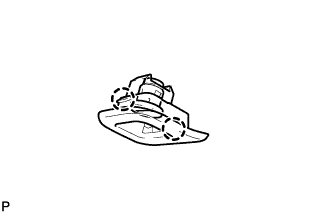 |
Disengage the 2 claws and remove the sunshade trim holder.
| 33. REMOVE ROOF HEADLINING ASSEMBLY (w/o Sliding Roof) |
| 34. REMOVE ROOF HEADLINING ASSEMBLY (w/ Sliding Roof) |
| 35. REMOVE BACK WINDOW MOULDING |
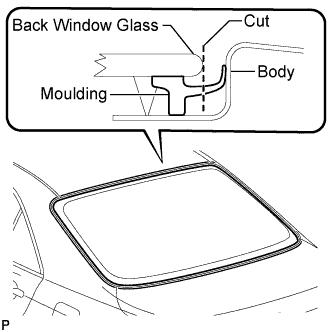 |
Using a knife, cut off the moulding, as shown in the illustration.
Remove the remaining moulding from the back window glass.
| 36. REMOVE BACK WINDOW GLASS ASSEMBLY |
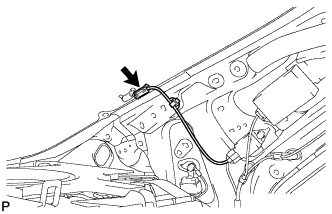 |
Disconnect the connector.
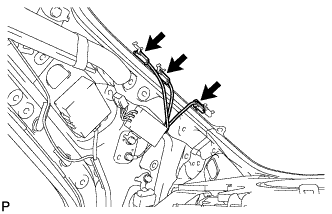 |
Disconnect the connectors.
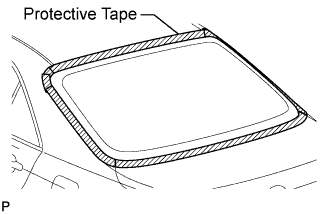 |
Apply protective tape to the installation position of the back window glass assembly on the vehicle body.
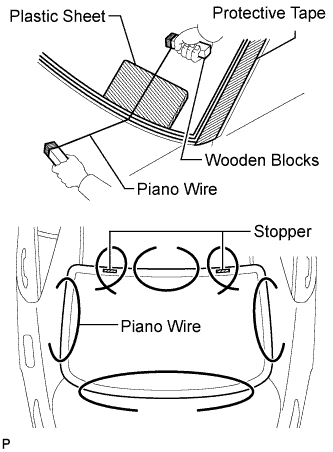 |
Pass a piano wire between the vehicle body and glass from the interior.
Tie both wire ends to wooden blocks or similar objects.
Cut off the adhesive by pulling the piano wire around the back window glass.
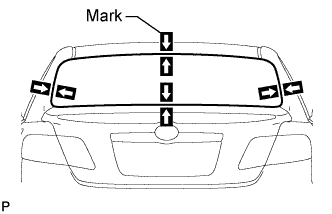 |
Place matchmarks on the back window glass and vehicle body on the locations indicated in the illustration.
Using a suction cup, remove the back window glass assembly.
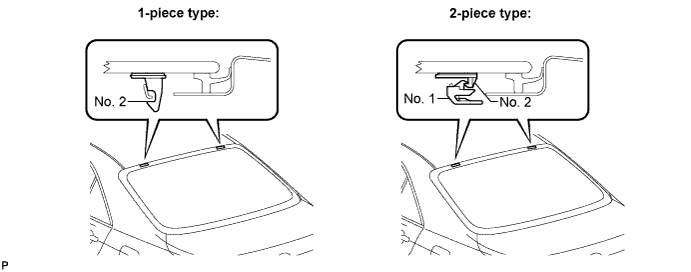
| 37. REMOVE NO. 2 BACK WINDOW GLASS STOPPER |
Using a scraper, remove the 2 No. 2 stoppers.
| 38. REMOVE NO. 1 BACK WINDOW GLASS STOPPER (for 2-Piece Type) |
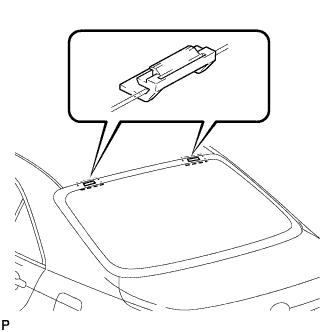 |
Remove the 2 No. 1 stoppers.
| 39. CLEAN BACK WINDOW GLASS |
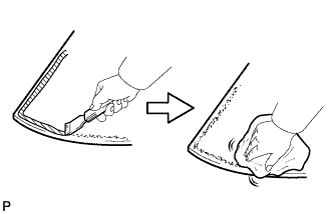 |
Using a scraper, remove the adhesive tape and adhesive sticking to the back window glass.
Clean the outer circumference of the back window glass with a non-residue solvent.
| 40. CLEAN VEHICLE BODY |
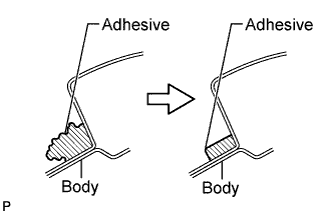 |
Clean and shape the contact surface of the vehicle body.
Using a knife, cut away any rough adhesive on the contact surface of the vehicle body to ensure the appropriate surface shape.
Clean the contact surface of the vehicle body with a piece of cloth saturated with cleaner.