 |
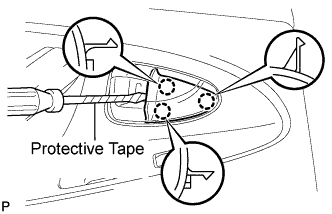
Using a screwdriver with the tip wrapped with protective tape, disengage the 3 claws and remove the rear door inside handle bezel plug.
REAR DOOR BELT MOULDING > REMOVAL |
| 1. REMOVE REAR DOOR INSIDE HANDLE BEZEL PLUG |
|
Using a screwdriver with the tip wrapped with protective tape, disengage the 3 claws and remove the rear door inside handle bezel plug.
| 2. REMOVE DOOR ASSIST GRIP COVER |
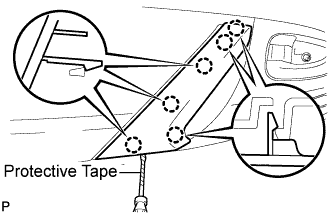 |
Using a screwdriver with the tip wrapped with protective tape, disengage the 6 claws and remove the door assist grip cover.
| 3. REMOVE REAR DOOR TRIM BOARD SUB-ASSEMBLY |
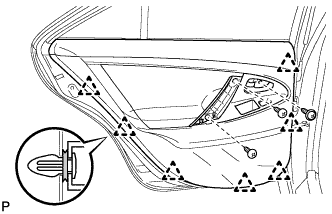 |
Remove the 3 screws.
Using a clip remover, disengage the 7 clips.
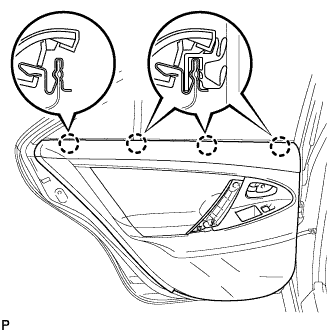 |
Raise the rear door trim board to disengage the 4 claws and remove the rear door trim board together with the rear door inner glass weatherstrip.
Disconnect the connector.
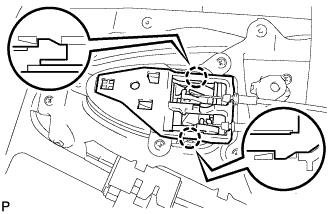 |
Disengage the 2 claws and disconnect the rear door inside handle sub-assembly.
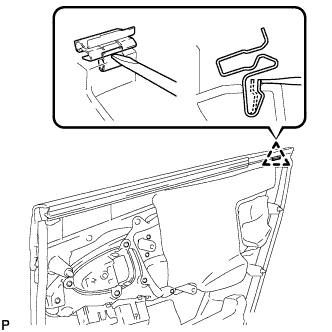 |
Disengage the clip as shown in the illustration and remove the No. 1 door scuff plate clamp from the rear door trim board.
| 4. REMOVE REAR DOOR INNER GLASS WEATHERSTRIP |
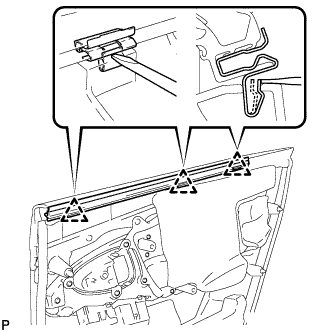 |
Disengage the 3 clips as shown in the illustration and remove the rear door inner glass weatherstrip from the rear door trim board.
| 5. REMOVE REAR DOOR BELT MOULDING ASSEMBLY |
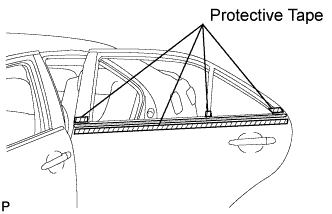 |
Fully open the rear door glass.
Put protective tape around the rear door belt moulding assembly.
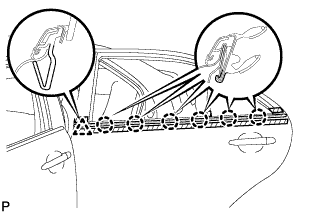 |
Using a moulding remover, disengage the clip and 6 claws, and remove the rear door belt moulding assembly.