FRONT DOOR WINDOW FRAME MOULDING > INSTALLATION |
| 1. INSTALL FRONT DOOR UPPER WINDOW FRAME MOULDING |
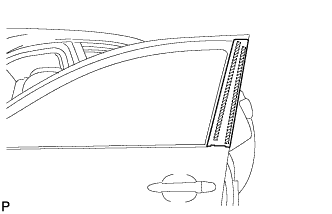
Install the front door upper window frame moulding to the door frame.
![]() |
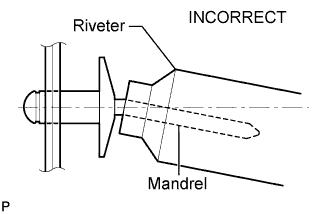
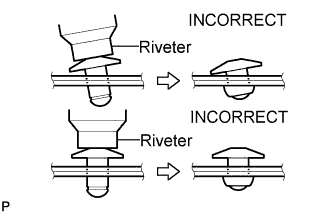
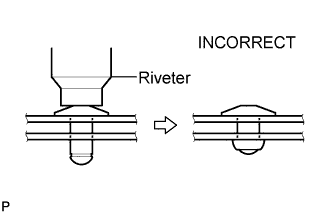
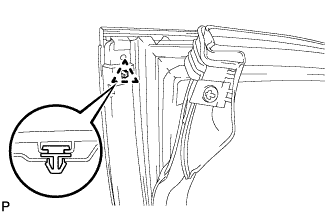
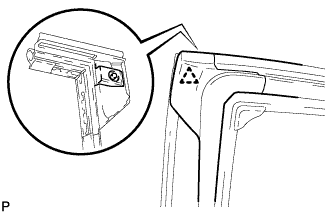
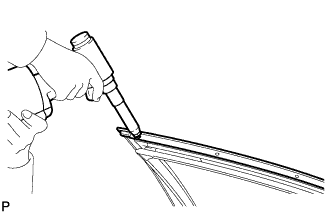
Using an air riveter or hand riveter with a nose piece, install the front door upper window frame moulding with 7 new rivets.
![]() |
![]() |
![]() |
| 2. INSTALL FRONT DOOR REAR WINDOW FRAME MOULDING |
| Item | Temperature |
| Vehicle Body | 40 to 60°C (104 to 140°F) |
| Moulding | 20 to 30°C (68 to 86°F) |
Clean the vehicle body surface.
Using a heat light, heat the vehicle body surface.
Remove the double-sided tape from the vehicle body.
Wipe off any tape adhesive residue with cleaner.
![]() |
Clean the front door rear window frame moulding. (If reusing the front door rear window frame moulding)
Using a heat light, heat the front door rear window frame moulding.
Remove the double-sided tape from the front door rear window frame moulding.
Wipe off any tape adhesive residue with cleaner.
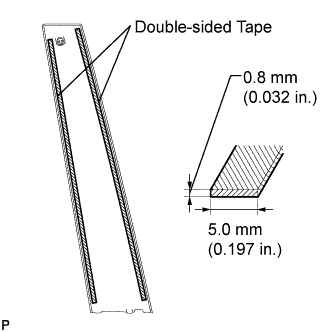
Apply new double-sided tape to the front door rear window frame moulding.
![]() |
Install the front door rear window frame moulding.
Using a heat light, heat the vehicle body and front door rear window frame moulding.
Remove the release paper from the front door rear window frame moulding.
![]() |
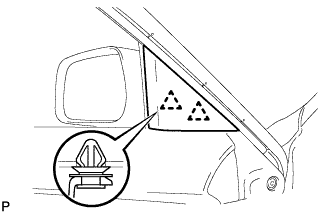
Engage the clip and install the front door rear window frame moulding.
| 3. INSTALL FRONT DOOR WEATHERSTRIP |
![]() |
Engage the clip and install the front door weatherstrip.
| 4. INSTALL FRONT DOOR GLASS RUN |
![]() |
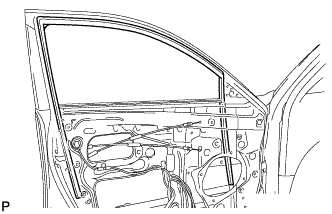
Install the front door glass run.
| 5. INSTALL FRONT DOOR GLASS SUB-ASSEMBLY |
![]() |
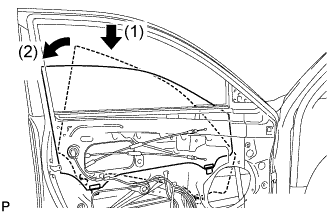
Insert the front door glass sub-assembly into the front door panel along the front door glass run as indicated in the order of the arrows in the illustration.
![]() |
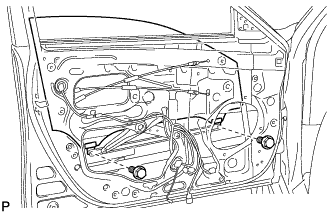
Install the front door glass sub-assembly with the 2 bolts.
| 6. INSTALL FRONT DOOR SERVICE HOLE COVER |
Apply butyl tape to the front door panel.
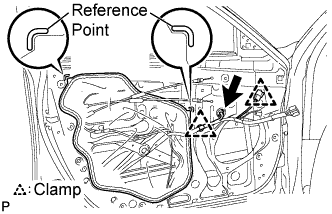
Pass the front door lock remote control cable and rear door inside locking cable through a new front door service hole cover.
![]() |
Install the new service hole cover.
Connect each connector and each clamp.
| 7. INSTALL OUTER REAR VIEW MIRROR ASSEMBLY WITH COVER |
![]() |
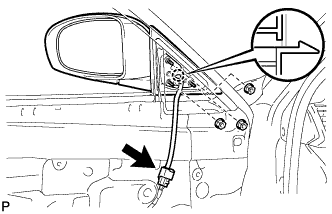
Engage the claw of the outer rear view mirror assembly with cover.
Install the outer rear view mirror assembly with cover with the 3 nuts.
Connect the connector.
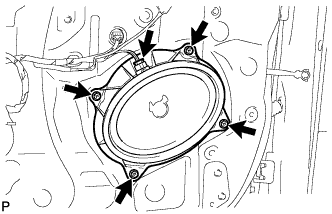
| 8. INSTALL FRONT NO. 1 SPEAKER ASSEMBLY |
![]() |
Install the front No. 1 speaker assembly with the 4 bolts.
Connect the connector.
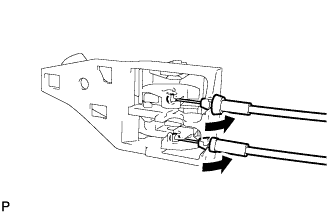
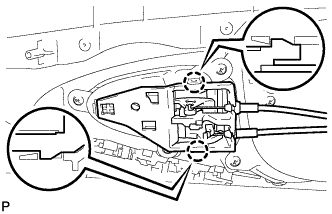
| 9. INSTALL FRONT DOOR INSIDE HANDLE SUB-ASSEMBLY |
![]() |
Connect the front door lock remote control cable and front door inside locking cable to the front door inside handle sub-assembly.
![]() |
Engage the 2 claws and install the front door inside handle sub-assembly.
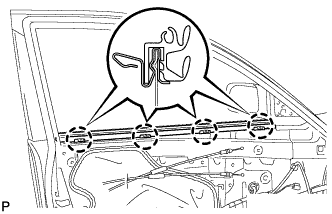
| 10. INSTALL FRONT DOOR INNER GLASS WEATHERSTRIP |
![]() |
Engage the 4 claws and install the front door inner glass weatherstrip.
| 11. INSTALL FRONT DOOR TRIM BOARD SUB-ASSEMBLY |
Connect each connector.
![]() |
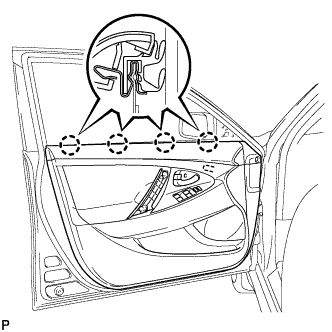
Engage the front door trim board with the 4 clips of the front door inner glass weatherstrip.
![]() |
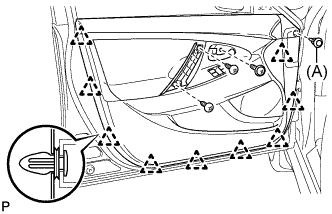
Engage the 9 clips and install the front door trim board to the front door panel.
Install the 3 screws and clip (A).
| 12. INSTALL COURTESY LIGHT ASSEMBLY |
Connect the connector.
![]() |
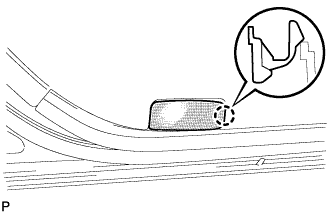
Engage the claw and install the courtesy light assembly.
| 13. INSTALL ASSIST GRIP COVER |
![]() |
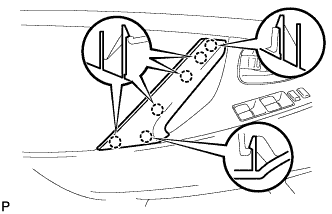
Engage the 6 claws and install the assist grip cover.
| 14. INSTALL FRONT DOOR INSIDE HANDLE BEZEL PLUG |
![]() |
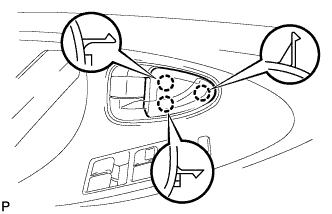
Engage the 3 claws and install the front door inside handle bezel plug.
| 15. INSTALL FRONT DOOR LOWER FRAME BRACKET GARNISH |
![]() |
Engage the 2 clips and install the front door lower frame bracket garnish.