 |
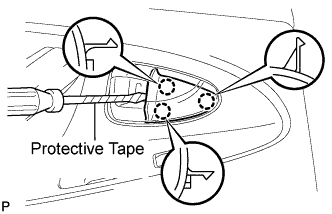
Using a screwdriver with the tip wrapped with protective tape, disengage the 3 claws and remove the rear door inside handle bezel plug.
REAR DOOR WINDOW FRAME MOULDING > REMOVAL |
| 1. REMOVE REAR DOOR INSIDE HANDLE BEZEL PLUG |
|
Using a screwdriver with the tip wrapped with protective tape, disengage the 3 claws and remove the rear door inside handle bezel plug.
| 2. REMOVE DOOR ASSIST GRIP COVER |
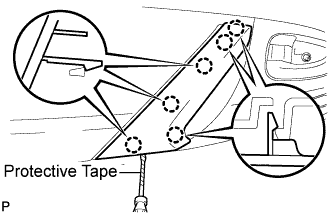 |
Using a screwdriver with the tip wrapped with protective tape, disengage the 6 claws and remove the door assist grip cover.
| 3. REMOVE REAR DOOR TRIM BOARD SUB-ASSEMBLY |
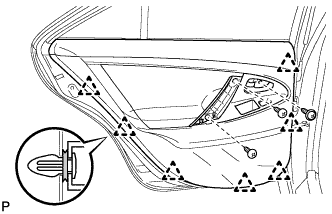 |
Remove the 3 screws.
Using a clip remover, disengage the 7 clips.
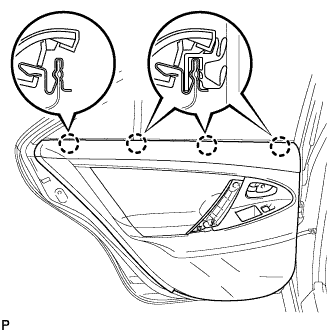 |
Raise the rear door trim board to disengage the 4 claws and remove the rear door trim board together with the rear door inner glass weatherstrip.
Disconnect the connector.
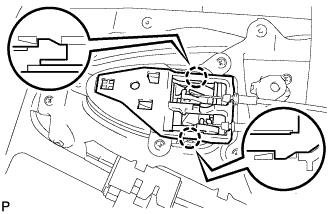 |
Disengage the 2 claws and disconnect the rear door inside handle sub-assembly.
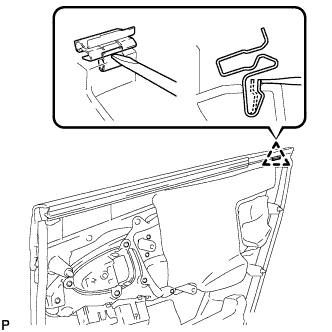 |
Disengage the clip as shown in the illustration and remove the No. 1 door scuff plate clamp from the rear door trim board.
| 4. REMOVE REAR DOOR INNER GLASS WEATHERSTRIP |
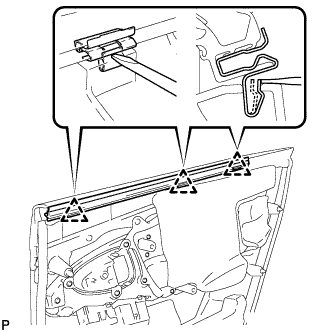 |
Disengage the 3 clips as shown in the illustration and remove the rear door inner glass weatherstrip from the rear door trim board.
| 5. REMOVE REAR DOOR INSIDE HANDLE SUB-ASSEMBLY |
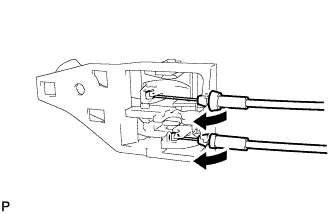 |
Disconnect the cables and remove the rear door inside handle sub-assembly.
| 6. REMOVE REAR DOOR SERVICE HOLE COVER |
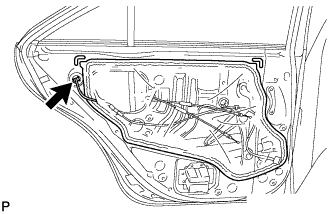 |
Disconnect the connector.
Remove the rear door service hole cover.
| 7. REMOVE REAR DOOR GLASS RUN |
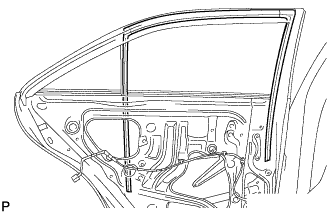 |
Remove the rear door glass run.
| 8. REMOVE REAR DOOR LOWER WINDOW FRAME SUB-ASSEMBLY |
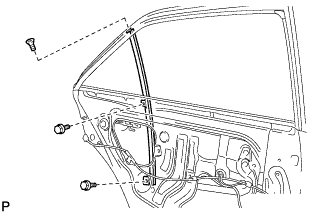 |
Remove the 2 bolts, the screw, and the rear door lower window frame sub-assembly.
| 9. REMOVE REAR DOOR QUARTER WINDOW GLASS |
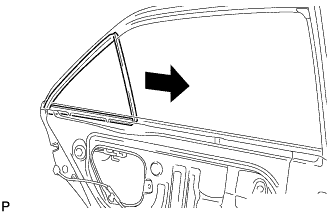 |
Remove the rear door quarter window glass and the rear door quarter window weatherstrip as a unit as shown in the illustration.
Remove the rear door quarter window glass from the rear door quarter window weatherstrip.
| 10. REMOVE REAR DOOR GLASS SUB-ASSEMBLY |
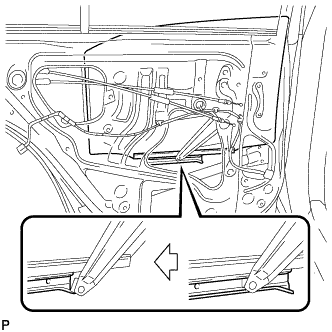 |
Remove the rear door glass sub-assembly from the rear door window regulator sub-assembly as shown in the illustration.
| 11. REMOVE REAR DOOR WEATHERSTRIP |
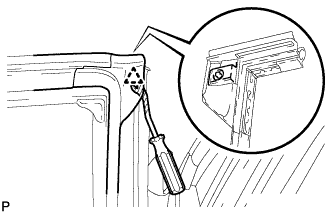 |
Using a clip remover, disengage the clip and remove the rear door weatherstrip.
| 12. REMOVE REAR DOOR FRONT WINDOW FRAME MOULDING |
| Item | Temperature |
| Vehicle Body | 40 to 60°C (104 to 140°F) |
| Moulding | 20 to 30°C (68 to 86°F) |
Using a heat light, heat the rear door front window frame moulding.
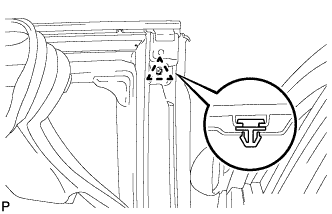 |
Disengage the clip.
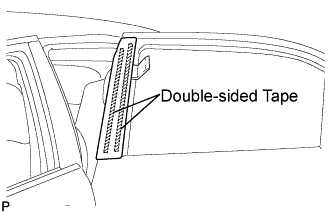 |
Using a moulding remover, remove the rear door front window frame moulding.
| 13. REMOVE REAR DOOR UPPER WINDOW FRAME MOULDING |
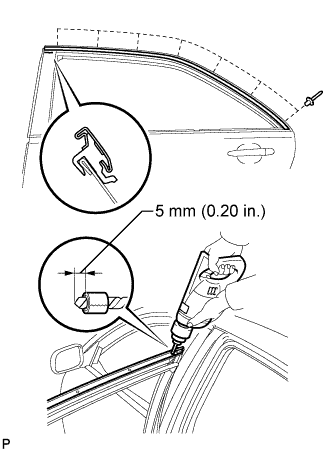 |
Put a 4 mm (0.16 in.) drill bit into a drill.
Tape the drill bit without the portion of 5 mm (0.20 in.) from the tip covered.
Lightly press the drill bit against the rivets, drill off the flanges of the rivets, and remove the 7 rivets.
Using a vacuum cleaner, remove the rivet fragments and shavings from the drilled areas.
Remove the rear door upper window frame moulding from the door frame.