 |
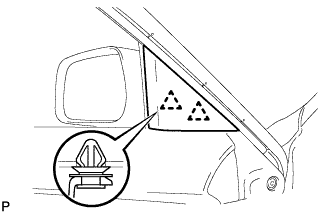
Disengage the 2 clips and remove the front door lower frame bracket garnish.
FRONT DOOR BLACK OUT TAPE > REMOVAL |
| 1. REMOVE FRONT DOOR LOWER FRAME BRACKET GARNISH |
|
Disengage the 2 clips and remove the front door lower frame bracket garnish.
| 2. REMOVE FRONT DOOR INSIDE HANDLE BEZEL PLUG |
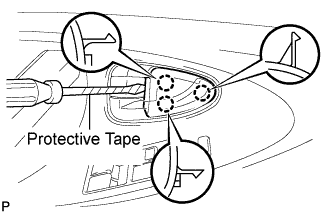 |
Using a screwdriver with the tip wrapped with protective tape, disengage the 3 claws, and remove the front door inside handle bezel plug.
| 3. REMOVE ASSIST GRIP COVER |
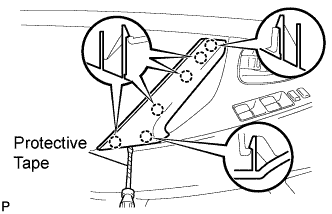 |
Using a screwdriver with the tip wrapped with protective tape, disengage the 6 claws and remove the assist grip cover.
| 4. REMOVE COURTESY LIGHT ASSEMBLY |
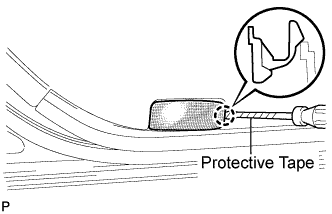 |
Using a screwdriver with the tip wrapped with protective tape, disengage the claw and remove the courtesy light assembly.
Disconnect the connector.
| 5. REMOVE FRONT DOOR TRIM BOARD SUB-ASSEMBLY |
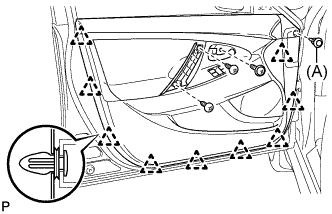 |
Remove the 3 screws and clip (A).
Using a clip remover, disengage the 9 clips.
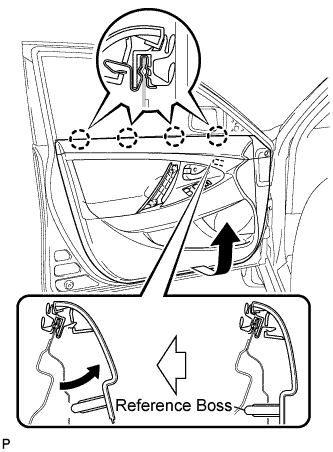 |
Pull up the front door trim board in the direction indicated by the arrow.
Disengage the reference bosses from the front door panel.
Raise the front door trim board to disengage the 4 claws and remove the front door trim board together with the front door inner glass weatherstrip.
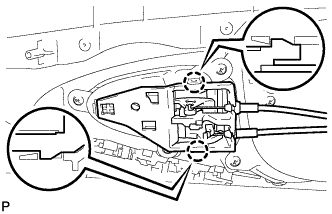 |
Disengage the 2 claws and disconnect the front door inside handle sub-assembly.
| 6. REMOVE FRONT DOOR INNER GLASS WEATHERSTRIP |
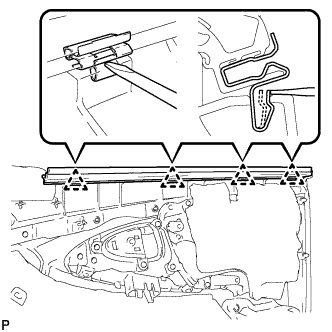 |
Using a screwdriver, disengage the 4 clips as shown in the illustration and remove the front door inner glass weatherstrip from the front door trim board.
| 7. REMOVE FRONT DOOR INSIDE HANDLE SUB-ASSEMBLY |
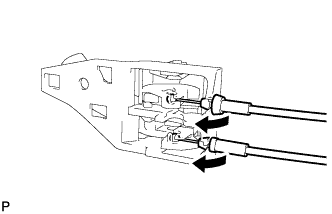 |
Disconnect the front door lock remote control cable and front door inside locking cable and remove the front door inside handle sub-assembly.
| 8. REMOVE FRONT NO. 1 SPEAKER ASSEMBLY |
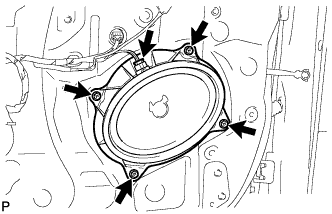 |
Disconnect the connector.
Remove the 4 bolts and front No. 1 speaker assembly.
| 9. REMOVE OUTER REAR VIEW MIRROR ASSEMBLY WITH COVER |
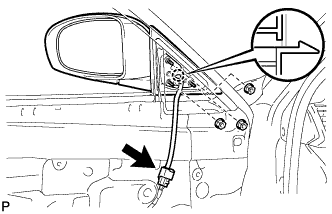 |
Disconnect the connector.
Remove the 3 nuts.
Disengage the claw and remove the outer rear view mirror assembly with cover.
| 10. REMOVE FRONT DOOR SERVICE HOLE COVER |
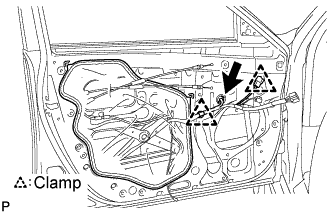 |
Disconnect the connector and each clamp, and remove the front door service hole cover.
| 11. REMOVE FRONT DOOR GLASS SUB-ASSEMBLY |
Connect the front power window regulator motor assembly connector.
Connect the power window regulator master switch assembly and move the front door glass sub-assembly so that the door glass bolts can be seen.
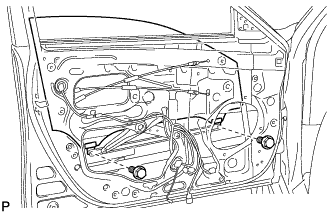 |
Remove the 2 bolts.
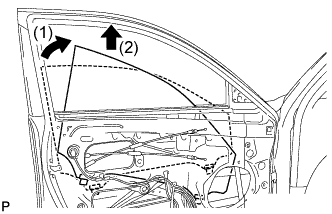 |
Remove the front door glass sub-assembly as shown in the illustration.
Disconnect the power window regulator master switch assembly and front power window regulator motor assembly connector.
| 12. REMOVE FRONT DOOR GLASS RUN |
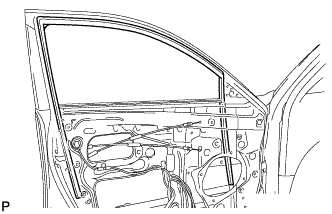 |
Remove the front door glass run.
| 13. REMOVE FRONT DOOR WEATHERSTRIP |
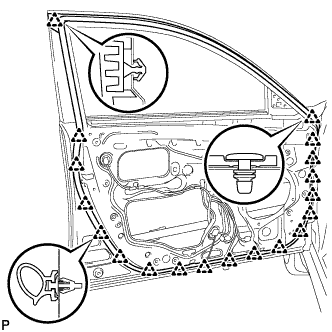 |
Using a clip remover, disengage the 19 clips and remove the front door weatherstrip.
| 14. REMOVE DOOR FRAME GARNISH |
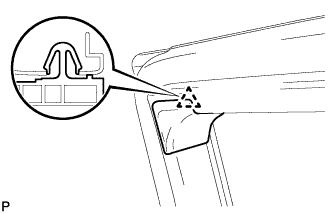 |
Disengage the clip and remove the door frame garnish.
| 15. REMOVE FRONT DOOR STRIPE |
Using a heat light, heat the front door stripe.
| Item | Temperature |
| Vehicle Body | 40 to 60°C (104 to 140°F) |
Pull back an edge of the front door stripe and pull it parallel to the vehicle body to pull it off.
| 16. REMOVE FRONT DOOR LOWER OUTSIDE STRIPE |
Using a heat light, heat the front door lower outside stripe.
| Item | Temperature |
| Vehicle Body | 40 to 60°C (104 to 140°F) |
Pull back an edge of the front door lower outside stripe and pull it parallel to the vehicle body to pull it off.