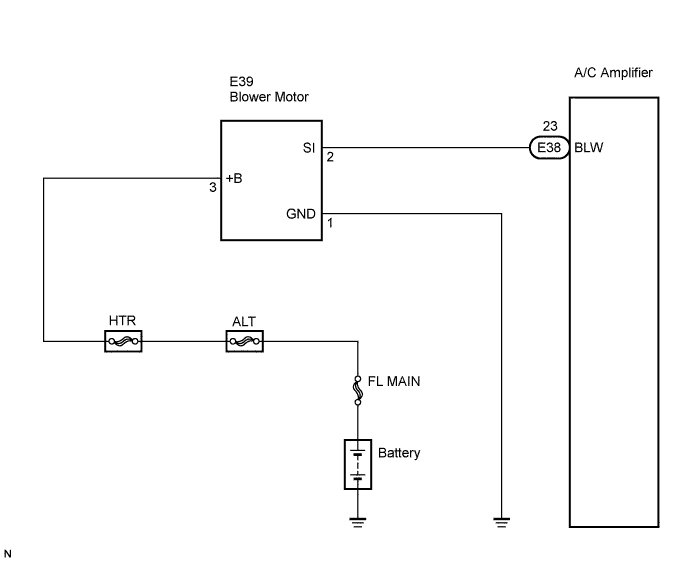
AIR CONDITIONING SYSTEM > Blower Motor Circuit |
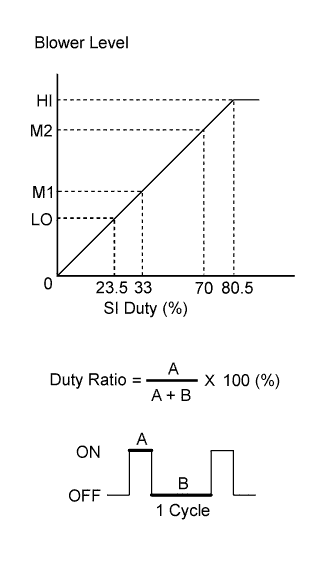
| 1.PERFORM ACTIVE TEST USING INTELLIGENT TESTER |
Connect the intelligent tester to the DLC3.
Turn the ignition switch to the ON position and turn the intelligent tester main switch on.
Select the item below in the Active Test and then check that the blower motor operates.
| Item | Test Details / Display (Range) | Diagnostic Note |
| Blower Motor (Blower Motor) | Blower motor / Min.: Level 01, Max.: Level 31 | - |
| Result | Proceed to |
| OK | A |
| NG (blower motor does not operate) | B |
| NG (blower motor operates but does not change speed) | C |
|
| ||||
|
| ||||
| A | ||
 | ||
| ||
| 2.INSPECT FUSIBLE LINK (HTR) |
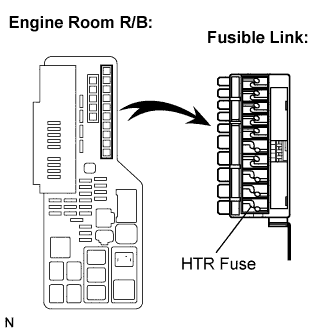 |
Remove the fusible link from the engine room R/B.
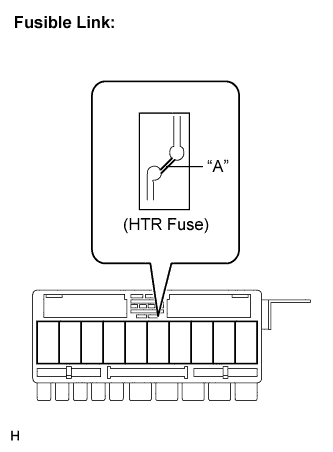 |
Check if the fusible link is melted.
Install the fusible link to the engine room R/B with the nut.
|
| ||||
| OK | |
 |
| 3.CHECK HARNESS AND CONNECTOR (BLOWER MOTOR - BODY GROUND) |
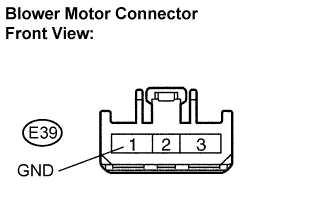 |
Disconnect the blower motor connector.
Measure the resistance according to the value(s) in the table below.
| Tester Connection | Condition | Specified Condition |
| E39-1 (GND) - Body ground | Always | Below 1 Ω |
|
| ||||
| OK | |
|
| 4.CHECK HARNESS AND CONNECTOR (BLOWER MOTOR - BATTERY) |
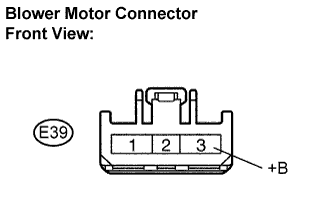 |
Disconnect the blower motor connector.
Measure the voltage according to the value(s) in the table below.
| Tester Connection | Condition | Specified Condition |
| E39-3 (+B) - Body ground | Always | 10 to 14 V |
|
| ||||
| OK | |
|
| 5.CHECK HARNESS AND CONNECTOR (A/C AMPLIFIER - BLOWER MOTOR) |
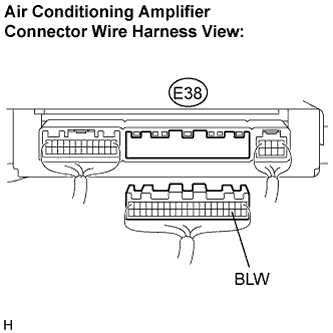 |
Disconnect the A/C amplifier connector.
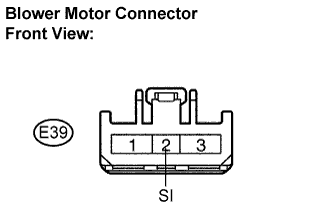 |
Measure the resistance according to the value(s) in the table below.
| Tester Connection (Symbols) | Condition | Specified Condition |
| E39-2 (SI) - E38-23 (BLW) | Always | Below 1 Ω |
| E39-2 (SI) - Body ground | Always | 10 kΩ or higher |
|
| ||||
| OK | |
|
| 6.INSPECT BLOWER MOTOR |
Reconnect the connector to the blower motor.
|
Measure the voltage on the A/C amplifier connector side according to the value(s) in the table below.
| Tester Connection | Condition | Specified Condition |
| E38-23 (BLW) - Body ground | Ignition switch: ON | 4.5 to 5.5 V |
|
| ||||
| OK | |
|
| 7.INSPECT AIR CONDITIONING AMPLIFIER |
Remove the A/C amplifier.
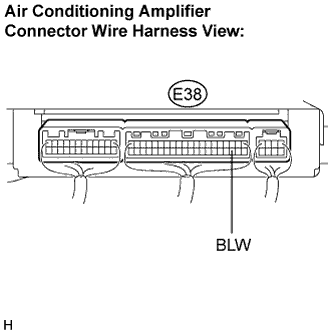 |
Reconnect the connector to the A/C amplifier.
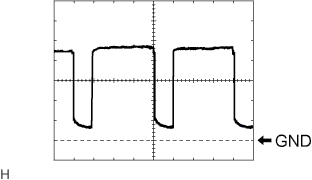 |
Turn the ignition switch to the ON position.
Turn the blower switch ON.
Measure the waveform between terminal E38-23 (BLW) of the A/C amplifier and body ground.
| Item | Contents |
| Tool setting | 1 V/DIV., 500 μs/DIV. |
| Vehicle condition | Ignition switch: ON Blower switch: ON |
|
| ||||
| OK | ||
| ||
| ||

