HOOD LOCK CONTROL CABLE ASSEMBLY > INSTALLATION |
| 1. INSTALL HOOD LOCK CONTROL CABLE ASSEMBLY (for LHD) |
Pass the hood lock control cable assembly into the engine compartment.
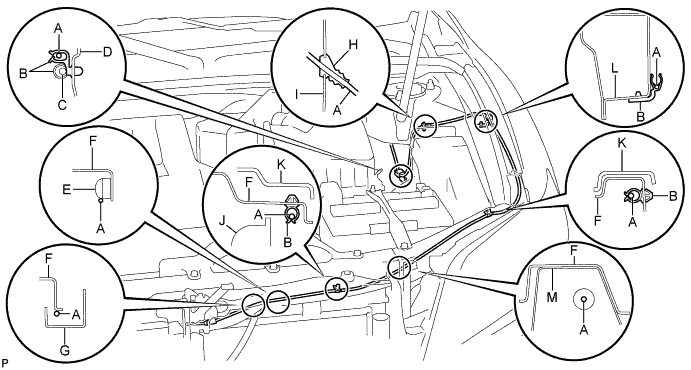
| Area | Part Name | Area | Part Name |
| A | Hood lock control cable | H | Grommet |
| B | Clamp | I | Side member outer |
| C | Wire harness | J | Radiator |
| D | Pillar | K | Radiator support cover (for 2GR-FE) |
| E | Nut | L | Front fender apron |
| F | Radiator support upper | M | Brace |
| G | Hood lock protector | - | - |
Pass the cable through the upper radiator support.
Connect the clamps as shown in the illustration.
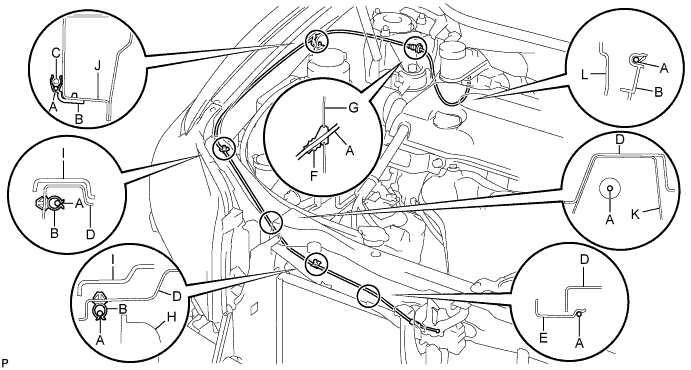
| 2. INSTALL HOOD LOCK CONTROL CABLE ASSEMBLY (for RHD) |
Pass the hood lock control cable assembly into the engine compartment.

| Area | Part Name | Area | Part Name |
| A | Hood lock control cable | G | Side member outer |
| B | Clamp | H | Radiator |
| C | Washer hose | I | Radiator support cover (for 2GR-FE) |
| D | Radiator support upper | J | Front fender apron |
| E | Hood lock protector | K | Brace |
| F | Grommet | L | Pillar |
Pass the cable through the upper radiator support.
Connect the clamps as shown in the illustration.
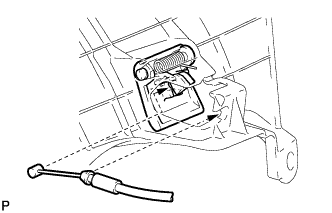
| 3. INSTALL HOOD LOCK CONTROL LEVER SUB-ASSEMBLY (for LHD) |
![]() |
Install the hood lock control lever and connect the hood lock control cable.
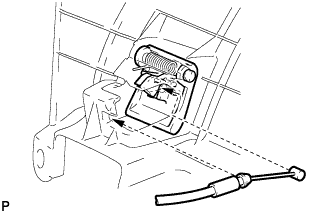
| 4. INSTALL HOOD LOCK CONTROL LEVER SUB-ASSEMBLY (for RHD) |
![]() |
Install the hood lock control lever and connect the hood lock control cable.
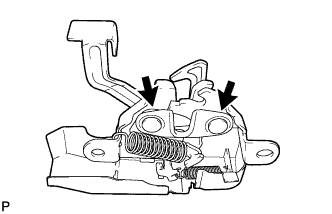
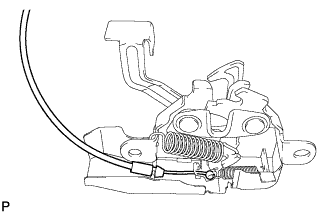
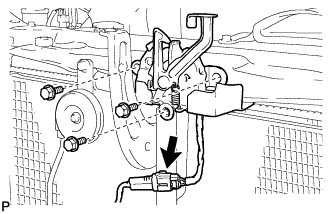
| 5. INSTALL HOOD LOCK ASSEMBLY |
![]() |
Apply MP grease to the sliding areas of the lock.
![]() |
Connect the hood lock control cable.
![]() |
Install the hood lock assembly with the 3 bolts.
Connect the connector.
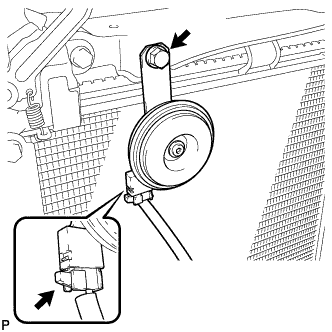
| 6. INSTALL HIGH PITCHED HORN ASSEMBLY |
![]() |
Install the high pitched horn assembly with the bolt.
Connect the connector.
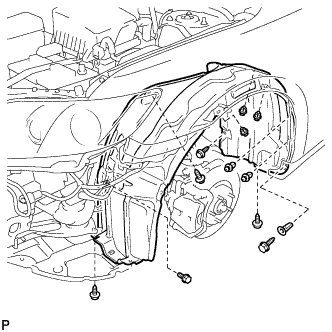
| 7. INSTALL FRONT FENDER LINER (w/o Front Fender Mudguard) |
![]() |
Install the front fender liner with the grommet and 5 screws.
Install the bolt and 5 clips.
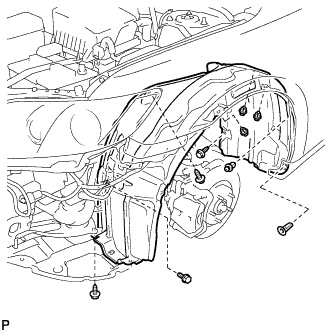
| 8. INSTALL FRONT FENDER LINER (w/ Front Fender Mudguard) |
![]() |
Install the front fender liner with the grommet and 3 screws.
Install the bolt and 4 clips.
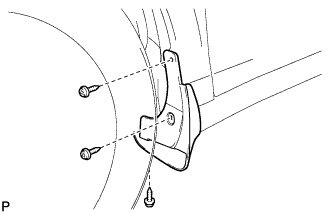
| 9. INSTALL FRONT FENDER MUDGUARD SUB-ASSEMBLY (w/ Front Fender Mudguard) |
![]() |
Install the front fender mudguard sub-assembly with the 3 screws.
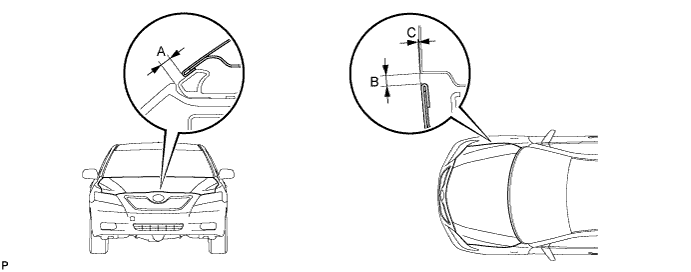
| 10. INSPECT HOOD SUB-ASSEMBLY |
Check that the clearance measurements of areas A through C are within each standard range.

| Area | Measurement |
| A | 2.3 to 5.3 mm (0.091 to 0.209 in.) |
| B | 2.0 to 5.0 mm (0.079 to 0.197 in.) |
| C | -1.4 to 1.6 mm (-0.055 to 0.063 in.) |
| 11. ADJUST HOOD SUB-ASSEMBLY |
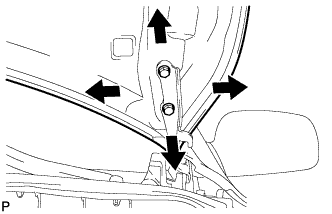
Horizontally and vertically adjust the hood.
![]() |
Loosen the 4 hinge bolts of the hood.
Adjust the clearance between the hood and front fender by moving the hood.
Tighten the 4 hinge bolts after the adjustment.
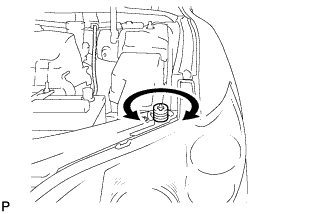
Adjust the height of the front end of the hood using the cushion rubber.
![]() |
Adjust the cushion rubber so that the height of the hood and fender are aligned.
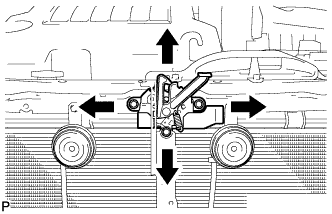
Adjust the hood lock.
![]() |
Loosen the 3 bolts.
Tighten the bolts after the adjustment.
Check that the striker can engage with the hood lock smoothly.
| 12. INSTALL FRONT BUMPER ASSEMBLY |
w/ Headlight Cleaner System:
![]() |
Connect the headlight cleaner washer hose.
Connect each connector.
w/ TOYOTA Parking Assist-sensor System:
Connect the No. 1 ultrasonic sensor connector and engage the clamp.
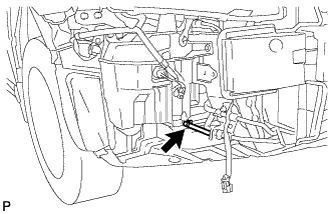
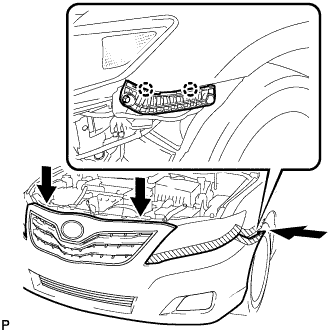
![]() |
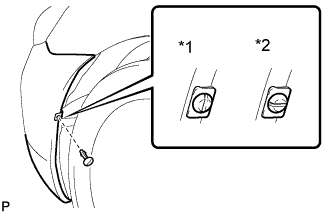
Engage the 2 claws.
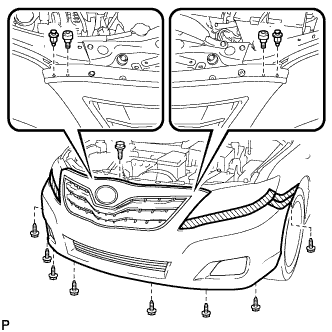
![]() |
Install the front bumper assembly with the 8 screws, 2 clips, 2 radiator grille protectors and bolt.
![]() |
Install the pin hold clip.
![]() |
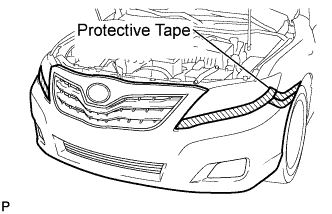
Remove the applied protective tape on the front bumper assembly.
| 13. INSTALL COOL AIR INTAKE DUCT SEAL (for 2GR-FE) |
![]() |
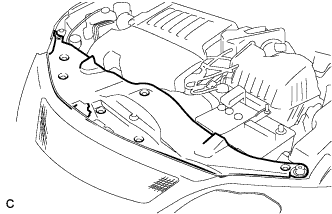
Install the intake duct seal with the 7 clips.
| 14. INSTALL FRONT WHEEL |
| 15. VEHICLE PREPARATION FOR FOG LIGHT AIM |
Prepare the vehicle:
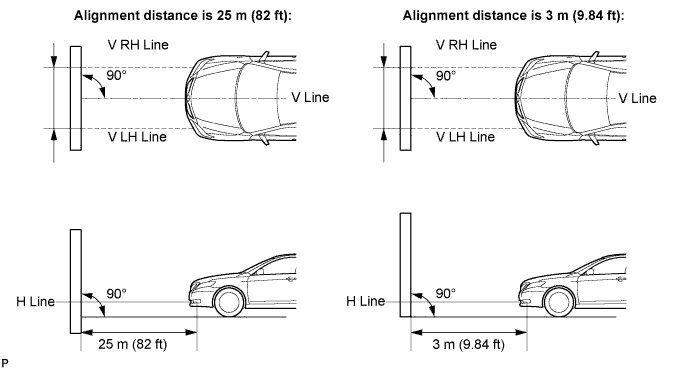
| 16. PREPARATION FOR FOG LIGHT AIMING |
![]() |
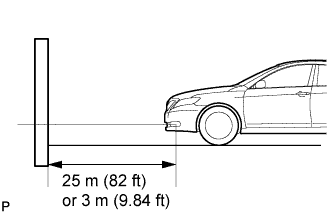
Prepare the vehicle:
Prepare a piece of thick white paper (approximately 2 m (6.6 ft) (height) x 4 m (13.1 ft) (width)) to use as a screen.
Draw a vertical line down the center of screen (V line).
Set the screen as shown in the illustration.

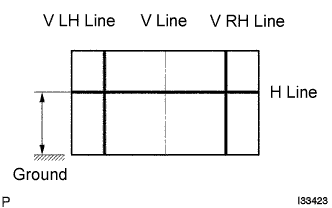
![]() |
Draw base lines (H, V LH, and V RH lines) on the screen as shown in the illustration.
H Line (Fog light height):
Draw a horizontal line across the screen so that it passes through the center marks. The H line should be at the same height as the fog light bulb center marks of the low-beam fog lights.
V LH Line, V RH Line (Center mark position of left-hand (LH) and right-hand (RH) fog lights):
Draw two vertical lines so that they intersect the H line at each center mark.
| 17. FOG LIGHT AIMING INSPECTION |
Cover the fog light or disconnect the connector of the fog light on the opposite side to prevent light from the fog light that is not being inspected from affecting the fog light aiming inspection.
Start the engine.
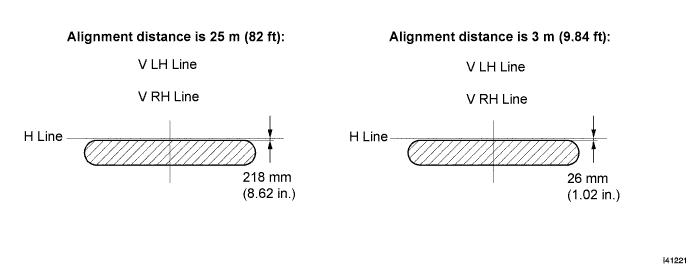
Turn on the fog light and check if the cut off line falls within the specified area in the following illustration.

| 18. FOG LIGHT AIMING ADJUSTMENT |
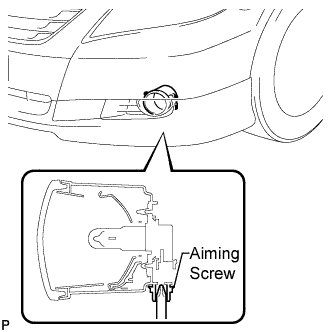
![]() |
Adjust the aim vertically:
Adjust the aim of each fog light to the specified range by turning each aiming screw with a screwdriver.