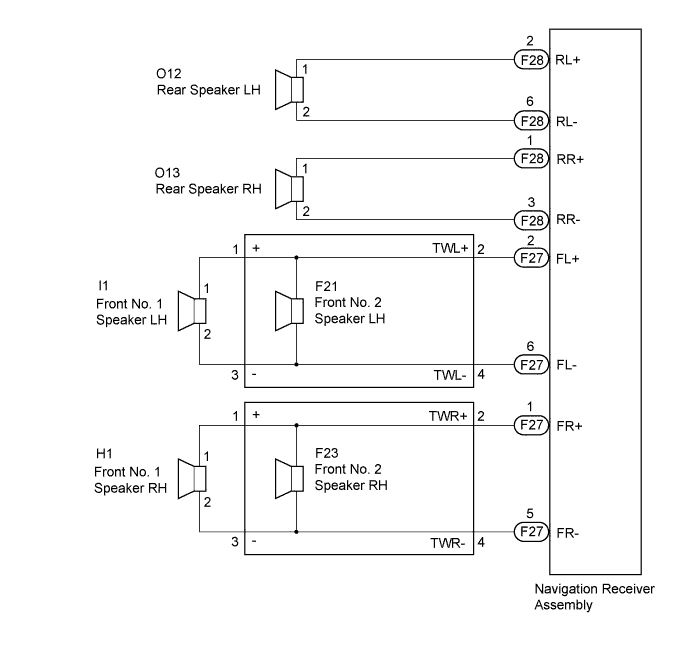
NAVIGATION SYSTEM > Speaker Circuit |
| 1.CHECK HARNESS AND CONNECTOR |
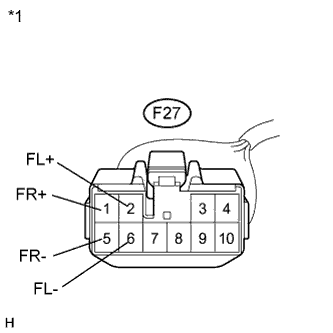 |
Disconnect the navigation receiver assembly connector.
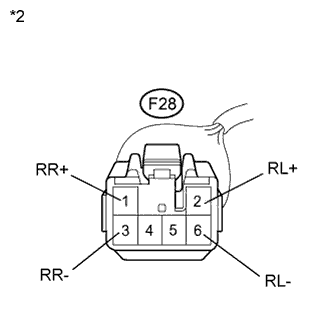 |
Disconnect the navigation receiver assembly connector.
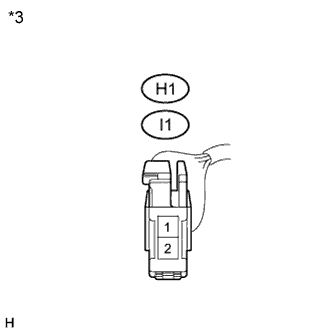 |
Disconnect the front No. 1 speaker connectors.
 |
Disconnect the front No. 2 speaker connectors.
 |
Disconnect the rear speaker connectors.
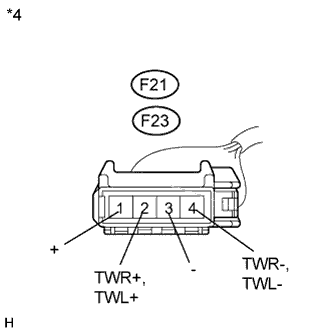
Measure the resistance between each of the front No. 2 speakers and the navigation receiver assembly to check for an open circuit in the wire harness.
| Tester Connection | Condition | Specified Condition |
| F27-2 (FL+) - F21-2 (TWL+) | Always | Below 1 Ω |
| F27-6 (FL-) - F21-4 (TWL-) | Always | Below 1 Ω |
| F27-1 (FR+) - F23-2 (TWR+) | Always | Below 1 Ω |
| F27-5 (FR-) - F23-4 (TWR-) | Always | Below 1 Ω |
Measure the resistance between each of the front No. 2 speakers and the front No. 1 speakers to check for an open circuit in the wire harness.
| Tester Connection | Condition | Specified Condition |
| F21-1 (+) - I1-1 | Always | Below 1 Ω |
| F21-3 (-) - I1-2 | Always | Below 1 Ω |
| F23-1 (+) - H1-1 | Always | Below 1 Ω |
| F23-3 (-) - H1-2 | Always | Below 1 Ω |
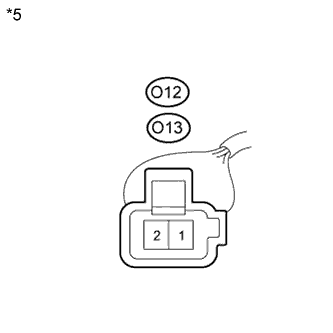
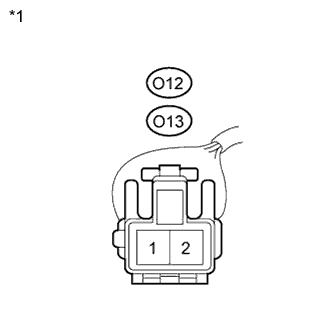
Measure the resistance between each of the rear speakers and the navigation receiver assembly to check for an open circuit in the wire harness.
| Tester Connection | Condition | Specified Condition |
| F28-2 (RL+) - O12-1 | Always | Below 1 Ω |
| F28-6 (RL-) - O12-2 | Always | Below 1 Ω |
| F28-1 (RR+) - O13-1 | Always | Below 1 Ω |
| F28-3 (RR-) - O13-2 | Always | Below 1 Ω |
Measure the resistance between each speaker and body ground to check for a short circuit in the wire harness.
| Tester Connection | Condition | Specified Condition |
| F21-1 (+) - Body ground | Always | 10 kΩ or higher |
| F21-3 (-) - Body ground | Always | 10 kΩ or higher |
| F21-2 (TWL+) - Body ground | Always | 10 kΩ or higher |
| F21-4 (TWL-) - Body ground | Always | 10 kΩ or higher |
| F23-1 (+) - Body ground | Always | 10 kΩ or higher |
| F23-3 (-) - Body ground | Always | 10 kΩ or higher |
| F23-2 (TWR+) - Body ground | Always | 10 kΩ or higher |
| F23-4 (TWR-) - Body ground | Always | 10 kΩ or higher |
| O12-1 - Body ground | Always | 10 kΩ or higher |
| O12-2 - Body ground | Always | 10 kΩ or higher |
| O13-1 - Body ground | Always | 10 kΩ or higher |
| O13-2 - Body ground | Always | 10 kΩ or higher |
| *1 | Front view of wire harness connector (to Navigation Receiver Assembly) |
| *2 | Front view of wire harness connector (to Navigation Receiver Assembly) |
| *3 | Front view of wire harness connector (to Front No. 1 Speaker) |
| *4 | Front view of wire harness connector (to Front No. 2 Speaker) |
| *5 | Front view of wire harness connector (to Rear Speaker) |
|
| ||||
| OK | |
 |
| 2.INSPECT FRONT NO. 1 SPEAKER |
 |
Resistance check
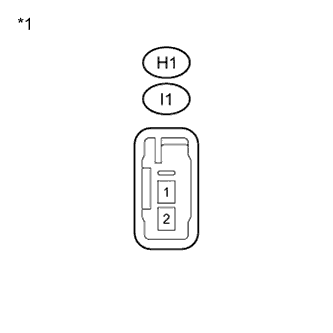
Measure the resistance between the terminals of the speaker.
| Tester Connection | Condition | Specified Condition |
| I1-1 - I1-2 | Always | 3.4 to 4.6 Ω |
| H1-1 - H1-2 | Always | 3.4 to 4.6 Ω |
| *1 | Component without harness connected (Front No. 1 Speaker) |
|
| ||||
| OK | |
|
| 3.INSPECT FRONT NO. 2 SPEAKER |
 |
Resistance check
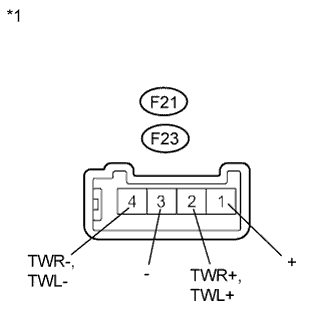
Measure the resistance between the terminals of the speaker.
| Tester Connection | Condition | Specified Condition |
| F21-1 (+) - F21-2 (TWL+) | Always | Below 1 Ω |
| F21-3 (-) - F21-4 (TWL-) | Always | Below 1 Ω |
| F23-1 (+) - F23-2 (TWR+) | Always | Below 1 Ω |
| F23-3 (-) - F23-4 (TWR-) | Always | Below 1 Ω |
| *1 | Component without harness connected (Front No. 2 Speaker) |
Check that the malfunction disappears when another speaker in good condition is installed.
|
| ||||
| OK | ||
 | ||
| ||
| 4.INSPECT REAR SPEAKER |
 |
Resistance check
Measure the resistance between the terminals of the speaker.
| Tester Connection | Condition | Specified Condition |
| O12-1 - O12-2 | Always | 3.2 to 4.8 Ω |
| O13-1 - O13-2 | Always | 3.2 to 4.8 Ω |
| *1 | Component without harness connected (Rear Speaker) |
|
| ||||
| OK | ||
| ||
| ||

