Home › ENGINE ยท 2AZ-FE › ENGINE CONTROL SYSTEM › CRANKSHAFT POSITION SENSOR

CRANKSHAFT POSITION SENSOR > REMOVAL

for Preparation Click here


1. DISCONNECT CABLE FROM NEGATIVE BATTERY TERMINAL


2. REMOVE FRONT WHEEL RH


3. REMOVE FRONT FENDER APRON RH


4. REMOVE V-RIBBED BELT


    A114351E03
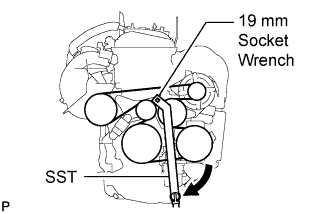
  1. Using SST and 19 mm socket wrench, loosen the V-ribbed belt tensioner arm clockwise, then remove the V-ribbed belt.

    SST
    09216-42010  

    NOTICE:
    1. Be sure to connect SST and the tools so that they are in line during use.
    2. When retracting the tensioner, turn it clockwise slowly for 3 seconds or more. Do not apply force rapidly.
    3. After the tensioner is fully retracted, do not apply force any more than necessary.


5. REMOVE GENERATOR ASSEMBLY


    A135170
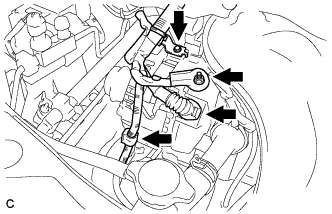
  1. Disconnect the generator connector.

  1. Remove the nut and disconnect the wire harness from terminal B.

  1. Remove the bolt and wire harness clamp bracket.

  1. Remove the wire harness clamps.


    A133567
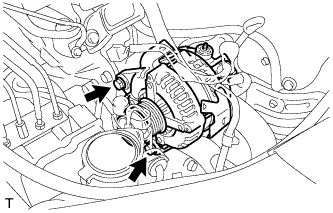
  1. Remove the 2 bolts and generator assembly.


6. REMOVE CRANKSHAFT POSITION SENSOR


    A097797
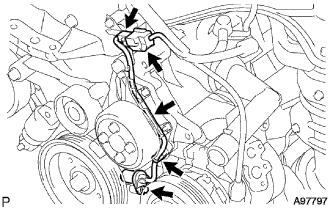
  1. Disconnect the crankshaft position sensor connector.

  1. Remove the connector clamp and wire harness clamp.

  1. Remove the wire harness clamp bracket from the wire harness.

  1. Remove the bolt, and then remove the crankshaft position sensor.