 |
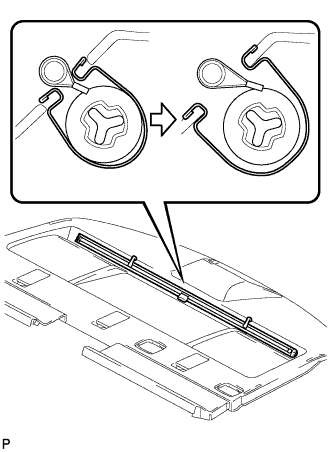
Install the rear window shade assembly as shown in the illustration.
REAR SUNSHADE ASSEMBLY > INSTALLATION |
| 1. INSTALL REAR WINDOW SHADE ASSEMBLY |
|
Install the rear window shade assembly as shown in the illustration.
| 2. INSTALL CURTAIN RAIL END CAP LH |
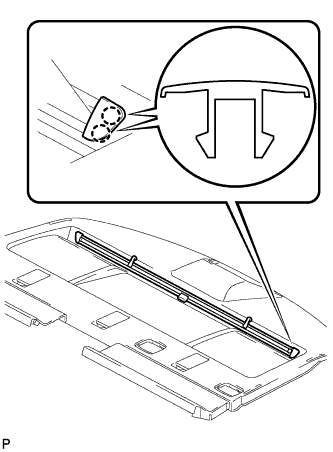 |
Engage the 2 claws and install the curtain rail end cap LH.
| 3. INSTALL CURTAIN RAIL END CAP RH |
| 4. INSTALL PACKAGE TRAY TRIM PANEL ASSEMBLY |
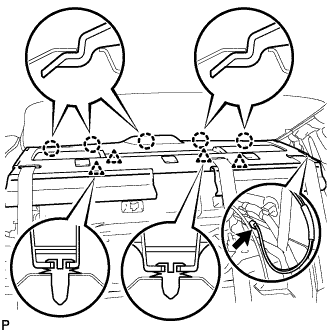 |
Pass the 3 rear seat belt floor anchors through the package tray trim panel assembly.
Engage the 4 clips and 5 claws and install the package tray trim panel assembly.
Connect the connector.
| 5. INSTALL REAR SEAT SHOULDER BELT COVER |
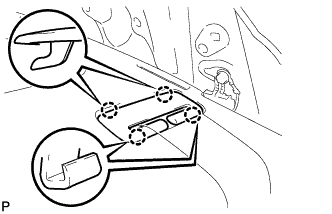 |
Engage the 4 claws and install the rear seat shoulder belt cover.
| 6. INSTALL REAR SEAT SHOULDER BELT HOLE COVER |
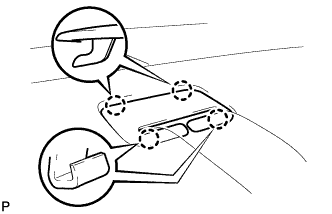 |
Engage the 4 claws and install the rear seat shoulder belt hole cover.
| 7. CONNECT REAR SEAT OUTER BELT ASSEMBLY (for LH Side) |
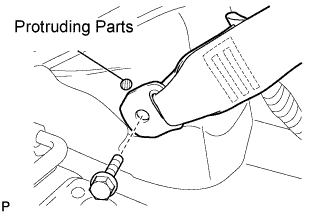 |
Install the floor end of the rear seat outer belt assembly with the bolt.
Check if the ELR locks.
With the belt assembly installed, check that the belt locks when it is pulled out quickly.
| 8. CONNECT REAR SEAT OUTER BELT ASSEMBLY (for RH Side) |
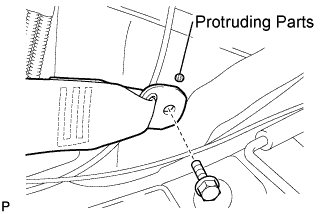 |
Install the floor end of the rear seat outer belt assembly with the bolt.
Check if the ELR locks.
With the belt assembly installed, check that the belt locks when it is pulled out quickly.
| 9. INSTALL ROOF SIDE INNER GARNISH LH |
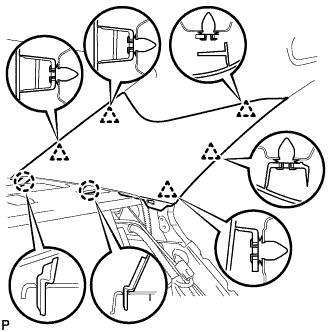 |
Engage the 5 clips and 2 claws, then install the roof side inner garnish LH.
| 10. INSTALL ROOF SIDE INNER GARNISH RH |
| 11. CONNECT REAR SEAT INNER WITH CENTER BELT ASSEMBLY LH |
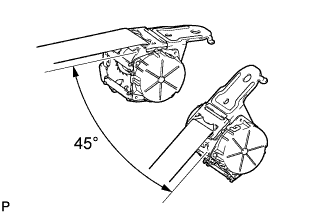 |
Check the degree of the tilt when the ELR begins to lock.
Check that the belt does not lock at less than 15 degrees of tilt in any direction but locks at over 45 degrees of tilt while gently pulling the belt.
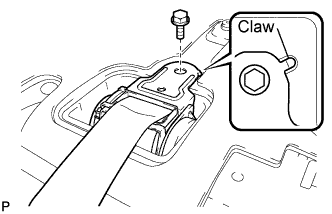 |
Align the claw with the seat belt positioning hole and install the rear seat inner with center belt assembly LH with the bolt.
| 12. INSTALL CHILD RESTRAINT SEAT ANCHOR BRACKET SUB-ASSEMBLY LH |
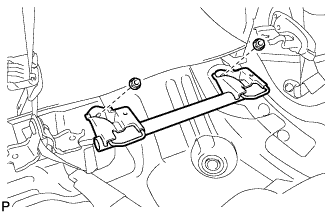 |
Install the child restraint seat anchor bracket sub-assembly with the 2 nuts.
| 13. INSTALL RECLINING REMOTE CONTROL LEVER SUB-ASSEMBLY LH |
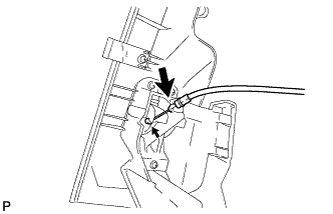 |
Install the rear seat reclining control cable.
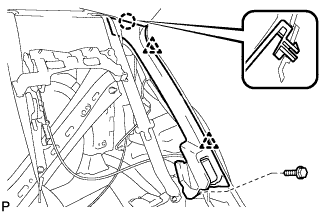 |
Engage the 2 clips and claw and then install the reclining remote control lever sub-assembly.
Install the bolt.
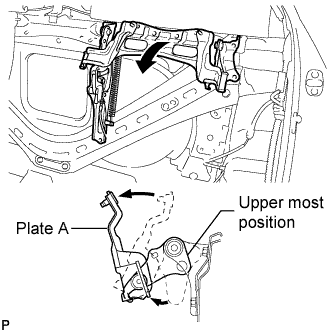 |
Adjust the control lever to set the rear reclining adjuster assembly to its upper most position.
Pull plate A toward the front of the vehicle to lock the plate.
| 14. INSTALL RECLINING REMOTE CONTROL LEVER SUB-ASSEMBLY RH |
| 15. CONNECT REAR DOOR OPENING TRIM WEATHERSTRIP LH |
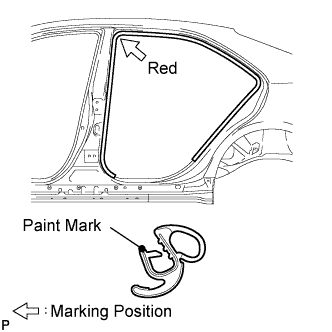 |
Install the rear door opening trim weatherstrip LH as shown in the illustration.
| 16. INSTALL REAR DOOR SCUFF PLATE LH |
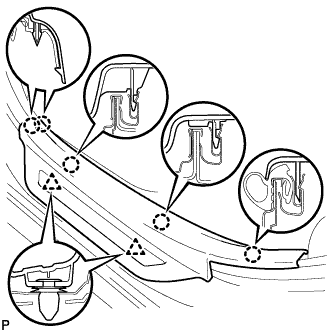 |
Engage the 5 claws and 2 clips, then install the rear door scuff plate LH.
| 17. CONNECT REAR DOOR OPENING TRIM WEATHERSTRIP RH |
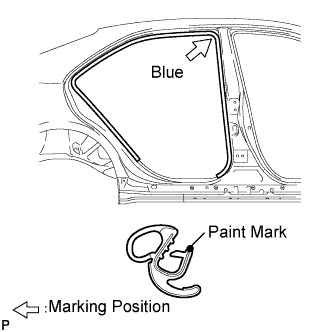 |
Install the rear door opening trim weatherstrip RH as shown in the illustration.
| 18. INSTALL REAR DOOR SCUFF PLATE RH |
| 19. INSTALL CENTER SEATBACK ASSEMBLY |
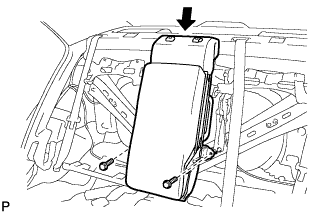 |
Install the center seatback assembly with the 2 bolts.
| 20. INSTALL SEPARATE TYPE REAR SEATBACK ASSEMBLY LH |
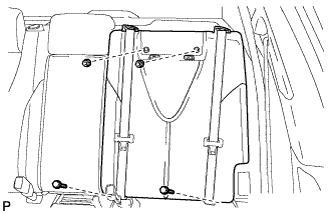 |
Install the separate type rear seatback assembly LH with the 2bolts and 2 nuts.
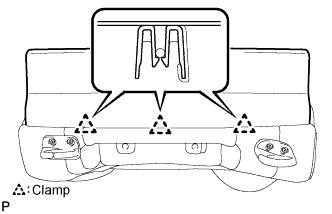 |
Engage the 3 clamps and install the cover.
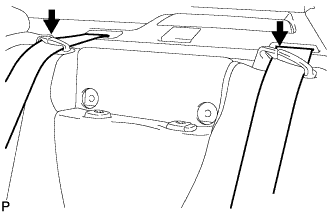 |
Install the 2 rear seat belts.
| 21. INSTALL SEPARATE TYPE REAR SEATBACK ASSEMBLY RH |
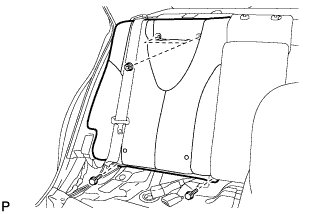 |
Install the separate type rear seatback assembly RH with the 2 bolts and 2 nuts.
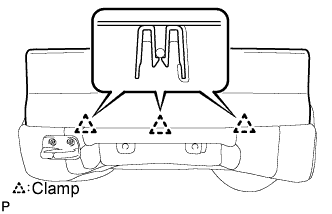 |
Engage the 3 clamps and install the cover.
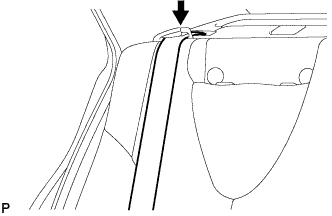 |
Install the rear seat belt.
| 22. INSTALL REAR SEATBACK COVER |
| 23. INSTALL REAR CENTER SEAT HEADREST ASSEMBLY |
| 24. INSTALL REAR SEAT HEADREST ASSEMBLY |
| 25. INSTALL REAR SEAT CUSHION ASSEMBLY |
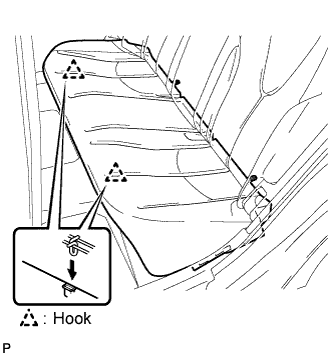 |
Attach the front hooks of the bench type rear seat cushion assembly to the vehicle body.
Confirm that the seat cushion is firmly installed.