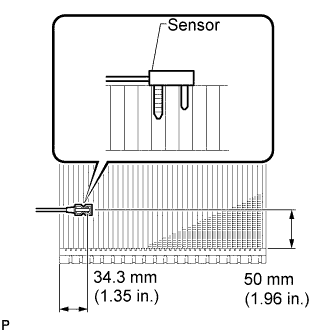
If using a new evaporator:
Install the No. 1 cooler thermistor to the evaporator as shown in the illustration.
 |
AIR CONDITIONING UNIT > REASSEMBLY |
| 1. INSTALL NO. 1 COOLER THERMISTOR |
If using a new evaporator:
|
Install the No. 1 cooler thermistor to the evaporator as shown in the illustration.
If reusing the evaporator:
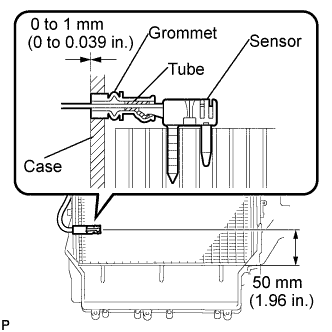 |
Install the No. 1 cooler thermistor to the evaporator as shown in the illustration.
| 2. INSTALL NO. 1 COOLER EVAPORATOR SUB-ASSEMBLY |
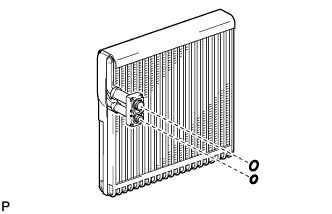 |
Sufficiently apply compressor oil to 2 new O-rings and the fitting surfaces. Install the 2 O-rings to the No. 1 cooler evaporator sub-assembly.
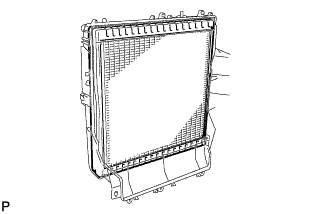 |
Install the No. 1 cooler evaporator sub-assembly.
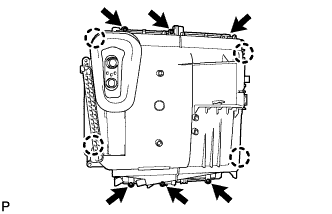 |
Engage the 4 claws and install the plate cover with the 6 screws.
| 3. INSTALL COOLER EXPANSION VALVE |
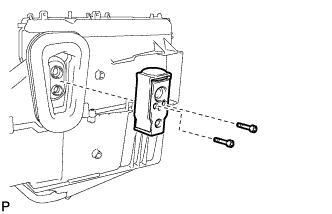 |
Using a 4 mm hexagon wrench, install the cooler expansion valve with the 2 hexagon bolts.
| 4. INSTALL HEATER RADIATOR UNIT SUB-ASSEMBLY |
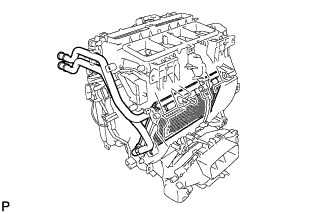 |
Install the heater radiator unit sub-assembly to the air conditioner radiator assembly.
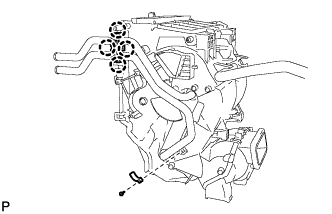 |
Install the clamp with the screw.
Engage the 4 claws and install the heater clamp.
| 5. INSTALL AIR MIX CONTROL SERVO MOTOR |
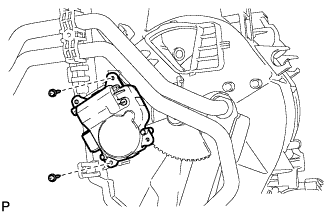 |
Install the air mix control servo motor with the 2 screws.
| 6. INSTALL AIR OUTLET CONTROL SERVO MOTOR |
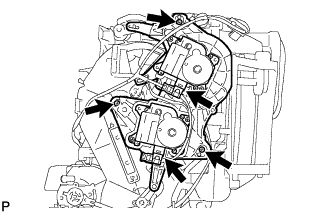 |
Install the air outlet control servo motor with the 3 screws.
Connect the 2 connectors and install the air conditioner harness.
| 7. INSTALL DRAIN COOLER HOSE |
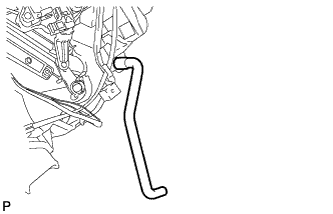 |
Install the drain cooler hose to the air conditioner radiator assembly.
| 8. INSTALL NO. 6 HEATER TO REGISTER DUCT ASSEMBLY |
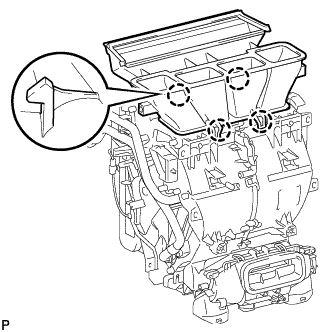 |
Engage the 4 claws to install the No. 6 heater to register duct assembly.
| 9. INSTALL BLOWER ASSEMBLY |
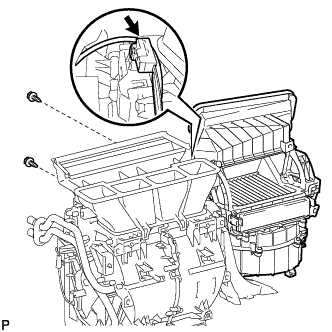 |
Install the blower assembly with the 2 screws.
Connect the connector.
| 10. INSTALL NO. 2 AIR DUCT SUB-ASSEMBLY |
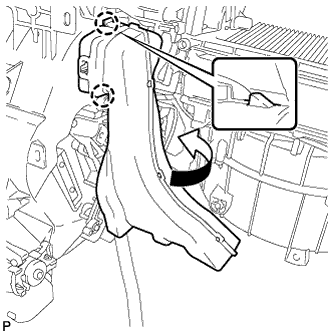 |
Engage the 2 claws to install the No. 2 air duct sub-assembly.