 |
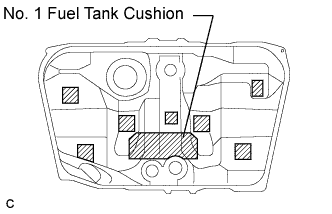
Install a new No. 1 fuel tank cushion to the fuel tank.
FUEL TANK > INSTALLATION |
| 1. INSTALL NO. 1 FUEL TANK CUSHION |
|
Install a new No. 1 fuel tank cushion to the fuel tank.
| 2. INSTALL NO. 2 FUEL TANK CUSHION |
Install 7 new No. 2 fuel tank cushions to the fuel tank.
| 3. INSTALL NO. 4 FUEL TUBE CLAMP |
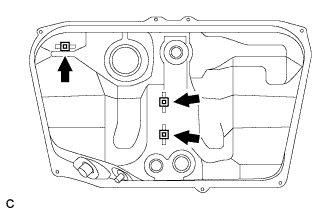 |
Install the 3 clamps.
| 4. INSTALL FUEL MAIN TUBE SUPPORT |
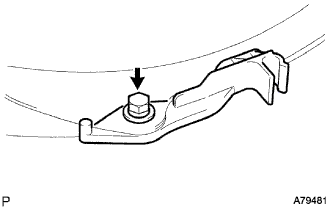 |
Install the fuel main tube support with the bolt.
| 5. INSTALL FUEL PUMP TUBE SUB-ASSEMBLY |
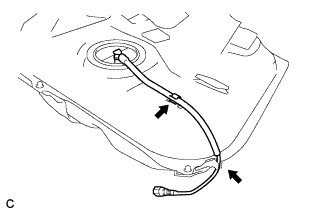 |
Install the fuel pump tube to the fuel main tube support and the clamp.
| 6. INSTALL FUEL CUT OFF WITH TUBE VALVE ASSEMBLY |
Install 2 new gaskets to the fuel tank.
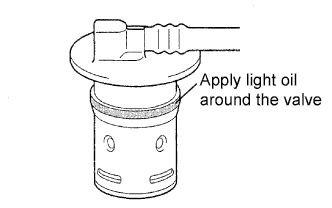 |
Apply light oil around 2 new fuel cut off valves as shown in the illustration, and carefully insert them into the tank.
Be careful not to drop the gasket into the tank.
Check that the fuel cut off valve is fully inserted.
| 7. INSTALL NO. 3 FUEL TANK PROTECTOR |
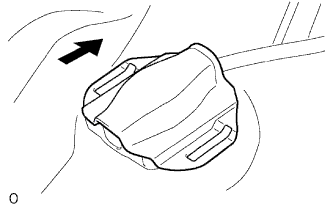 |
Install the No. 3 fuel tank protector by sliding it as shown in the illustration.
| 8. INSTALL NO. 2 FUEL TANK PROTECTOR |
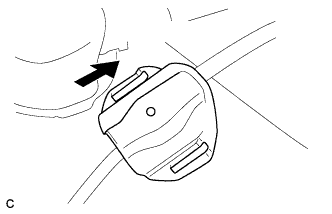 |
Install the No. 2 fuel tank protector by sliding it as shown in the illustration.
| 9. INSTALL FUEL TANK ASSEMBLY |
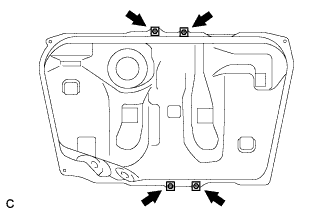 |
Install the 4 clip nuts.
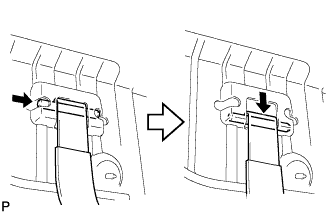 |
Install the 2 fuel tank bands with the 2 pins.
Set the fuel tank assembly onto the transmission jack.
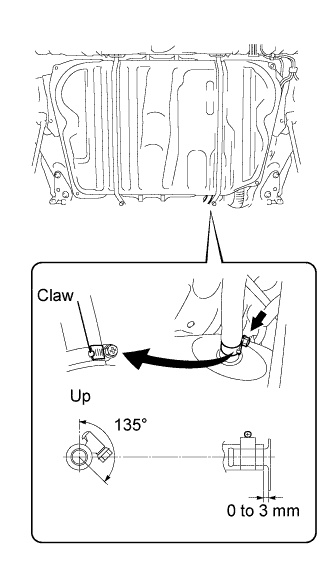 |
Raise the transmission jack so that the fuel tank vent hose can be connected as shown in the illustration.
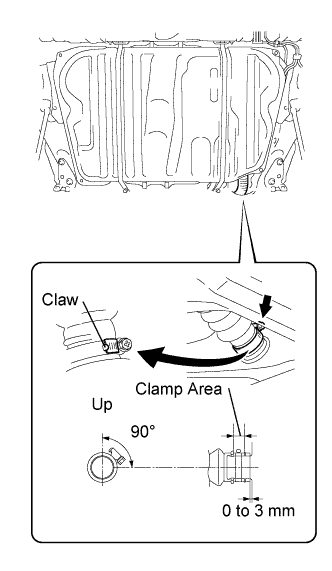 |
Connect the fuel tank inlet pipe with the fuel filter pipe clamp as shown in the illustration.
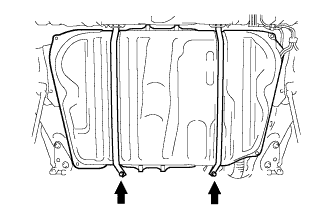 |
Tighten the 2 set bolts of the fuel tank bands.
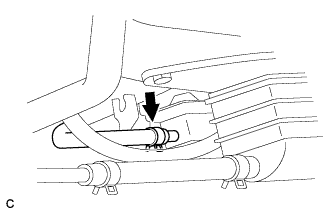 |
Connect the fuel emission hose to the charcoal canister.
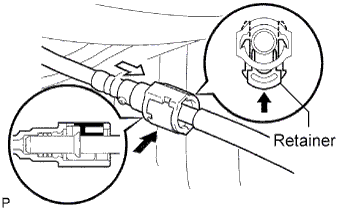 |
Connect the fuel pump tube.
Push the fuel connector into the pipe and push up the retainer so that the claws engage.
| 10. INSTALL FUEL TANK PROTECTOR LOWER CENTER |
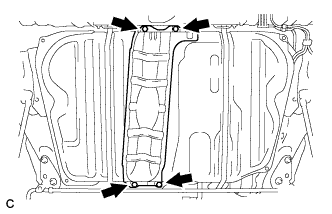 |
Install the 4 bolts and fuel tank protector.
| 11. INSTALL REAR STABILIZER BAR NO. 1 BRACKET |
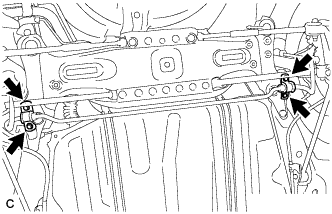 |
Install the 2 rear stabilizer bar No. 1 brackets with the 4 bolts.
| 12. INSTALL NO. 3 PARKING BRAKE CABLE ASSEMBLY |
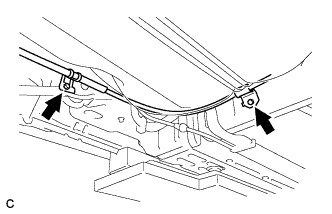 |
Install the No. 3 parking brake cable assembly with the bolt and nut.
| 13. INSTALL NO. 2 PARKING BRAKE CABLE ASSEMBLY |
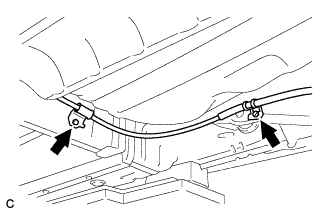 |
Install the No. 2 parking brake cable assembly with the bolt and nut.
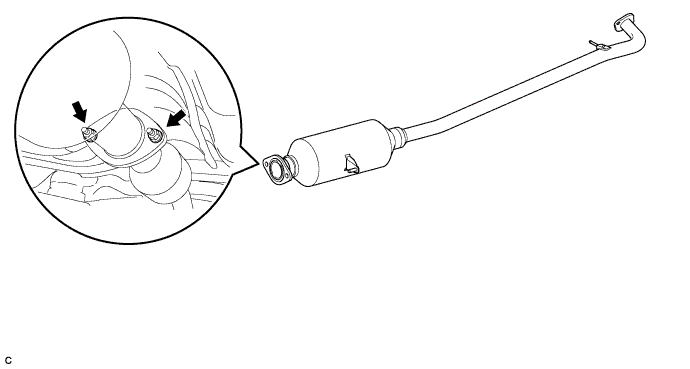
| 14. INSTALL CENTER EXHAUST PIPE ASSEMBLY |
Install a new gasket onto the front exhaust pipe.
Install the center exhaust pipe assembly with the 2 bolts and 2 nuts.
| 15. INSTALL FUEL SUCTION TUBE ASSEMBLY WITH PUMP AND GAUGE |
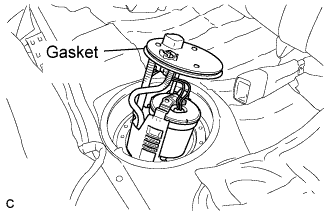 |
Install a new gasket to the fuel suction tube.
Install the fuel suction tube.
| 16. INSTALL FUEL TANK VENT TUBE SET PLATE |
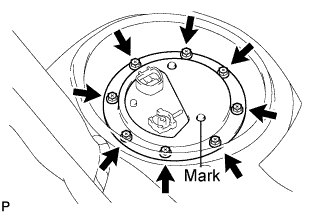 |
Align the mark of the set plate with the fuel suction tube.
Install the set plate with the 8 bolts.
| 17. CONNECT FUEL PUMP TUBE SUB-ASSEMBLY |
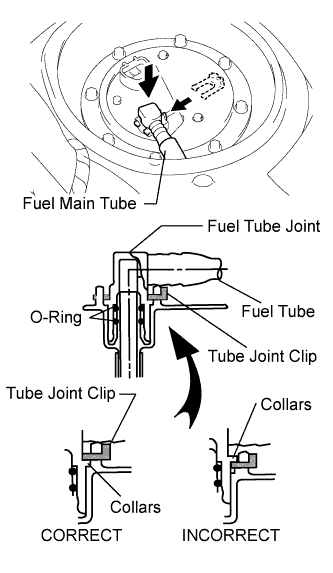 |
Install the fuel pump tube with the tube joint clip.
| 18. ADD FUEL |
| 19. CONNECT CABLE TO NEGATIVE BATTERY TERMINAL |
| 20. CHECK FOR FUEL LEAKS |
| 21. CHECK FOR EXHAUST GAS LEAKS |
| 22. INSTALL REAR FLOOR SERVICE HOLE COVER |
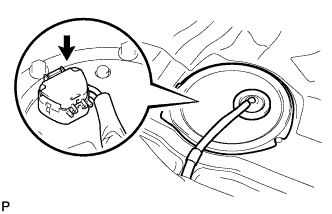 |
Connect the fuel pump connector.
Install the rear floor service hole cover with new butyl tape.
| 23. INSTALL REAR SEAT CUSHION ASSEMBLY (for Fold Down Seat Type) |
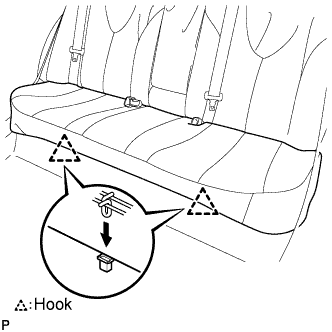 |
Attach the front hooks of the bench type rear seat cushion assembly to the vehicle body.
Confirm that the seat cushion is firmly installed.
| 24. INSTALL REAR SEAT CUSHION ASSEMBLY (for Reclining Seat Type) |
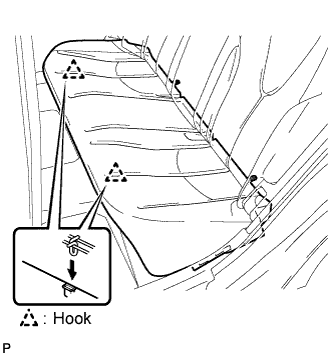 |
Attach the front hooks of the bench type rear seat cushion assembly to the vehicle body.
Confirm that the seat cushion is firmly installed.