Home › BODY › SEAT › REAR SEAT ASSEMBLY (for Reclining Seat Type)

REAR SEAT ASSEMBLY (for Reclining Seat Type) > REMOVAL

for Preparation Click here


1. REMOVE REAR SEAT CUSHION ASSEMBLY


    B139074E01
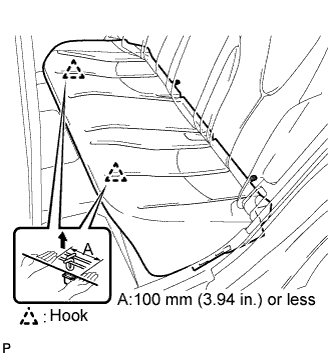
  1. Detach the 2 front hooks of the seat cushion from the vehicle body.

    NOTICE:
    Follow the instructions below carefully as the cushion frame can be deformed easily.


    1. Choose a hook to detach first. Place your hands near the hook as shown in the illustration. Then lift the seat cushion to detach the hook.

    2. Repeat the step above for the other hook.
  1. Remove the seat cushion.


2. REMOVE REAR SEAT HEADREST ASSEMBLY
  1. Remove the 2 rear seat headrest assemblies.


3. REMOVE REAR CENTER SEAT HEADREST ASSEMBLY
  1. Remove the rear center seat headrest assembly.


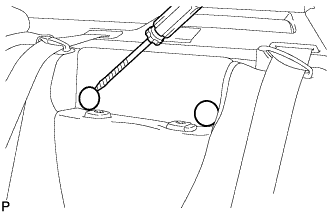
4. REMOVE REAR SEATBACK COVER


    B139075
  1. Using a screwdriver, detach the claws and remove the 2 rear seatback covers.

    NOTICE:
    1. Tape the screwdriver tip before use.
    2. Use the same procedures for the RH side and LH side.


5. REMOVE SEPARATE TYPE REAR SEATBACK ASSEMBLY LH


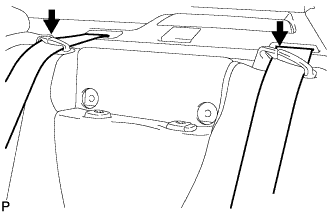
    B139076E01
  1. Separate the 2 rear seat belts.


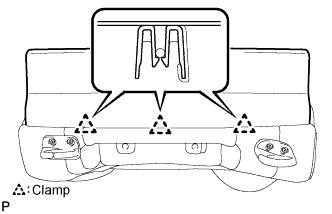
    B139081E01
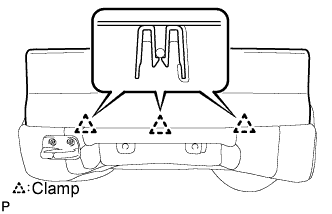
  1. Disengage the 3 clamps and then separate the cover.


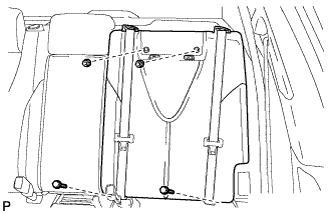
    B139077
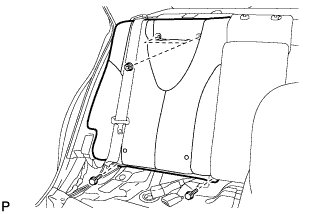
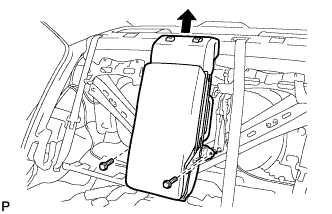
  1. Remove the 2 bolts and 2 nuts and separate type rear seatback assembly LH.


6. REMOVE SEPARATE TYPE REAR SEATBACK ASSEMBLY RH


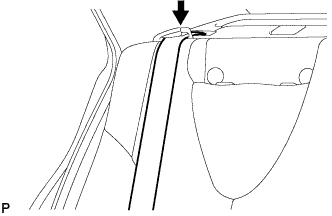
    B139078E01
  1. Separate the rear seat belt.


    B139082E01
  1. Disengage the 3 clamps and then separate the cover.


    B139079
  1. Remove the 2 bolts and 2 nuts and separate type rear seatback assembly RH.


7. REMOVE CENTER SEATBACK ASSEMBLY


    B139080
  1. Remove the 2 bolts and center seatback assembly.