 |
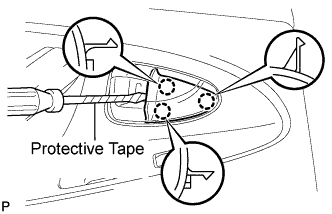
Using a screwdriver with the tip wrapped with protective tape, disengage the 3 claws and remove the rear door inside handle bezel plug.
REAR DOOR LOCK > REMOVAL |
| 1. REMOVE REAR DOOR INSIDE HANDLE BEZEL PLUG |
|
Using a screwdriver with the tip wrapped with protective tape, disengage the 3 claws and remove the rear door inside handle bezel plug.
| 2. REMOVE DOOR ASSIST GRIP COVER |
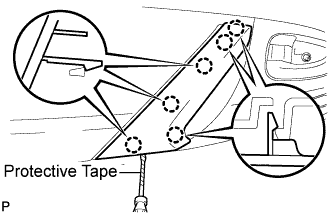 |
Using a screwdriver with the tip wrapped with protective tape, disengage the 6 claws and remove the door assist grip cover.
| 3. REMOVE REAR DOOR TRIM BOARD SUB-ASSEMBLY |
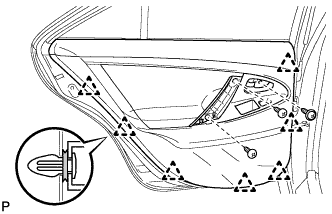 |
Remove the 3 screws.
Using a clip remover, disengage the 7 clips.
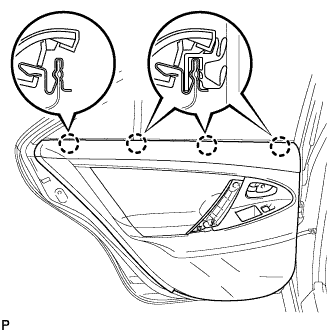 |
Raise the rear door trim board to disengage the 4 claws and remove the rear door trim board together with the rear door inner glass weatherstrip.
Disconnect the connector.
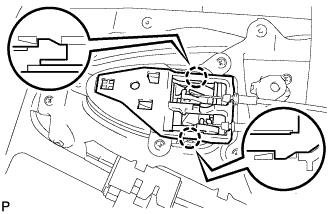 |
Disengage the 2 claws and disconnect the rear door inside handle sub-assembly.
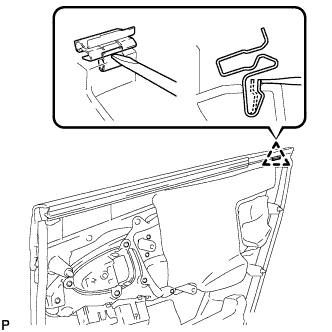 |
Disengage the clip as shown in the illustration and remove the No. 1 door scuff plate clamp from the rear door trim board.
| 4. REMOVE REAR DOOR SERVICE HOLE COVER |
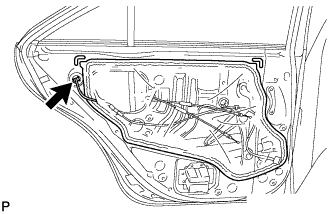 |
Disconnect the connector.
Remove the rear door service hole cover.
| 5. REMOVE REAR DOOR LOCK ASSEMBLY |
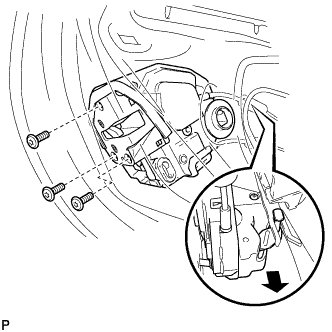 |
Using a "TORX" socket wrench (T30), remove the 3 screws.
Move the rear door lock assembly downward and pull the release plate out of the rear door outside handle frame.
Remove the door lock wiring harness seal from the rear door lock assembly.
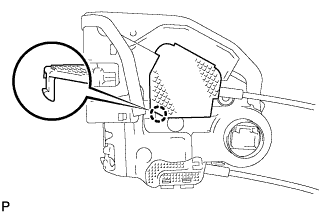 |
Using a screwdriver, disengage the claw.
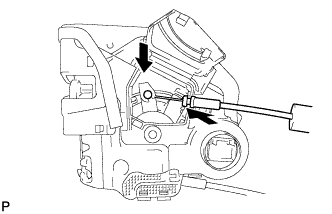 |
Remove the rear door inside locking cable assembly.
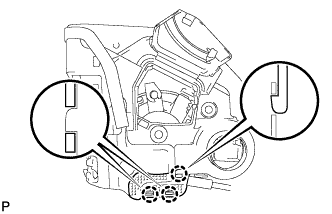 |
Using a screwdriver, disengage the 3 claws.
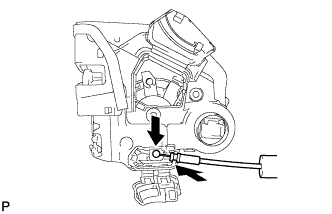 |
Remove the rear door inside locking cable assembly.