Home › SECURITIES › THEFT DETERRENT › THEFT DETERRENT SYSTEM (w/o Entry and Start System)

THEFT DETERRENT SYSTEM (w/o Entry and Start System) > Security Indicator Light Circuit


DESCRIPTION

Even when the theft deterrent system is in the disarmed state, the security indicator blinks due to a signal output from the immobiliser system. The security indicator blinks continuously due to a continuous signal received from the immobiliser system while in the armed state.
The main body ECU causes the security indicator to light up or blink only during the arming preparation state and alarm sounding states.

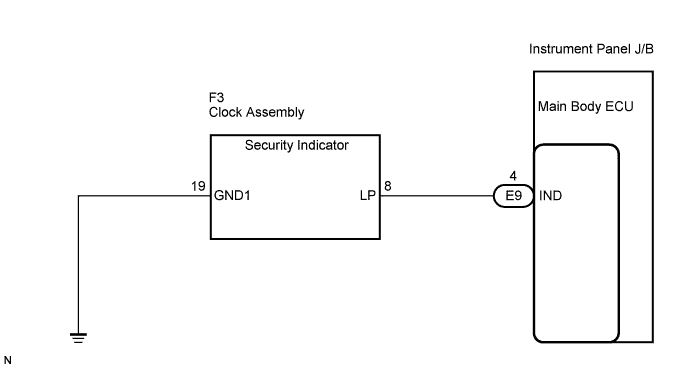
WIRING DIAGRAM


B139445E01


INSPECTION PROCEDURE

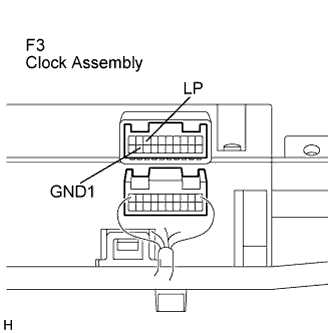
1.INSPECT CLOCK ASSEMBLY


    B139454E01
  1. Disconnect the F3 clock connector.

  1. Apply battery voltage between the terminals of the indicator, and check the lighting condition of the security indicator.

    Standard :
    Measurement Condition
    Specified Condition
    Battery positive (+) → Terminal F3-8 (LP)
    Battery negative (-) → Terminal F3-19 (GND1)
    Lights up

    NOTICE:
    1. If the positive (+) lead and the negative (-) lead are incorrectly connected, the security indicator will not light up.
    2. Voltage of more than 12 V will damage the security indicator.
    3. If the voltage is too low, the security indicator will not light up.


NG
REPLACE CLOCK ASSEMBLY
OK


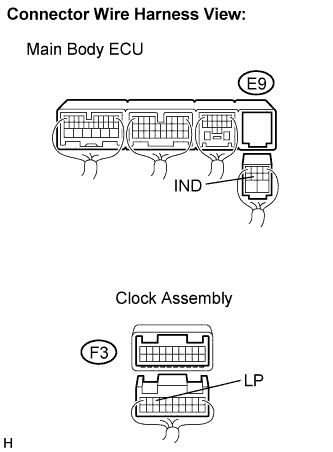
2.CHECK HARNESS AND CONNECTOR (CLOCK ASSEMBLY - MAIN BODY ECU)


    B139459E01
  1. Disconnect the E9 ECU connector.

  1. Disconnect the F3 clock connector.

  1. Measure the resistance according to the value(s) table below.

    Standard resistance:
    Symbol (Tester Connection)
    Specified Condition
    IND (E9-4) - LP (F3-8)
    Below 1 Ω
    IND (E9-4) - Body ground
    10 kΩ or higher


NG
REPAIR OR REPLACE HARNESS OR CONNECTOR
OK


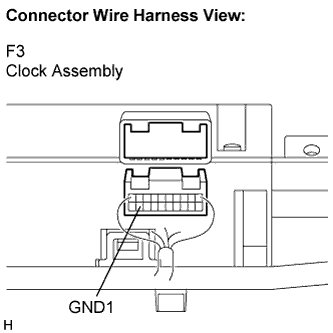
3.CHECK HARNESS AND CONNECTOR (CLOCK ASSEMBLY - BODY GROUND)


    E128063E06
  1. Measure the resistance according to the value(s) in the table below.

    Standard resistance:
    Symbol (Tester Connection)
    Specified Condition
    GND1 (F3-19) - Body ground
    Below 1 Ω


NG
REPAIR OR REPLACE HARNESS OR CONNECTOR
OK

PROCEED TO NEXT CIRCUIT INSPECTION SHOWN IN PROBLEM SYMPTOMS TABLE