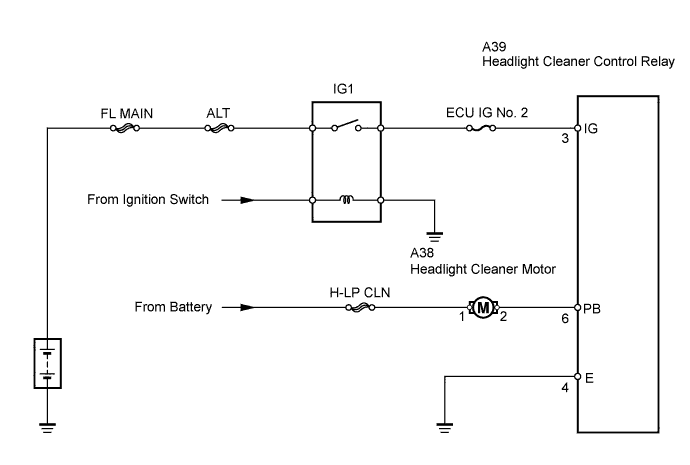
WIPER AND WASHER SYSTEM > Headlight Cleaner Motor and Relay Circuit |
| 1.INSPECT FUSE (ECU IG NO. 2) |
Remove the ECU IG No. 2 fuse from the instrument panel J/B.
Measure the resistance of the fuse.
|
| ||||
| OK | |
 |
| 2.INSPECT HEADLIGHT CLEANER MOTOR AND PUMP ASSEMBLY |
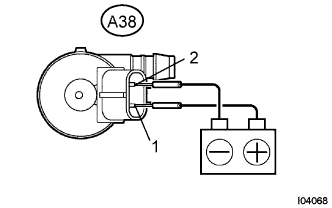 |
Disconnect the A38 headlight cleaner motor and pump assembly connector.
Connect the positive (+) battery lead to terminal A38-1 of the headlight cleaner motor and pump assembly, and the negative (-) battery lead to terminal A38-2.
|
| ||||
| OK | |
|
| 3.CHECK HARNESS AND CONNECTOR (HEADLIGHT CLEANER MOTOR CIRCUIT) |
 |
Connect the A38 headlight cleaner motor and pump assembly connector.
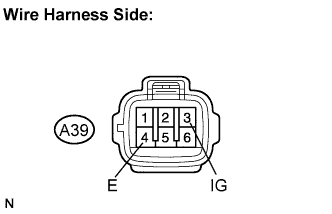
Disconnect the A39 headlight cleaner control relay connector.
Measure the voltage according to the value(s) in the table below.
| Tester Connection | Switch Condition | Specified Condition |
| A39-3 (IG) - Body ground | Ignition switch ON | 10 to 14 V |
| A39-6 (PB) - Body ground | Always | 10 to 14 V |
Measure the resistance according to the value(s) in the table below.
| Tester Connection | Specified Condition |
| A39-4 (E) - Body ground | Below 1 Ω |
|
| ||||
| OK | ||
 | ||
| ||
