 |
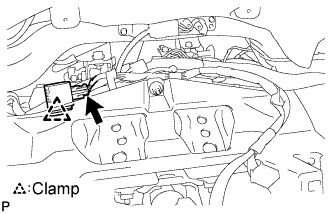
Install the clamp and the turn signal flasher assembly.
TURN SIGNAL FLASHER ASSEMBLY > INSTALLATION |
| 1. INSTALL TURN SIGNAL FLASHER ASSEMBLY |
|
Install the clamp and the turn signal flasher assembly.
Connect the connector.
| 2. INSTALL COMBINATION METER ASSEMBLY |
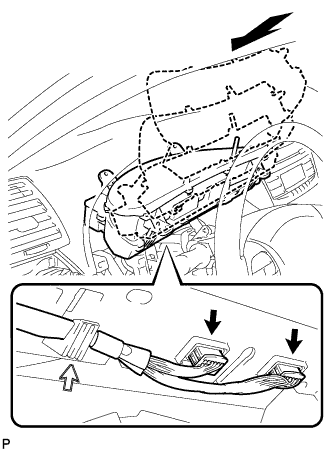 |
Connect the 2 connectors as shown in the illustration.
Secure the wire harness to the combination meter assembly.
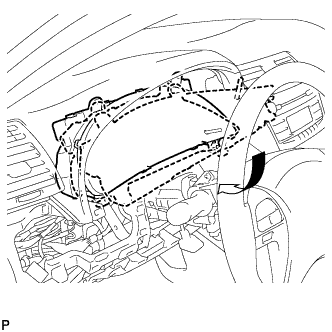 |
Install the combination meter assembly as shown in the illustration.
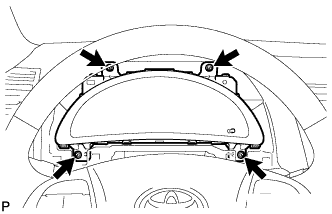 |
Install the 4 screws.
| 3. INSTALL INSTRUMENT CLUSTER FINISH PANEL NO.1 |
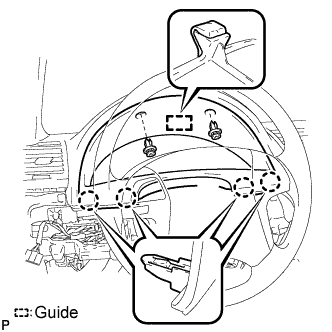 |
Engage the guide and the 4 claws.
Install the instrument cluster finish panel with the 2 clips.
| 4. INSTALL LOWER INSTRUMENT PANEL FINISH PANEL |
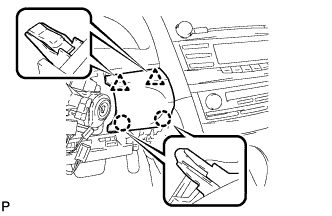 |
Engage the 2 claws and 2 clips to install the lower instrument panel finish panel.
| 5. INSTALL NO. 1 INSTRUMENT PANEL SUB-ASSEMBLY |
Connect each connector.
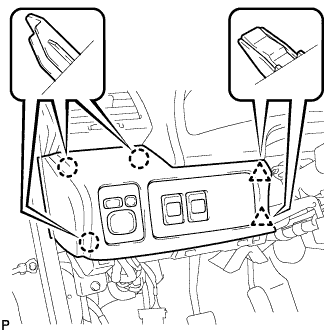 |
Engage the 3 claws and 2 clips to install the No. 1 instrument panel sub-assembly.
| 6. INSTALL STEERING COLUMN COVER |
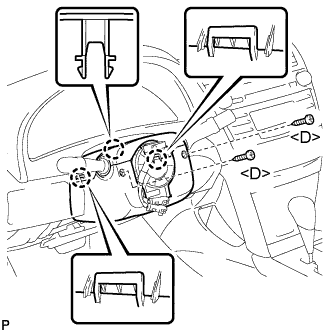 |
Engage the claw and install the upper steering column cover.
Engage the 2 claws and install the lower steering column cover.
Install the steering column cover with the 2 screws <D>.
| 7. INSTALL LOWER INSTRUMENT PANEL FINISH PANEL LH |
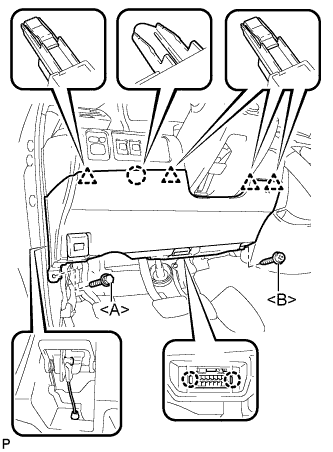 |
Install the air hose and connect the connector.
Engage the 2 claws and the DLC3.
Engage the claw and the 4 clips.
Instal the lower instrument panel finish panel LH with the screw <B> and bolt <A>.
| 8. INSTALL COWL SIDE TRIM SUB-ASSEMBLY LH |
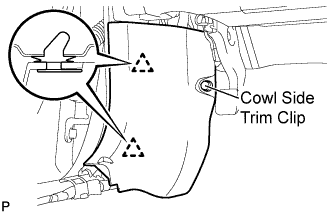 |
Engage the 2 clips.
Install the cowl side trim sub-assembly LH with the cowl side trim clip.
| 9. INSTALL FRONT DOOR SCUFF PLATE LH |
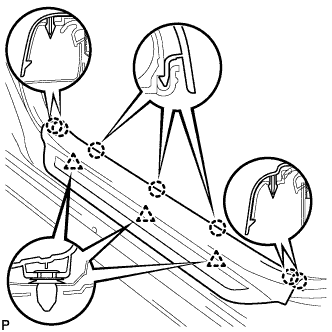 |
Engage the 7 claws and 3 clips, then install the front door scuff plate LH.