 |
Disconnect the mass air flow meter connector (*1).
BRAKE MASTER CYLINDER > REMOVAL |
| 1. DRAIN BRAKE FLUID |
| 2. REMOVE AIR CLEANER CAP SUB-ASSEMBLY (for LHD) |
|
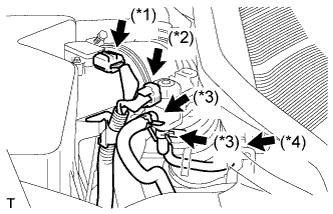
Disconnect the mass air flow meter connector (*1).
Disconnect the purge VSV connector (*2).
Disconnect the 2 purge VSV vacuum hoses (*3).
Disconnect the purge line hose from the clamp (*4).
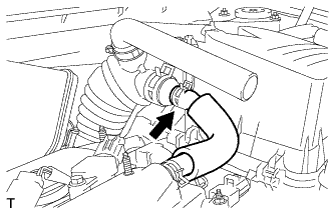 |
Disconnect the No. 2 ventilation hose from the air cleaner hose.
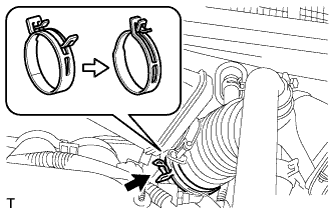 |
Lock the No. 1 air cleaner hose clamp, and then disconnect the No. 1 air cleaner hose from the throttle body.
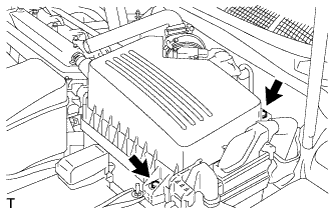 |
Remove the 2 bolts and air cleaner cap.
Remove the air cleaner filter element from the air cleaner case.
| 3. REMOVE AIR CLEANER FILTER ELEMENT SUB-ASSEMBLY (for LHD) |
| 4. REMOVE FRONT WIPER ARM AND BLADE ASSEMBLY LH |
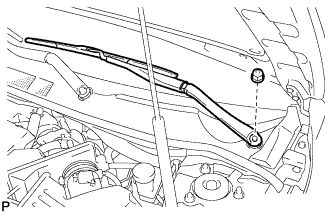 |
Remove the nut and the front wiper arm and blade assembly LH.
| 5. REMOVE FRONT WIPER ARM AND BLADE ASSEMBLY RH |
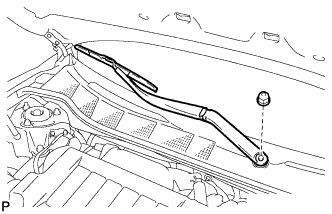 |
Remove the nut and the front wiper arm and blade assembly RH.
| 6. REMOVE FRONT FENDER TO COWL SIDE SEAL LH |
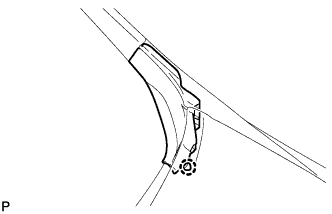 |
Disengage the claw and remove the front fender to cowl side seal LH.
| 7. REMOVE FRONT FENDER TO COWL SIDE SEAL RH |
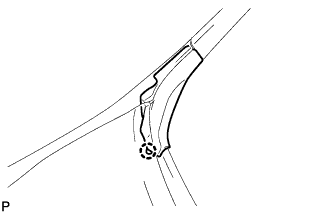 |
Disengage the claw and remove the front fender to cowl side seal RH.
| 8. REMOVE COWL TOP VENTILATOR LOUVER SUB-ASSEMBLY |
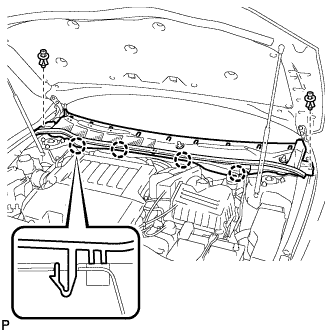 |
Remove the 2 clips.
Disengage the 4 claws and remove the cowl top ventilator louver sub-assembly.
| 9. REMOVE WINDSHIELD WIPER MOTOR AND LINK ASSEMBLY |
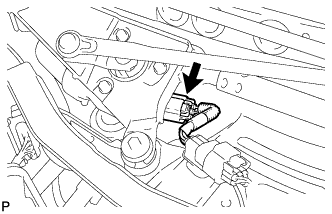 |
Disconnect the connector.
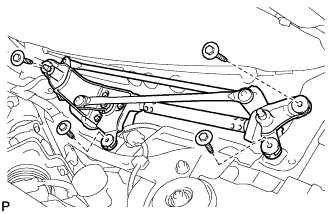 |
Remove the 4 bolts and the windshield wiper motor and link assembly.
| 10. REMOVE COWL TOP OUTER FRONT PANEL SUB-ASSEMBLY |
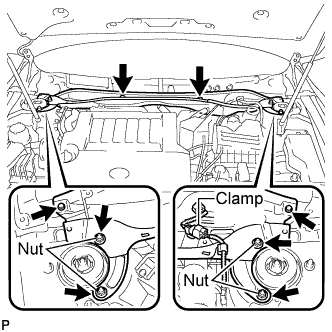 |
Disengage the clamp.
Remove the 4 nuts, the 4 bolts and the cowl top outer front panel sub-assembly.
| 11. DISCONNECT CLUTCH RESERVOIR TUBE (for Manual Transaxle) |
Move the clip and disconnect the clutch reservoir tube from the brake master cylinder sub-assembly.
| 12. REMOVE BRAKE MASTER CYLINDER SUB-ASSEMBLY (for LHD) |
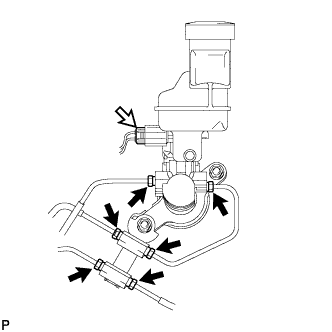 |
Disconnect the connector.
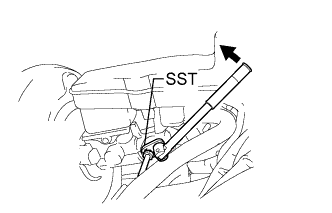 |
Using SST, disconnect the 6 brake lines and remove the brake master cylinder to way tube.
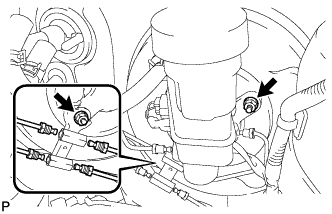 |
Remove the 2 nuts, the front brake tube way, the gasket and the brake master cylinder sub-assembly.
| 13. REMOVE BRAKE MASTER CYLINDER SUB-ASSEMBLY (for RHD) |
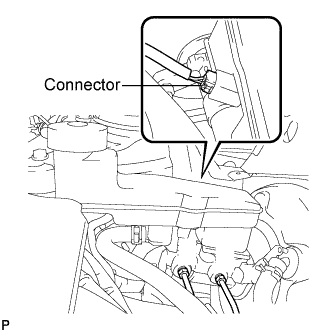 |
Disconnect the connector.
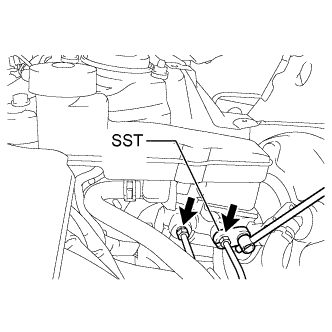 |
Using SST, disconnect the 2 brake lines.
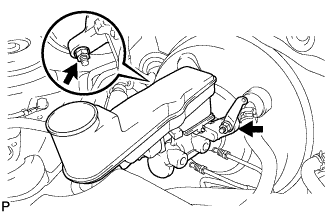 |
Remove the 2 nuts, vacuum check valve bracket, the O-ring and the brake master cylinder sub-assembly.