 |
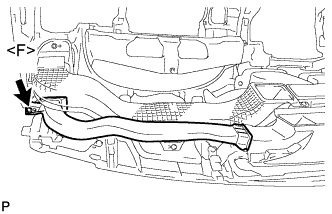
Remove the screw <F> and the side No. 1 defroster nozzle duct.
RADIO ANTENNA CORD > REMOVAL |
| 1. REMOVE INSTRUMENT PANEL SAFETY PAD ASSEMBLY |
| 2. REMOVE SIDE NO. 1 DEFROSTER NOZZLE DUCT |
|
Remove the screw <F> and the side No. 1 defroster nozzle duct.
| 3. REMOVE SIDE NO. 2 DEFROSTER NOZZLE DUCT |
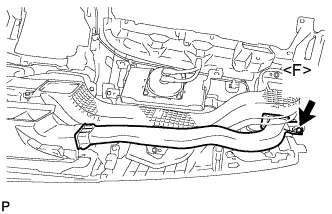 |
Remove the screw <F> and the side No. 2 defroster nozzle duct.
| 4. REMOVE DEFROSTER NOZZLE ASSEMBLY |
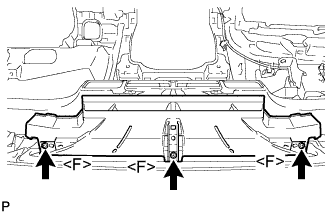 |
Remove the 3 screws <F> and the defroster nozzle assembly.
| 5. REMOVE NO. 1 HEATER TO REGISTER DUCT |
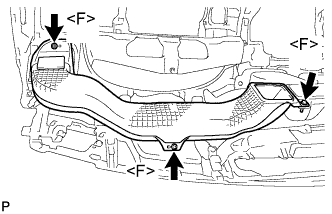 |
Remove the 3 screws <F> and the No. 1 heater to register duct.
| 6. REMOVE NO. 3 HEATER TO REGISTER DUCT |
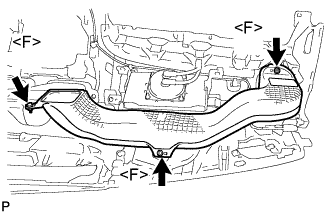 |
Remove the 3 screws <F> and the No. 3 heater to register duct.
| 7. REMOVE NO. 2 HEATER TO REGISTER DUCT |
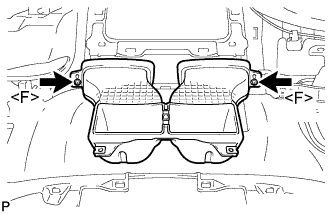 |
Remove the 2 screws <F> and the No. 2 heater to register duct.
| 8. REMOVE NO. 2 ANTENNA CORD SUB-ASSEMBLY (for LHD) |
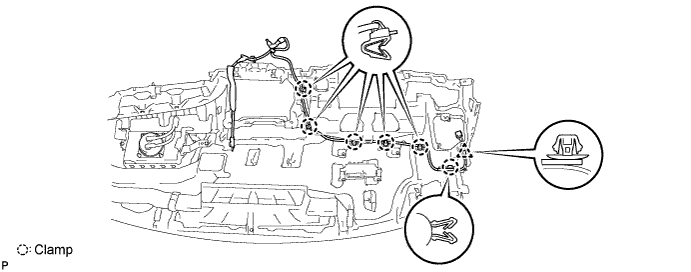
Disengage the 6 clamps and clip and remove the No. 2 antenna cord sub-assembly.
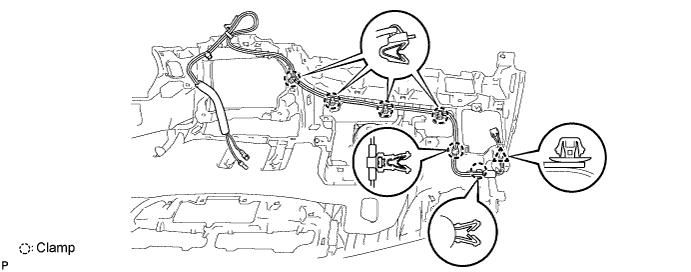
| 9. REMOVE NO. 2 ANTENNA CORD SUB-ASSEMBLY (for RHD) |
Disengage the 6 clamps and clip and remove the No. 2 antenna cord sub-assembly.
| 10. REMOVE ROOF HEADLINING ASSEMBLY |
| 11. REMOVE ANTENNA CORD SUB-ASSEMBLY |
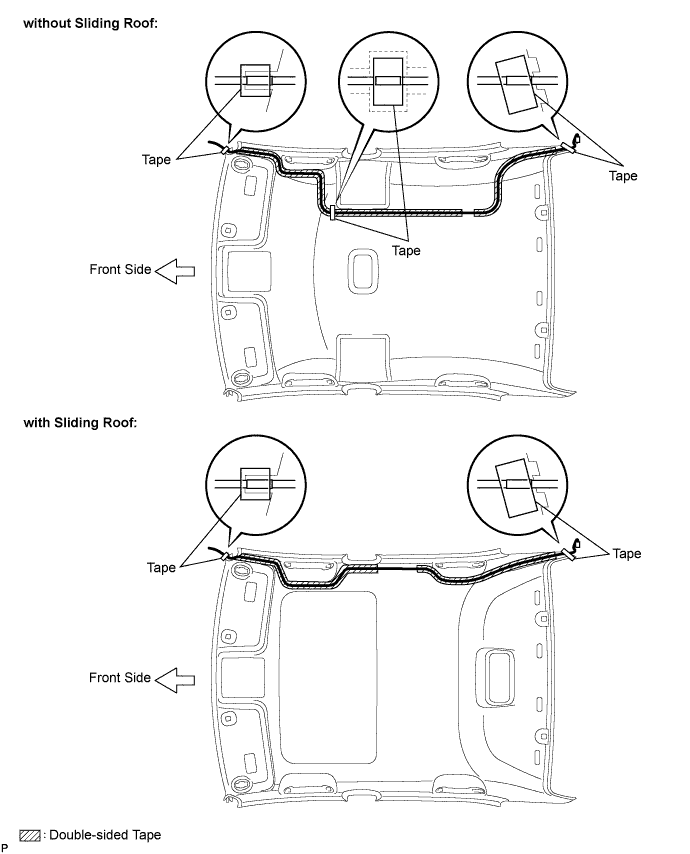
Peel the strips of the tape used to secure the antenna cord only to the extent that allows removal of the antenna cord.
Remove the antenna cord from the roof headlining.