 |
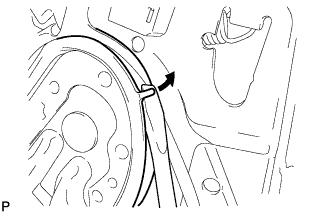
Using a screwdriver, pull up the parking brake pedal claw.
PARKING BRAKE CABLE > REMOVAL |
| 1. PRECAUTION |
| 2. DISCONNECT CABLE FROM NEGATIVE BATTERY TERMINAL (for Manual Seat) |
| 3. REMOVE FRONT SEAT ASSEMBLY LH (for Manual Seat) |
| 4. REMOVE FRONT SEAT ASSEMBLY RH (for Manual Seat) |
| 5. REMOVE FRONT SEAT ASSEMBLY LH (for Power Seat) |
| 6. REMOVE FRONT SEAT ASSEMBLY RH (for Power Seat) |
| 7. REMOVE PARKING BRAKE PEDAL ASSEMBLY (for Automatic Transaxle) |
| 8. REMOVE PARKING BRAKE LEVER SUB-ASSEMBLY (for Manual Transaxle) |
| 9. REMOVE NO. 1 PARKING BRAKE CABLE ASSEMBLY (for Automatic Transaxle) |
|
Using a screwdriver, pull up the parking brake pedal claw.
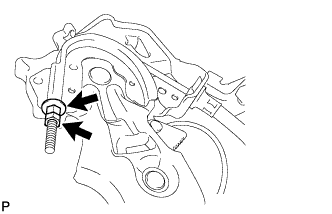 |
Remove the lock nut and the No. 1 wire adjusting nut.
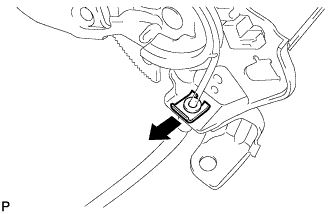 |
Using needle-nose pliers, remove the clip and the No. 1 parking brake cable from the parking brake pedal assembly.
| 10. REMOVE NO. 1 PARKING BRAKE CABLE ASSEMBLY (for Manual Transaxle) |
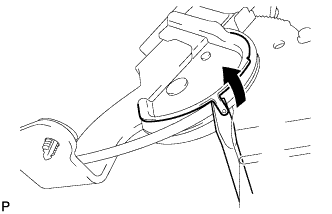 |
Using a screwdriver, pull up the parking brake lever claw.
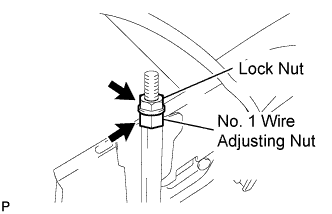 |
Remove the lock nut, the No. 1 wire adjusting nut, and the No. 1 parking brake cable assembly from the parking brake lever sub-assembly.
| 11. REMOVE FRONT DOOR OPENING TRIM WEATHERSTRIP LH (for Automatic Transaxle) |
| 12. REMOVE REAR DOOR SCUFF PLATE LH (for Automatic Transaxle) |
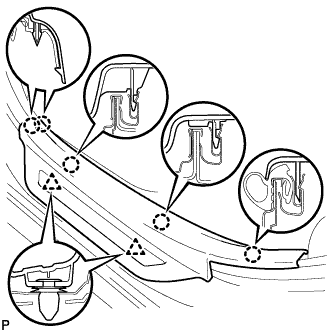 |
Disengage the 5 claws and 2 clips, and remove the rear door scuff plate LH.
| 13. REMOVE REAR DOOR OPENING TRIM WEATHERSTRIP LH (for Automatic Transaxle) |
| 14. REMOVE LOWER CENTER PILLAR GARNISH LH (for Automatic Transaxle) |
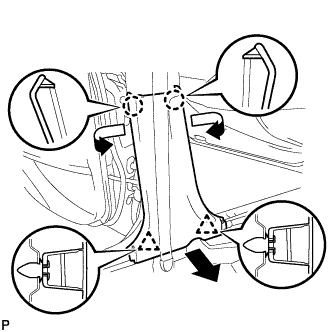 |
Disengage the 2 claws and 2 clips, and remove the lower center pillar garnish LH.
| 15. REMOVE FRONT DOOR OPENING TRIM WEATHERSTRIP RH (for Automatic Transaxle) |
| 16. REMOVE REAR DOOR SCUFF PLATE RH (for Automatic Transaxle) |
| 17. REMOVE REAR DOOR OPENING TRIM WEATHERSTRIP RH (for Automatic Transaxle) |
| 18. REMOVE LOWER CENTER PILLAR GARNISH RH (for Automatic Transaxle) |
| 19. REMOVE FRONT FLOOR CAUTION PLATE COVER (for Automatic Transaxle) |
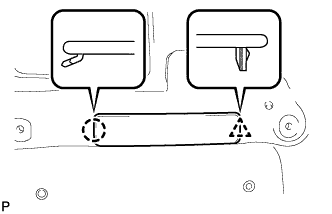 |
Disengage the clip and the claw and remove the front floor caution plate cover.
| 20. REMOVE LUGGAGE DOOR LOCK OPEN LEVER SUB-ASSEMBLY (for Automatic Transaxle) |
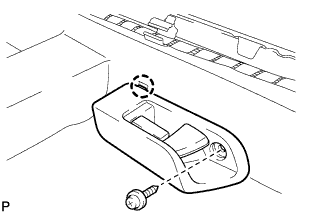 |
Remove the screw.
Disengage the claw and remove the luggage door open lever sub-assembly.
| 21. REMOVE FRONT FLOOR CARPET ASSEMBLY (for Automatic Transaxle) |
Disengage the 6 clamps and the 2 claws.
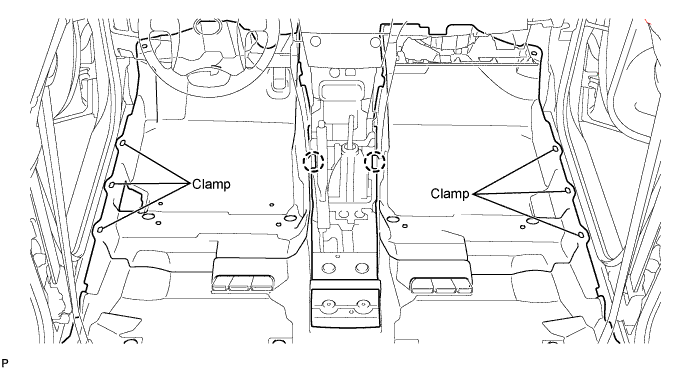
Turn back the front floor carpet assembly until the bolts of the cross member floor No. 4 reinforcement sub-assembly can be seen.
| 22. REMOVE CROSS MEMBER FLOOR NO. 4 REINFORCEMENT SUB-ASSEMBLY (for Automatic Transaxle) |
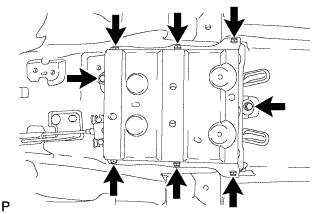 |
Remove the 8 bolts and the cross member floor No. 4 reinforcement sub-assembly.
| 23. SEPARATE NO. 3 PARKING BRAKE CABLE ASSEMBLY (for Automatic Transaxle) |
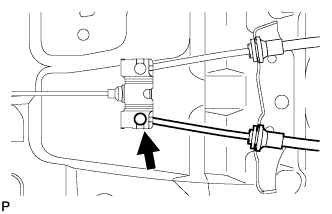 |
Separate the No. 3 parking brake cable assembly from the parking brake equalizer.
| 24. SEPARATE NO. 2 PARKING BRAKE CABLE ASSEMBLY (for Automatic Transaxle) |
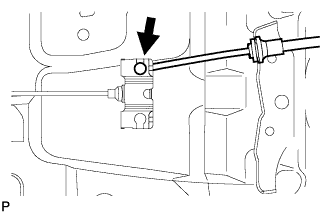 |
Separate the No. 2 parking brake cable assembly from the parking brake equalizer.
| 25. REMOVE NO. 4 PARKING BRAKE CABLE ASSEMBLY (for Automatic Transaxle) |
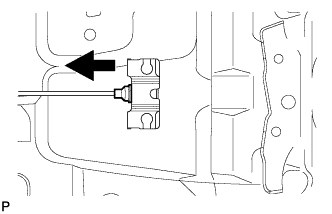 |
Slide the rubber boot as shown in the illustration.
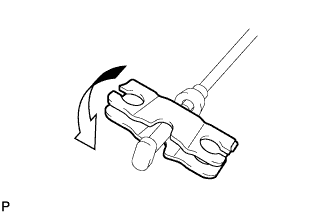 |
Remove the No. 4 parking brake cable assembly from the parking brake equalizer as shown in the illustration.
| 26. REMOVE CENTER EXHAUST PIPE ASSEMBLY (for 2AZ-FE) |
Remove the 2 bolts, 2 nuts and center exhaust pipe assembly.
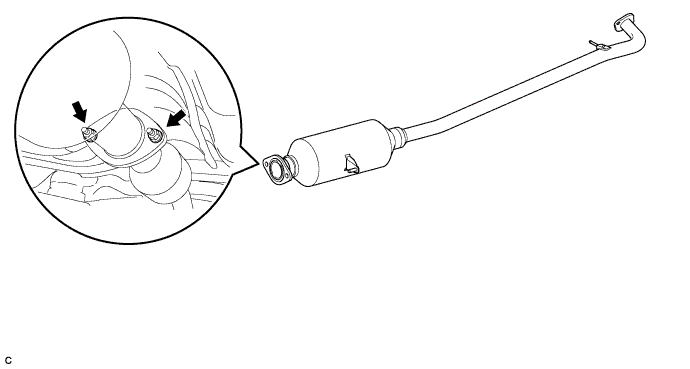
Remove the gasket from the front exhaust pipe.
| 27. REMOVE EXHAUST TAIL PIPE ASSEMBLY (for 2GR-FE) |
Remove the 4 nuts and 2 exhaust tail pipes.
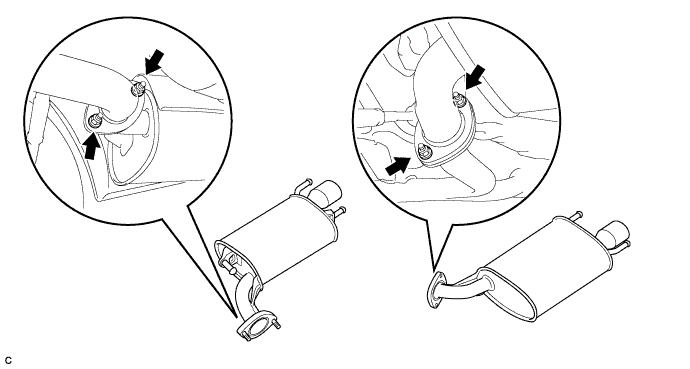
Remove the 2 gaskets from the exhaust tail pipes.
| 28. REMOVE EXHAUST CENTER PIPE ASSEMBLY (for 2GR-FE) |
Remove the 2 bolts, 2 nuts and exhaust center pipe assembly.
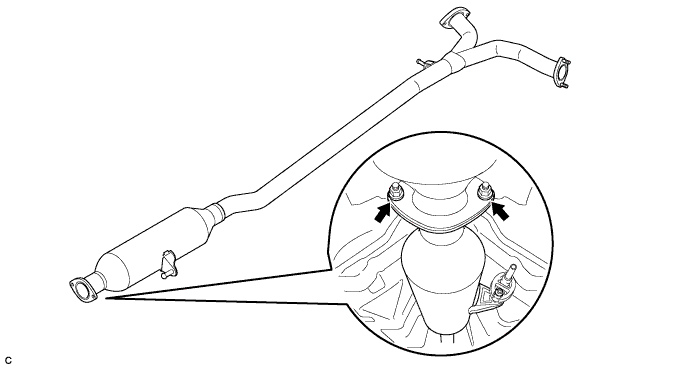
Remove the gasket from the exhaust center pipe assembly.
| 29. REMOVE NO. 2 FRONT FLOOR HEAT LOWER INSULATOR (for 2AZ-FE) |
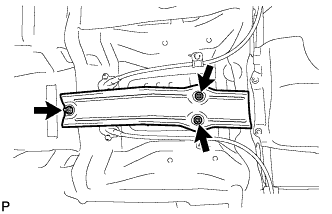 |
Remove the 3 nuts and the No. 2 front floor heat lower insulator.
| 30. REMOVE REAR WHEEL |
| 31. SEPARATE REAR DISC BRAKE CALIPER ASSEMBLY |
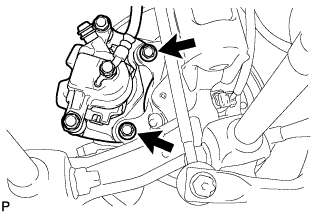 |
Remove the 2 bolts and separate the rear disc brake caliper assembly.
| 32. REMOVE REAR DISC |
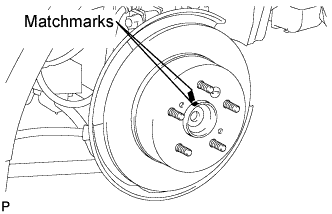 |
Release the parking brake and place the matchmarks on the rear disc and the axle hub.
Remove the rear disc.
| 33. REMOVE PARKING BRAKE SHOE RETURN TENSION NO. 1 SPRING |
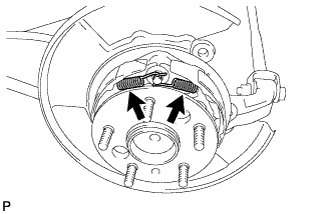 |
Using needle-nose pliers, remove the 2 parking brake shoe return tension No. 1 springs.
| 34. REMOVE PARKING BRAKE SHOE STRUT |
Remove the parking brake shoe strut and the parking brake shoe strut compression spring.
| 35. REMOVE NO. 1 PARKING BRAKE SHOE ASSEMBLY |
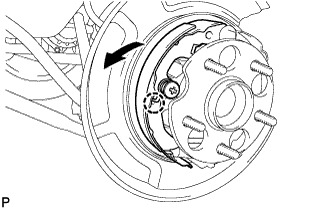 |
Release the claw of the parking brake shoe hold down spring No. 1 cup.
Remove the No. 1 parking brake shoe assembly as shown in the illustration.
Remove the parking brake shoe hold down spring No. 1 cup, the parking brake shoe hold down spring, the parking brake shoe hold down spring No. 2 cup, and the parking brake shoe hold down spring No. 1 pin.
| 36. REMOVE PARKING BRAKE SHOE ADJUSTING SCREW SET |
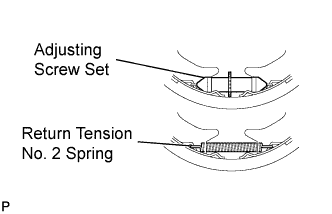 |
Remove the parking brake shoe adjusting screw set.
Remove the parking brake shoe return tension No. 2 spring.
| 37. REMOVE NO. 2 PARKING BRAKE SHOE ASSEMBLY |
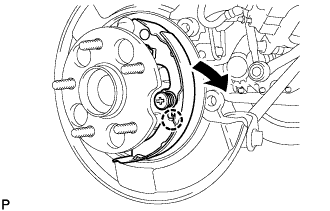 |
Release the claw of the parking brake shoe hold down spring No. 1 cup.
Remove the No. 2 parking brake shoe assembly as shown in the illustration.
Remove the parking brake shoe hold down spring No. 1 cup, the parking brake shoe hold down spring, the parking brake shoe hold down spring No. 2 cup, and the parking brake shoe hold down spring No. 2 pin.
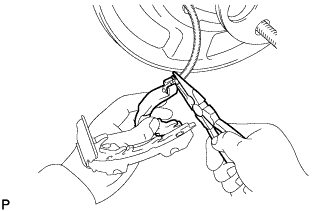 |
Using needle-nose pliers, disconnect the No. 3 parking brake cable assembly from the parking brake shoe lever.
| 38. REMOVE NO. 3 PARKING BRAKE CABLE ASSEMBLY |
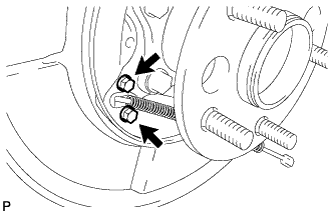 |
Remove the 2 bolts and separate the No. 3 parking brake cable assembly from the backing plate.
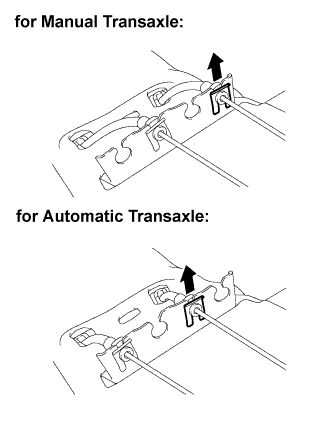 |
Using needle-nose pliers, remove the clip from the No. 3 parking brake cable assembly.
Remove 3 bolts (A), bolt (B), and nut (C), and disengage each claw.
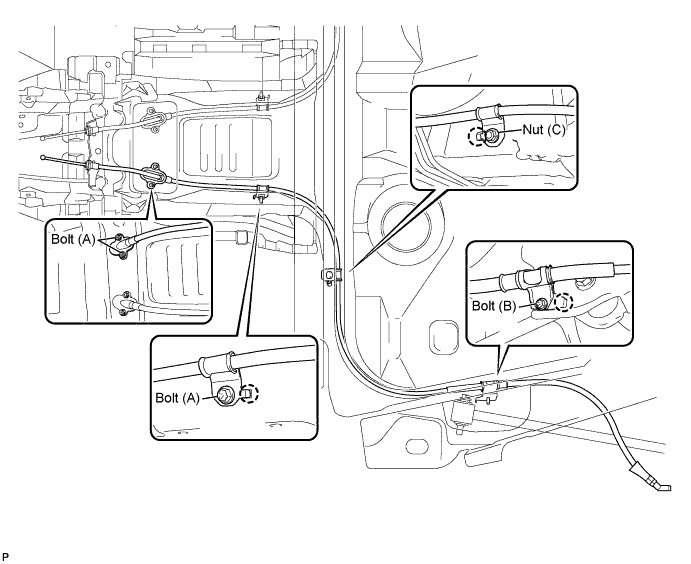
Remove the No. 3 parking brake cable assembly from the body.
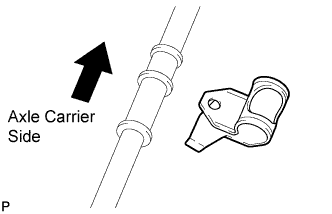 |
Remove the parking brake cable clamp.