CONDENSER > REMOVAL |
| 1. RECOVER REFRIGERANT FROM REFRIGERATION SYSTEM |
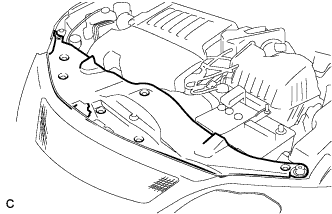
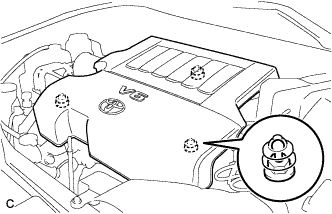
| 2. REMOVE V-BANK COVER SUB-ASSEMBLY (for 2GR-FE) |
![]() |
Hold the front of the V-bank cover and raise it to disengage the 2 retainers on the front of the cover. Continue to raise the cover to disengage the retainer on the rear of the cover and remove the cover.
| 3. REMOVE COOL AIR INTAKE DUCT SEAL (for 2GR-FE) |
![]() |
Remove the 7 clips and intake duct seal.
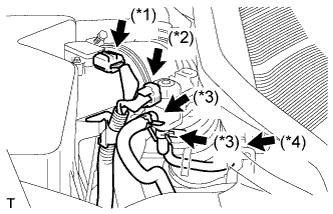
| 4. REMOVE AIR CLEANER CAP SUB-ASSEMBLY (for 2AZ-FE) |
![]() |
Disconnect the mass air flow meter connector (*1).
Disconnect the purge VSV connector (*2).
Disconnect the 2 purge VSV vacuum hoses (*3).
Disconnect the purge line hose from the clamp (*4).
![]() |
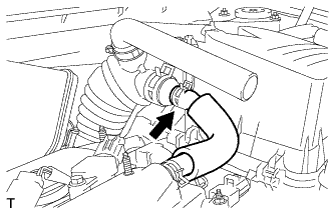
Disconnect the No. 2 ventilation hose from the air cleaner hose.
![]() |
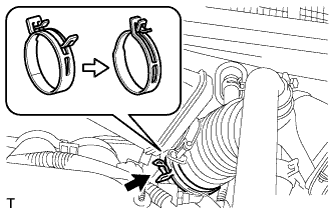
Lock the No. 1 air cleaner hose clamp, and then disconnect the No. 1 air cleaner hose from the throttle body.
![]() |
Remove the 2 bolts and air cleaner cap.
Remove the air cleaner filter element from the air cleaner case.
| 5. REMOVE AIR CLEANER CAP SUB-ASSEMBLY (for 2GR-FE) |
![]() |
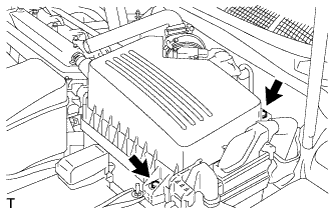
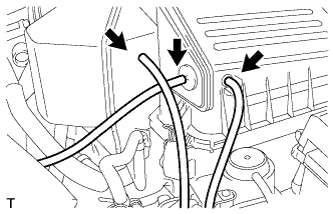
Disconnect the 3 vacuum hoses.
![]() |
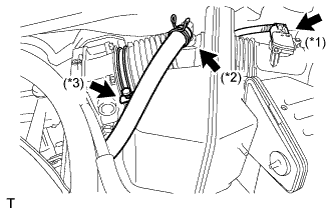
Disconnect the mass air flow meter connector (*1).
Disconnect the No. 2 ventilation hose (*2).
Disconnect the hose band (*3).
![]() |
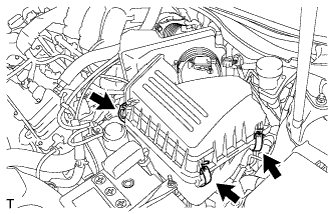
Disconnect the 3 bands, and remove the air cleaner cap sub-assembly.
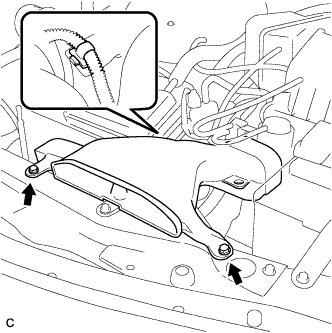
| 6. REMOVE AIR CLEANER INLET ASSEMBLY (for 2AZ-FE) |
![]() |
Remove the 2 bolts, clamp and air cleaner inlet.
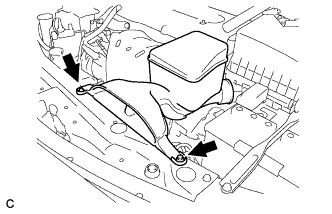
| 7. REMOVE AIR CLEANER INLET SUB-ASSEMBLY (for 2GR-FE) |
![]() |
Remove the 2 bolts, clamp and air cleaner inlet.
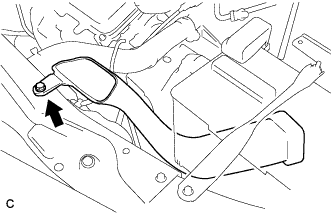
| 8. REMOVE NO. 1 AIR CLEANER INLET (for 2GR-FE) |
![]() |
Remove the bolt and No. 1 air cleaner inlet.
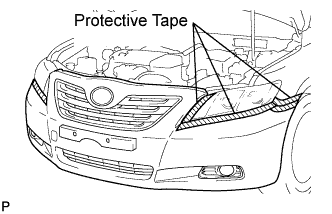
| 9. REMOVE FRONT BUMPER ASSEMBLY (w/o Headlight Cleaner System) |
![]() |
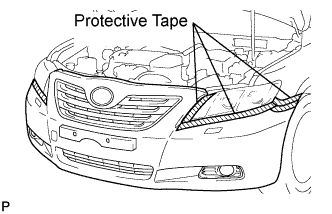
Put protective tape around the front bumper assembly.
![]() |
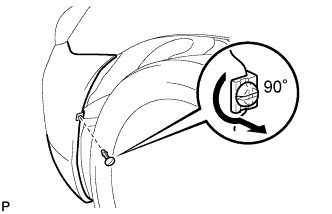
Using a screwdriver, turn the pin 90 degrees and remove the pin hold clip.
![]() |
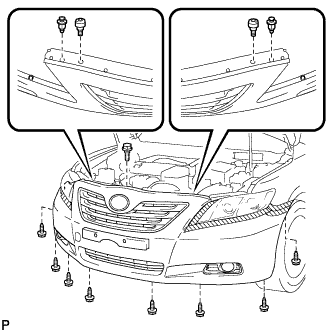
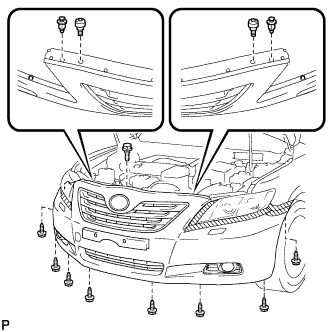
Remove the 8 screws, 2 clips, 2 radiator grille protectors and bolt.
![]() |
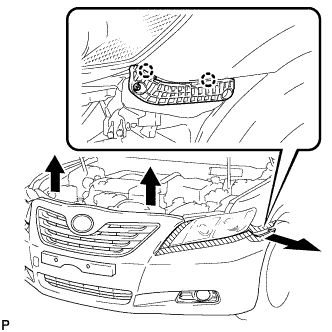
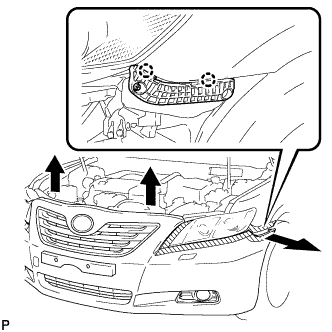
Disengage the 2 claws and disconnect the front bumper assembly as shown in the illustration.
Disconnect 2 fog light connectors.
w/ TOYOTA Parking Assist-sensor System:
Disengage the clamp and disconnect the clearance sonar connector.
Remove the front bumper assembly.
| 10. REMOVE FRONT BUMPER ASSEMBLY (w/ Headlight Cleaner System) |
![]() |
Put protective tape around the front bumper assembly.
![]() |
Using a screwdriver, turn the pin 90 degrees and remove the pin hold clip.
![]() |
Remove the 8 screws, 2 clips, 2 radiator grille protectors and bolt.
![]() |
Disengage the 2 claws and disconnect the front bumper assembly as shown in the illustration.
Disconnect 2 fog light connectors.
w/ TOYOTA Parking Assist-sensor System:
Disengage the clamp and disconnect the clearance sonar connector.
![]() |
Disconnect the headlight cleaner washer hose, and then remove the front bumper assembly.
| 11. REMOVE RADIATOR SUPPORT UPPER |
Disconnect the horn connector.
![]() |
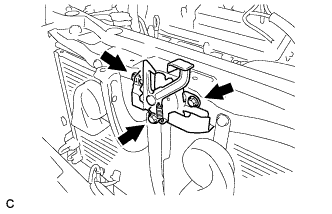
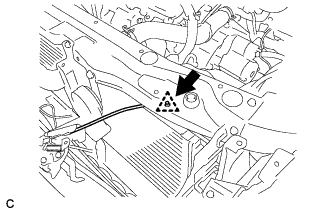
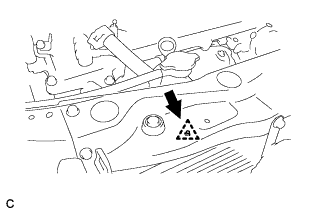
Remove the 3 bolts and separate the hood lock assembly from the radiator support upper.
![]() |
For LHD:
Remove the clamp and separate the hood lock control cable from the radiator support upper.
![]() |
For RHD:
Remove the clamp and separate the hood lock control cable from the radiator support upper.
![]() |
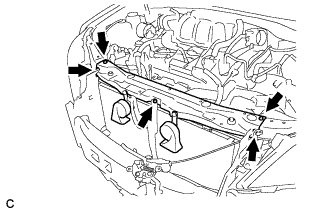
Remove the 5 bolts and radiator support upper.
| 12. REMOVE HOOD LOCK SUPPORT SUB-ASSEMBLY |
![]() |
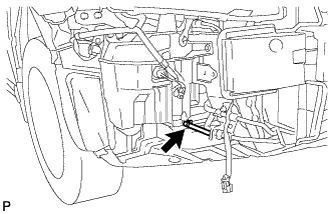
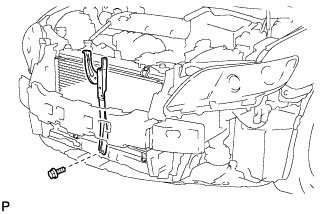
Remove the bolt and hood lock support sub-assembly.
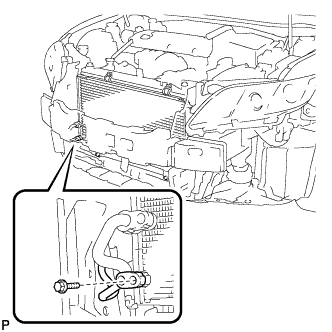
| 13. DISCONNECT AIR CONDITIONING TUBE AND ACCESSORY |
![]() |
Remove the bolt and disconnect the air conditioning tube assembly from the condenser.
Remove the O-ring from the air conditioning tube assembly.
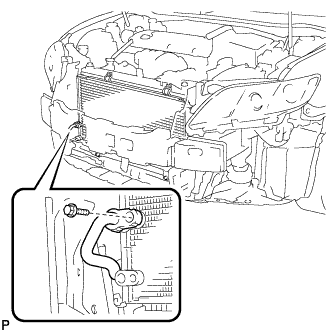
| 14. DISCONNECT COOLER REFRIGERANT DISCHARGE PIPE |
![]() |
Remove the bolt and disconnect the cooler refrigerant discharge pipe from the condenser.
Remove the O-ring from the cooler refrigerant discharge pipe.
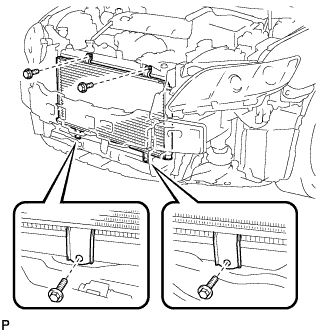
| 15. REMOVE COOLER CONDENSER ASSEMBLY |
![]() |
Remove the 4 bolts and condenser.
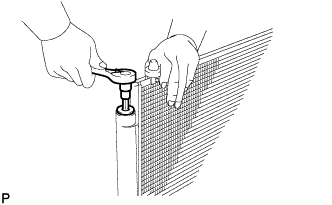
| 16. REMOVE COOLER DRYER |
![]() |
Using a 14 mm straight hexagon wrench, remove the cap from the modulator.
![]() |
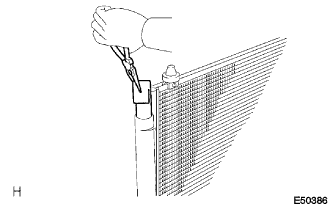
Using pliers, remove the cooler dryer.