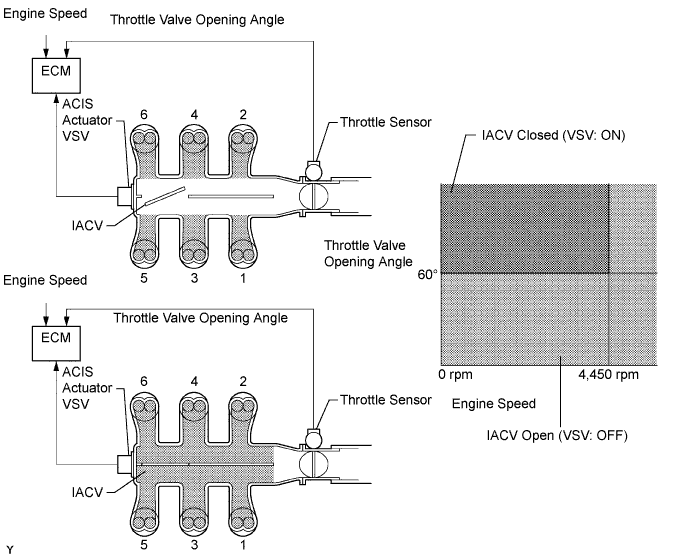
DTC P0660 Intake Manifold Tuning Valve Control Circuit / Open (Bank 1) |
| DTC No. | DTC Detection Condition | Trouble Area |
| P0660 | The following conditions are met simultaneously for 0.5 seconds or more (2 trip detection logic):
|
|
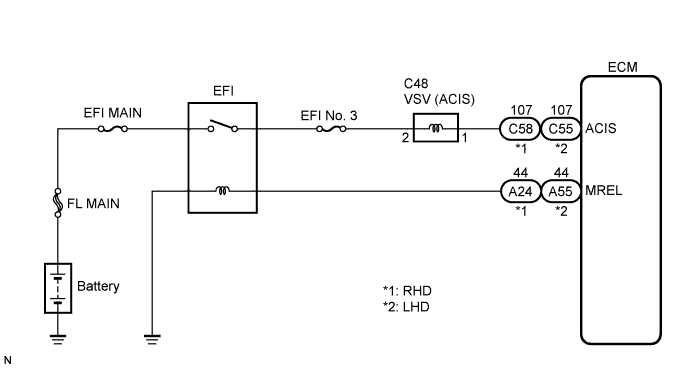
| 1.PERFORM ACTIVE TEST USING INTELLIGENT TESTER |
 |
Connect the intelligent tester to the DLC3.
Start the engine and turn the tester on.
Select the following menu items: Powertrain / Engine / Active Test / Active the VSV for Intake Control.
Check if operating noise can be heard when operating the air intake control valve using the intelligent tester.
|
| ||||
| NG | |
 |
| 2.CHECK INTAKE AIR CONTROL VALVE (OPERATION) |
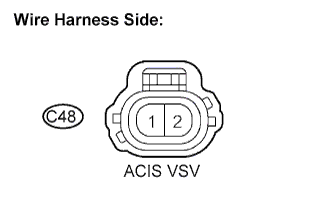
Disconnect the C48 air intake valve connector.
Apply battery voltage between the terminals of the intake air control valve connector.
Check intake air control valve operation.
|
| ||||
| OK | |
|
| 3.CHECK HARNESS AND CONNECTOR |
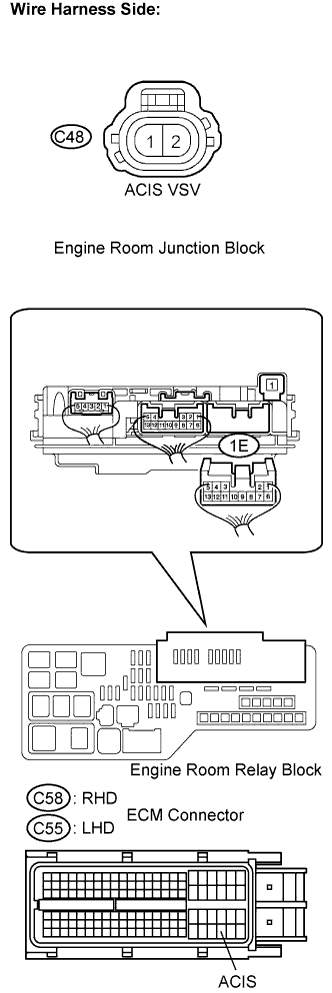 |
Check the wire harness and connectors between the VSV for ACIS and ECM.
Disconnect the C48 VSV for ACIS connector.
Disconnect the C58 (RHD) or C55 (LHD) ECM connector.
Measure the resistance between the terminals of the VSV for ACIS connector and ECM connector.
| Tester Connection | Specified Condition |
| VSV for ACIS (C48-1) - ACIS (C58-107) | Below 1 Ω |
| Tester Connection | Specified Condition |
| VSV for ACIS (C48-1) - ACIS (C55-107) | Below 1 Ω |
| Tester Connection | Specified Condition |
| VSV for ACIS (C48-1) or ACIS (C58-107) - Body ground | 10 kΩ or higher |
| Tester Connection | Specified Condition |
| VSV for ACIS (C48-1) or ACIS (C55-107) - Body ground | 10 kΩ or higher |
Reconnect the VSV for ACIS connector.
Reconnect the ECM connector.
Check the EFI No. 3 fuse.
Remove the EFI No. 3 fuse from the engine room R/ B.
Measure the EFI No. 3 fuse resistance.
Reinstall the EFI No. 3 fuse.
Check the wire harness between the VSV for ACIS connector and EFI MAIN relay.
Remove the engine room junction block from the engine room R/B.
Disconnect the C48 VSV connector.
Measure the resistance between the terminals.
| Tester Connection | Specified Condition |
| VSV for ACIS (C48-2) - 1E-6 | Below 1 Ω |
Reinstall the engine room junction block.
Reinstall the VSV connector.
|
| ||||
| OK | ||
 | ||
| ||
