 |
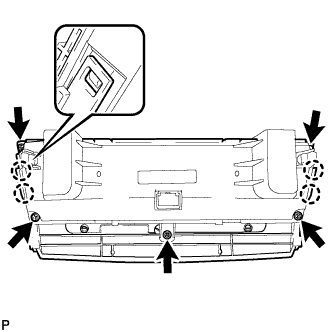
Remove the 5 screws.
AIR CONDITIONING CONTROL ASSEMBLY > DISASSEMBLY |
| 1. REMOVE AIR CONDITIONING PANEL SUB-ASSEMBLY (for Automatic Air Conditioning System) |
|
Remove the 5 screws.
Disengage the 4 claws and remove the air conditioning panel sub-assembly.
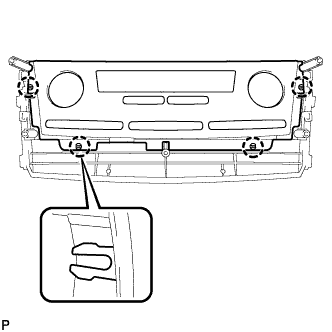 |
Disengage the 4 claws and remove the ornament.
| 2. REMOVE CONTROL KNOB SUB-ASSEMBLY (for Automatic Air Conditioning System) |
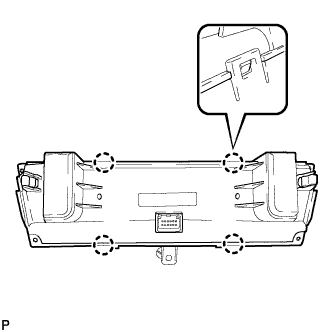 |
Disengage the 4 claws and remove the control panel case.
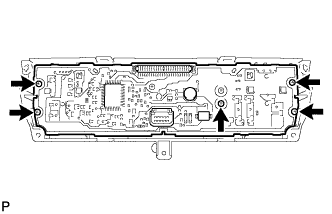 |
Remove the 5 screws and heater control base sub-assembly.
Driver Side:
Disengage the 3 claws and pull the control knob sub-assembly to the position shown in the illustration.
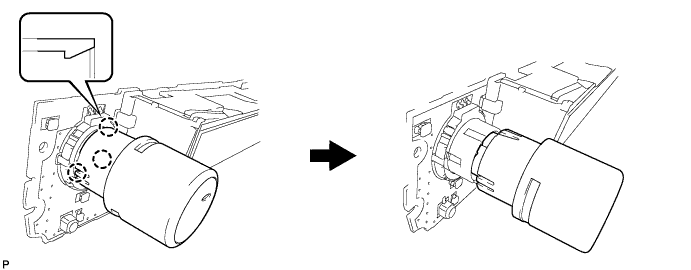
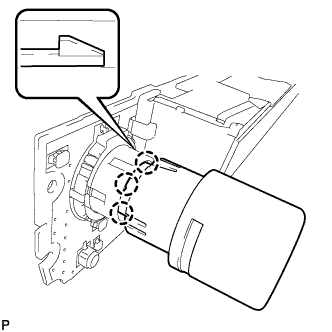 |
Disengage the 3 claws and remove the control knob sub-assembly.
Passenger Side:
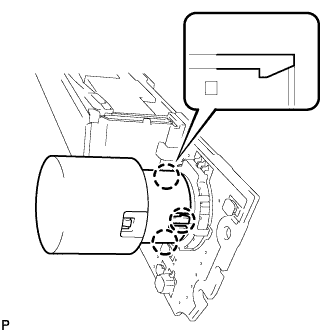 |
Disengage the 3 claws and remove the control knob sub-assembly.