FIT STANDARD / ADJUSTMENT METHOD > ADJUSTMENT |
| INSPECT HOOD SUB-ASSEMBLY |
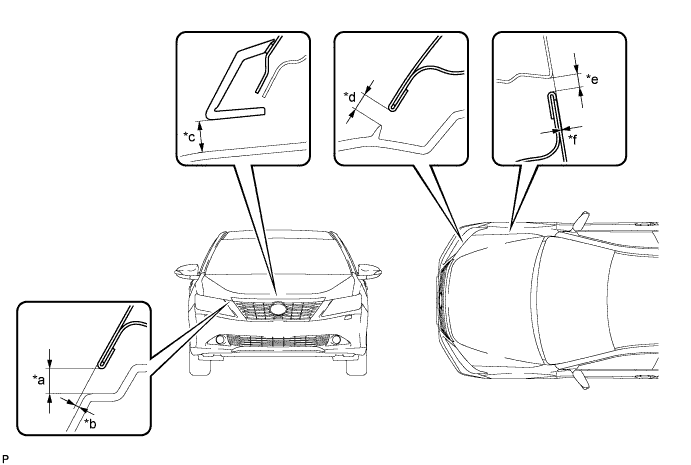
Check that the clearance measurements of areas *a through *f are within each standard range.
| Area | Measurement | Area | Measurement |
| *a | 5.5 to 9.5 mm (0.217 to 0.374 in.) | *b | -0.8 to 3.2 mm (-0.0315 to 0.126 in.) |
| *c | 8.7 to 12.7 mm (0.345 to 0.50 in.) | *d | 2.8 to 6.8 mm (0.110 to 0.268 in.) |
| *e | 2.3 to 5.3 mm (0.0906 to 0.209 in.) | *f | -1.5 to 1.5 mm (-0.0590 to 0.0590 in.) |
| ADJUST HOOD SUB-ASSEMBLY |
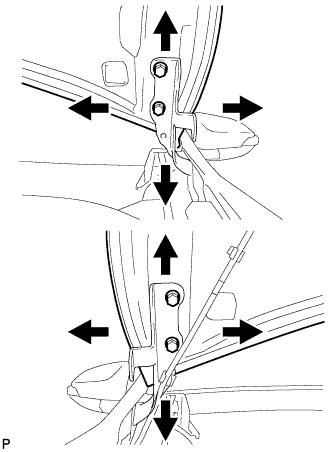 |
Horizontally and vertically adjust the hood.
Loosen the 4 hinge bolts of the hood.
Adjust the clearance between the hood and front fender by moving the hood.
Tighten the 4 hinge bolts after the adjustment.
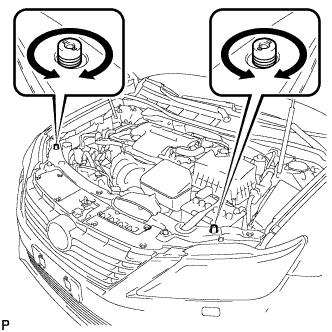 |
Adjust the height of the front end of the hood using the cushion rubbers.
Adjust the 2 cushion rubbers so that the heights of the hood and fender are aligned.
Remove the front bumper assembly.
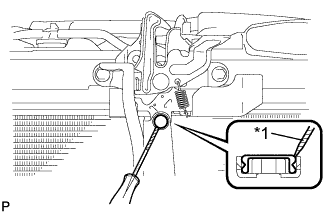 |
Adjust the hood lock.
Using a screwdriver, remove the hood lock nut cap.
| *1 | Protective Tape |
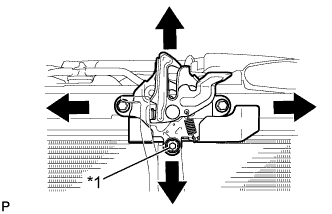 |
Loosen the 2 bolts and hood lock bolt.
| *1 | Hood Lock Bolt |
Adjust the hood lock and tighten the 2 bolts and hood lock bolt.
Check that the striker can engage with the hood lock smoothly.
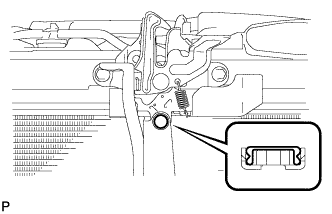 |
Install a new hood lock nut cap.
Install the front bumper assembly.
| INSPECT FRONT DOOR |
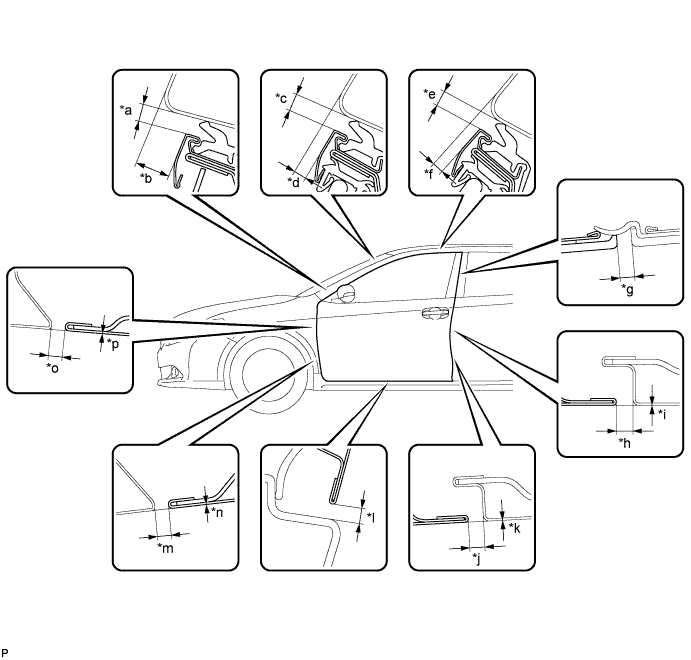
Check that the clearance measurements of areas *a through *p are within each standard range.
| Area | Measurement | Area | Measurement |
| *a | 3.35 to 6.35 mm (0.132 to 0.250 in.) | *b | 9.0 to 12.0 mm (0.354 to 0.472 in.) |
| *c | 3.35 to 6.35 mm (0.132 to 0.250 in.) | *d | 1.7 to 4.7 mm (0.0669 to 0.185 in.) |
| *e | 3.35 to 6.35 mm (0.132 to 0.250 in.) | *f | 1.0 to 4.0 mm (0.0394 to 0.157 in.) |
| *g | 2.3 to 6.3 mm (0.0906 to 0.248 in.) | *h | 2.96 to 4.64 mm (0.115 to 0.182 in.) |
| *i | -0.84 to 0.84 mm (-0.0331 to 0.0331 in.) | *j | 2.96 to 4.64 mm (0.115 to 0.182 in.) |
| *k | -0.84 to 0.84 mm (-0.0331 to 0.0331 in.) | *l | 2.9 to 7.1 mm (0.114 to 0.280 in.) |
| *m | 2.3 to 4.7 mm (0.0906 to 0.185 in.) | *n | -1.2 to 1.2 mm (-0.0472 to 0.0472 in.) |
| *o | 2.3 to 4.7 mm (0.0906 to 0.185 in.) | *p | -1.2 to 1.2 mm (-0.0472 to 0.0472 in.) |
| REMOVE FRONT WHEEL |
| REMOVE FRONT FENDER SEAL |
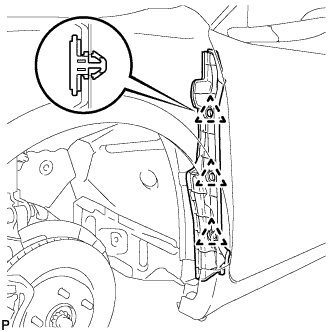 |
Disengage the 3 clips and remove the front fender seal.
| ADJUST FRONT DOOR |
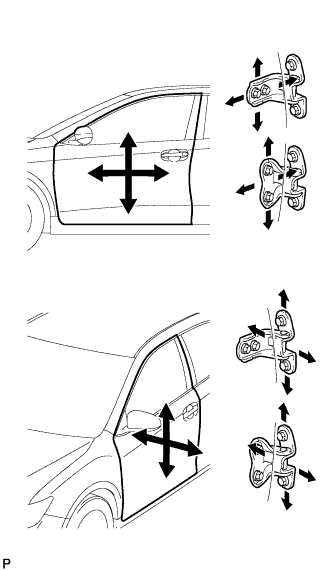 |
Using SST, loosen the hinge bolts on the vehicle body and adjust the door position.
Tighten the hinge bolts on the vehicle body after the adjustment.
Loosen the hinge bolts on the door and adjust the door position.
Tighten the hinge bolts on the door after the adjustment.
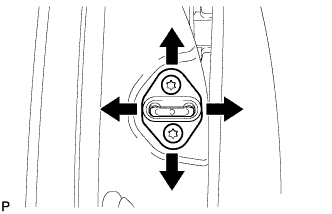 |
Using a T40 "TORX" socket wrench, slightly loosen the striker mounting screws.
Using a brass bar and a hammer, hit the striker to adjust its position.
Using a T40 "TORX" socket wrench, tighten the striker mounting screws after adjustment.
| INSTALL FRONT FENDER SEAL |
|
Install the front fender seal with 3 new clips.
| INSTALL FRONT WHEEL |
| INSPECT REAR DOOR |
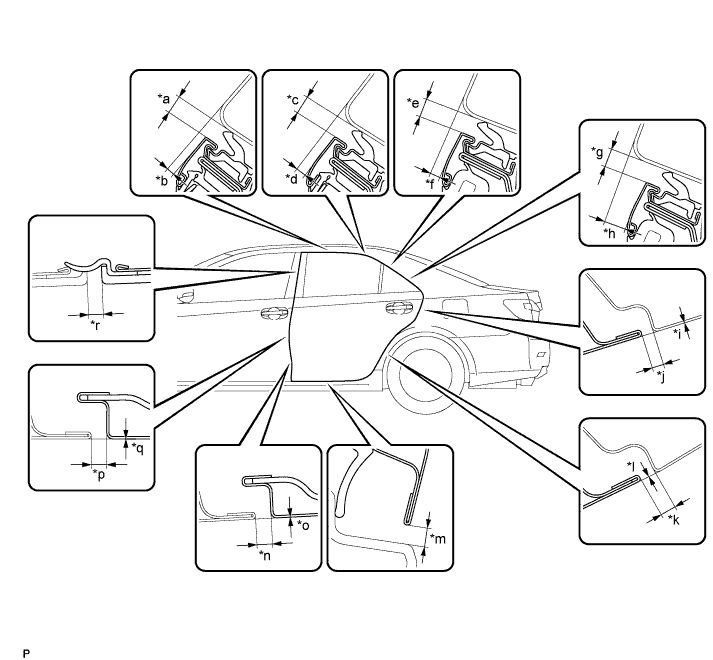
Check that the clearance measurements of areas *a through *r are within each standard range.
| Area | Measurement | Area | Measurement |
| *a | 3.35 to 6.35 mm (0.132 to 0.250 in.) | *b | 0.6 to 3.6 mm (0.0236 to 0.142 in.) |
| *c | 3.35 to 6.35 mm (0.132 to 0.250 in.) | *d | 0.9 to 3.9 mm (0.0354 to 0.154 in.) |
| *e | 3.35 to 6.35 mm (0.132 to 0.250 in.) | *f | 1.5 to 4.5 mm (0.0591 to 0.177 in.) |
| *g | 3.35 to 6.35 mm (0.132 to 0.250 in.) | *h | 5.4 to 8.4 mm (0.213 to 0.331 in.) |
| *i | -1.5 to 1.5 mm (-0.0591 to 0.0591 in.) | *j | 2.0 to 5.0 mm (0.0787 to 0.197 in.) |
| *k | 2.0 to 5.0 mm (0.0787 to 0.197 in.) | *l | -1.5 to 1.5 mm (-0.0591 to 0.0591 in.) |
| *m | 2.9 to 7.1 mm (0.114 to 0.280 in.) | *n | 2.96 to 4.64 mm (0.115 to 0.182 in.) |
| *o | -0.84 to 0.84 mm (-0.0331 to 0.0331 in.) | *p | 2.96 to 4.64 mm (0.115 to 0.182 in.) |
| *q | -0.84 to 0.84 mm (-0.0331 to 0.0331 in.) | *r | 2.3 to 6.3 mm (0.0906 to 0.248 in.) |
| ADJUST REAR DOOR |
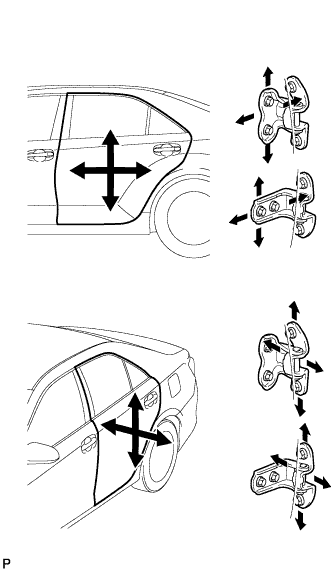 |
Using SST, loosen the hinge bolts on the vehicle body and adjust the door position.
Tighten the hinge bolts on the vehicle body after the adjustment.
Loosen the hinge bolts on the door and adjust the door position.
Tighten the hinge bolts on the door after the adjustment.
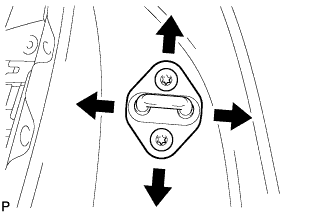 |
Using a T40 "TORX" socket wrench, slightly loosen the striker mounting screws.
Using a brass bar and a hammer, hit the striker to adjust its position.
Using a T40 "TORX" socket wrench, tighten the striker mounting screws after adjustment.
| INSPECT LUGGAGE COMPARTMENT DOOR PANEL SUB-ASSEMBLY |
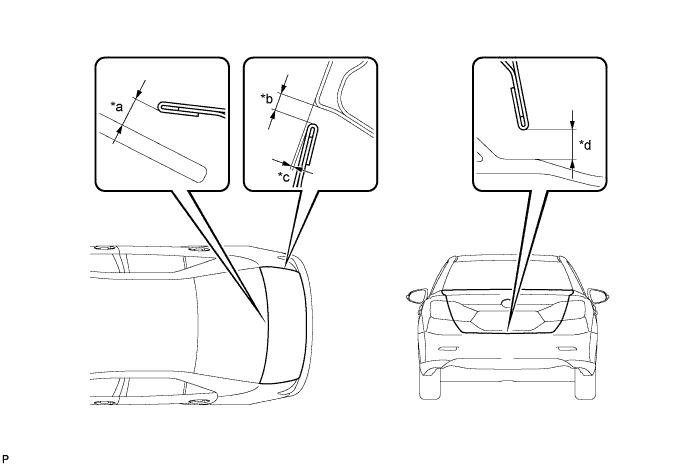
Check that the clearance measurements of areas *a through *d are within each standard range.
| Area | Measurement | Area | Measurement |
| *a | 6.4 mm (0.252 in.) | *b | 2.0 to 5.0 mm (0.0787 to 0.197 in.) |
| *c | -1.5 to 1.5 mm (-0.0591 to 0.0591 in.) | *d | 3.7 to 7.7 mm (0.146 to 0.303 in.) |
| ADJUST LUGGAGE COMPARTMENT DOOR |
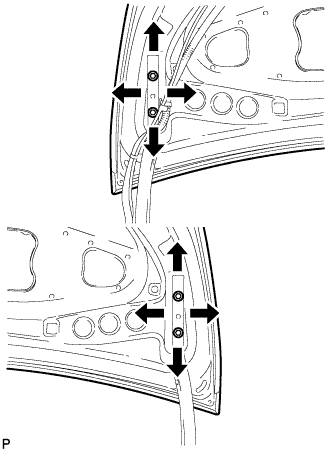 |
Loosen the door side hinge bolts to adjust the door horizontally and vertically.
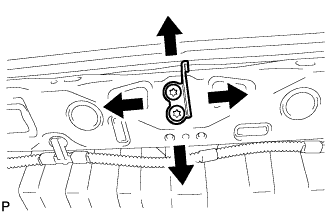 |
Using a T40 "TORX" socket wrench, slightly loosen the striker mounting screws.
Using a brass bar and a hammer, hit the striker to adjust its position.
Using a T40 "TORX" socket wrench, tighten the striker mounting screws after adjustment.