 |
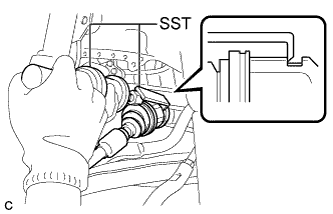
Using SST, remove the front drive shaft assembly LH.
- SST
- 09520-00031
09520-01010
- NOTICE:
- Do not damage the transaxle case oil seal.
- Do not damage the front axle inboard joint boot.
- Do not drop the front drive shaft assembly LH.
AUTOMATIC TRANSAXLE ASSEMBLY > REMOVAL |
| 1. REMOVE ENGINE ASSEMBLY WITH TRANSAXLE |
| 2. REMOVE FRONT DRIVE SHAFT ASSEMBLY LH |
|
Using SST, remove the front drive shaft assembly LH.
| 3. REMOVE FRONT DRIVE SHAFT HOLE SNAP RING LH |
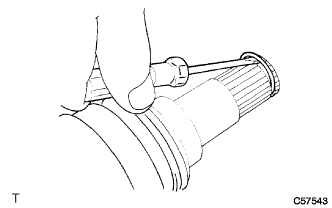 |
Using a screwdriver, remove the front drive shaft hole snap ring LH.
| 4. REMOVE FRONT DRIVE SHAFT ASSEMBLY RH |
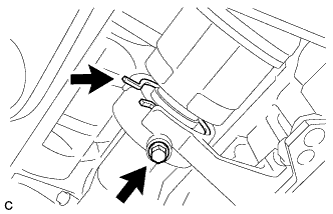 |
Separate the bearing bracket hole snap ring from the drive shaft bearing bracket.
Remove the bolt and front drive shaft assembly RH from the drive shaft bearing bracket.
Remove the bearing bracket hole snap ring from the front drive shaft assembly RH.
| 5. REMOVE FRONT FRAME ASSEMBLY |
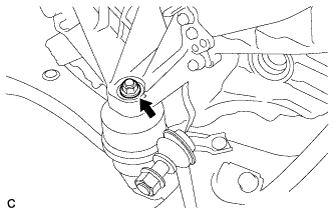 |
Remove the nut and separate the engine mounting insulator LH.
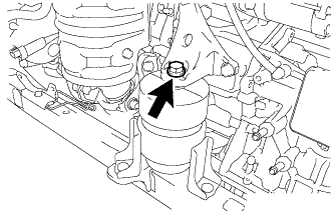 |
Remove the bolt and separate the front engine mounting insulator.
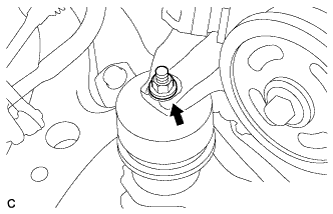 |
Remove the nut and separate the engine mounting insulator RH.
Remove the front frame assembly.
Using a height adjustable attachment and plate lift attachment, place the engine assembly on a flat level surface.
| 6. REMOVE WIRING HARNESS CONNECTOR |
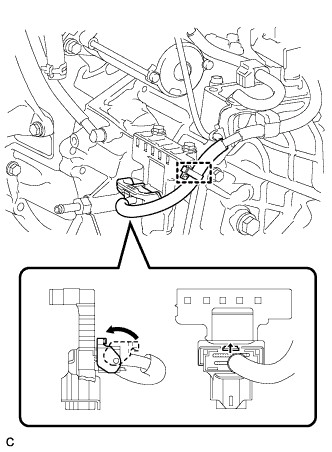 |
Disconnect the wire harness clamp.
Turn the lock lever and disconnect the connector from the wiring harness connector.
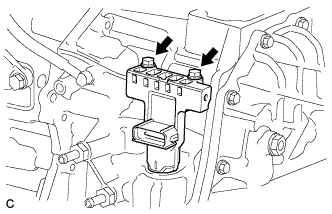 |
Remove the 2 bolts and wiring harness connector from the automatic transaxle assembly.
| 7. SEPARATE WIRE HARNESS |
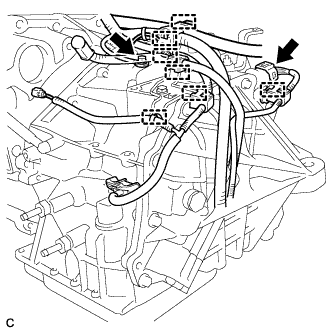 |
Remove the bolt and ground cable.
Separate the park/neutral position switch connector and 7 wire harness clamps.
| 8. REMOVE AUTOMATIC TRANSAXLE ASSEMBLY |
Using the transmission jack attachment, set the automatic transaxle assembly on a transmission jack.
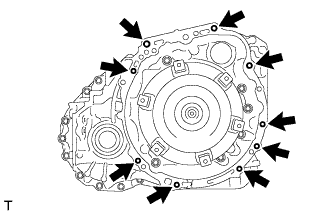 |
Remove the 9 bolts and automatic transaxle assembly.
| 9. REMOVE FRONT ENGINE MOUNTING BRACKET |
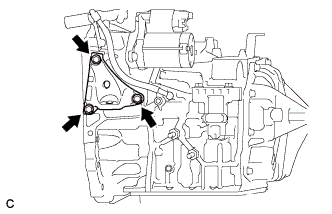 |
Remove the 3 bolts and front engine mounting bracket from the automatic transaxle assembly.
| 10. REMOVE TRANSMISSION BREATHER SKIRT |
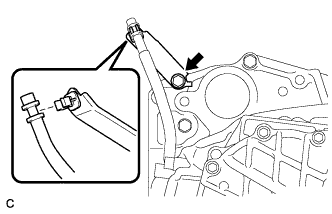 |
Disconnect the breather plug hose from the transmission breather skirt.
Remove the bolt and transmission breather skirt from the transaxle.
Remove the clamp from the transmission breather skirt.
| 11. REMOVE NO. 1 TRANSMISSION CONTROL CABLE BRACKET |
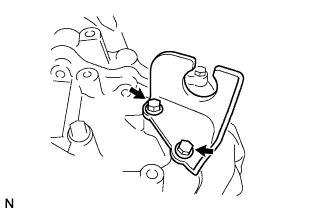 |
Remove the 2 bolts and No. 1 transmission control cable bracket from the automatic transaxle assembly.
| 12. REMOVE WIRE HARNESS CLAMP BRACKET |
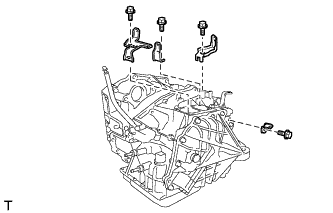 |
Remove the 4 bolts and 4 wire harness clamp brackets from the automatic transaxle assembly.
| 13. REMOVE TRANSMISSION CASE PLUG ASSEMBLY |
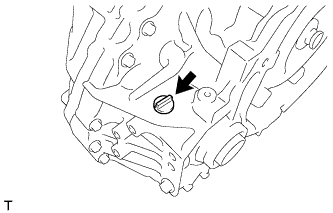 |
Remove the transmission case plug assembly from the automatic transaxle assembly.
Remove the O-ring from the transmission case plug assembly.
| 14. REMOVE TORQUE CONVERTER ASSEMBLY |
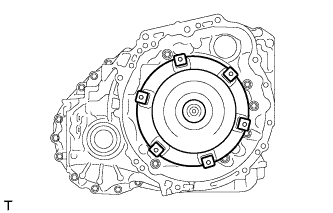 |
Remove the torque converter assembly from the automatic transaxle assembly.