 |
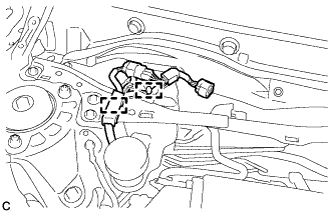
Disengage the 2 clamps and separate the wire harness from the front outer cowl top panel sub-assembly.
INTAKE MANIFOLD > REMOVAL |
| 1. PRECAUTION |
| 2. DISCHARGE FUEL SYSTEM PRESSURE |
| 3. DISCONNECT CABLE FROM NEGATIVE BATTERY TERMINAL |
| 4. REMOVE WINDSHIELD WIPER MOTOR AND LINK ASSEMBLY |
| 5. REMOVE FRONT OUTER COWL TOP PANEL SUB-ASSEMBLY (for RHD) |
|
Disengage the 2 clamps and separate the wire harness from the front outer cowl top panel sub-assembly.
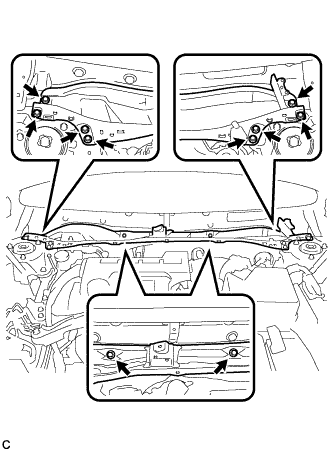 |
Remove the 10 bolts and front outer cowl top panel sub-assembly.
| 6. REMOVE FRONT OUTER COWL TOP PANEL SUB-ASSEMBLY (for LHD) |
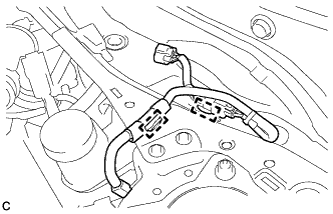 |
Disengage the 2 clamps and separate the wire harness from the front outer cowl top panel sub-assembly.
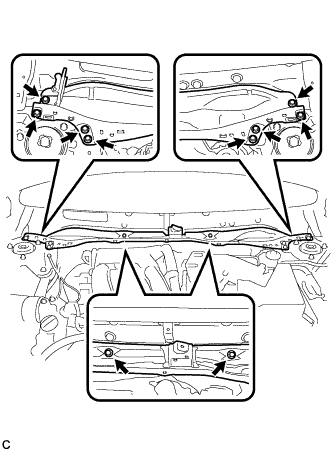 |
Remove the 10 bolts and front outer cowl top panel sub-assembly.
| 7. REMOVE THROTTLE WITH MOTOR BODY ASSEMBLY |
| 8. REMOVE VACUUM SWITCHING VALVE ASSEMBLY (for ACIS) |
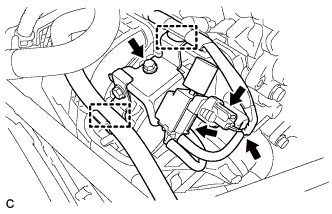 |
Disconnect the union to connector tube hose and wire harness clamp.
Disconnect the 2 vacuum hoses and connector.
Remove the bolt and vacuum switching valve assembly.
| 9. DISCONNECT NO. 2 VENTILATION HOSE |
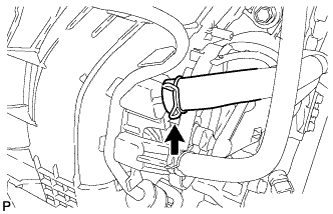 |
Disconnect the No. 2 ventilation hose from the intake manifold.
| 10. DISCONNECT UNION TO CONNECTOR TUBE HOSE |
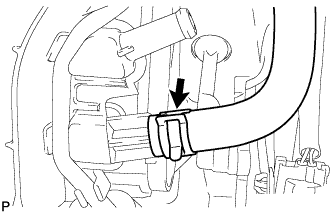 |
Disconnect the union to connector tube hose from the intake manifold.
| 11. DISCONNECT FUEL TUBE SUB-ASSEMBLY |
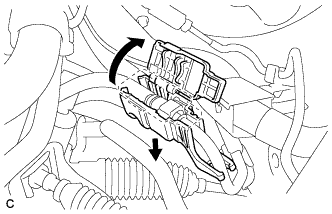 |
Remove the No. 1 fuel pipe clamp.
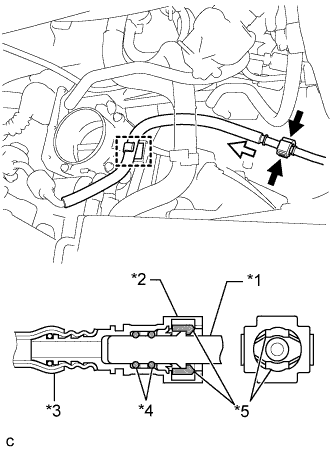 |
Pinch the retainer of the fuel tube connector, and then pull the fuel tube connector off of the fuel pipe.
| *1 | Fuel Pipe |
| *2 | Fuel Tube Connector |
| *3 | Nylon Tube |
| *4 | O-ring |
| *5 | Retainer |
 | Pinch |
 | Pull |
Remove the fuel tube sub-assembly from the fuel hose clamp.
| 12. REMOVE FUEL DELIVERY PIPE SUB-ASSEMBLY |
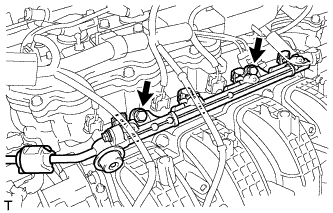 |
Remove the 2 bolts, and then remove the fuel delivery pipe together with the 4 fuel injectors.
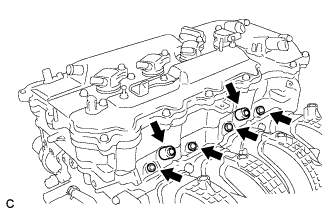 |
Remove the 2 fuel delivery spacers from the cylinder head.
Remove the 4 injector vibration insulators from the cylinder head.
| 13. REMOVE INTAKE MANIFOLD |
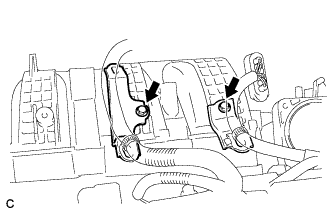 |
Remove the 2 bolts and 2 wire harness clamp brackets.
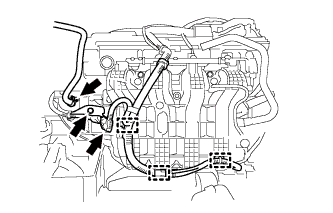 |
Disconnect the fuel vapor feed hose.
Disconnect the 3 wire harness clamps and connector.
Remove the bolt and wire harness clamp bracket.
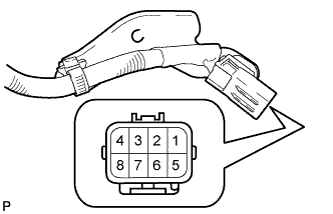 |
Apply battery voltage to the terminals of the connector to close the tumble control valves (w/ TCV).
| Tester Connection | Specified Condition |
| Positive (+) battery voltage applied to terminal 8 (M-), and negative (-) battery voltage applied to terminal 4 (M+) | Open → Closed |
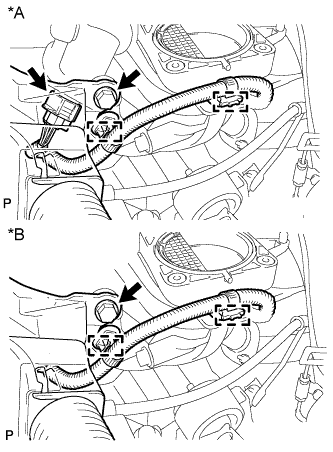 |
Remove the bolt and separate the wire harness.
Disconnect the 2 wire harness clamps and intake air control valve actuator connector (w/ TCV).
Disconnect the 2 wire harness clamps (w/o TCV).
| *A | w/ TCV |
| *B | w/o TCV |
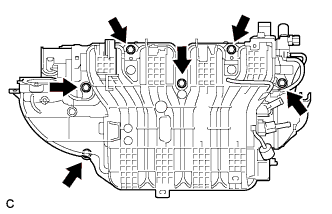 |
Remove the 6 bolts and intake manifold (w/ TCV).
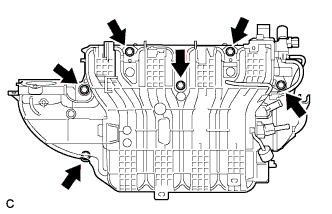 |
Remove the 6 bolts and intake manifold (w/o TCV).
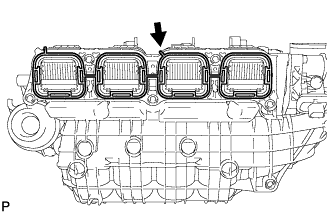 |
Remove the intake manifold gasket from the intake manifold (w/ TCV).
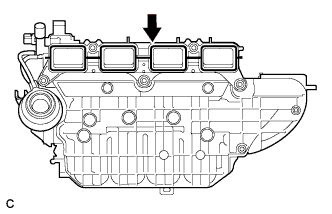 |
Remove the intake manifold gasket from the intake manifold (w/o TCV).
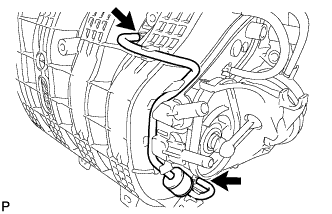 |
Disconnect the 2 vacuum hoses from the intake manifold and remove the No. 1 check valve.
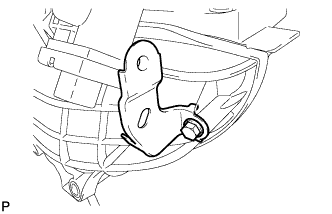 |
Remove the bolt and wire harness clamp bracket.