 |
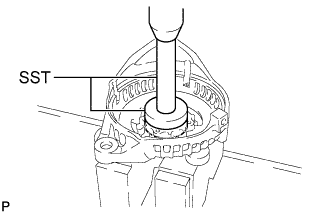
Using SST and a press, press in a new bearing.
- SST
- 09950-60010
(09951-00520)
09950-70010 (09951-07100)
GENERATOR > REASSEMBLY |
| 1. INSTALL GENERATOR DRIVE END FRAME BEARING |
|
Using SST and a press, press in a new bearing.
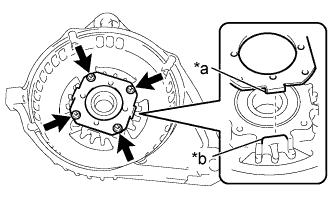 |
Fit the tabs on the bearing retainer into the cutouts on the drive end frame to install the bearing retainer.
| *a | Tab |
| *b | Cutout |
Install the 4 screws.
| 2. INSTALL GENERATOR ROTOR ASSEMBLY |
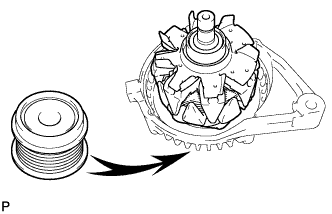 |
Place the generator drive end frame on the generator pulley.
Install the generator rotor to the generator drive end frame.
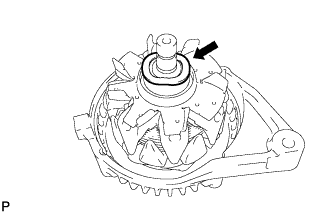 |
Place a new generator washer on the generator rotor.
| 3. INSTALL GENERATOR COIL ASSEMBLY |
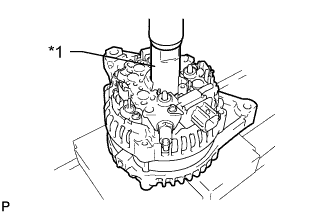 |
Using a 21 mm socket wrench and a press, slowly press in the generator coil.
| *1 | Deep Socket Wrench (21 mm) |
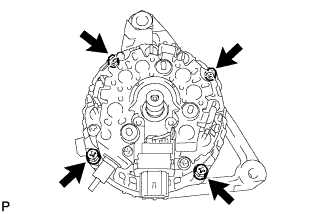 |
Install the 4 bolts.
| 4. INSTALL GENERATOR BRUSH HOLDER ASSEMBLY |
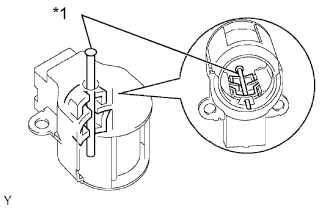 |
While pushing the 2 brushes into the generator brush holder, insert a 1.0 mm (0.0394 in.) pin into the generator brush holder.
| *1 | Pin |
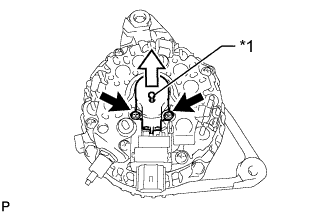 |
Install the generator brush holder with the 2 screws.
| *1 | Pin |
Pull the pin out of the generator brush holder.
| 5. INSTALL GENERATOR REAR END COVER |
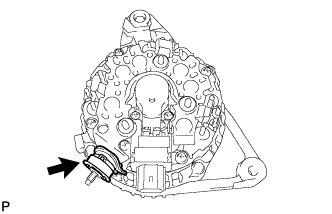 |
Install the terminal insulator onto the generator coil assembly.
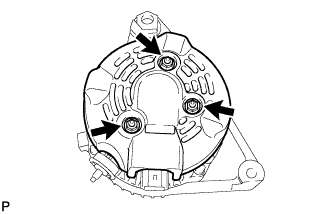 |
Install the generator rear end cover with the 3 nuts.
| 6. INSTALL GENERATOR PULLEY WITH CLUTCH |
Temporarily install the generator pulley by hand.
Mount the generator in a vise.
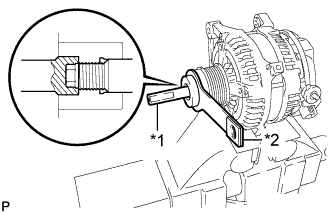 |
Install SST (A) and (B) to the generator pulley as shown in the illustration.
| *1 | SST (A) |
| *2 | SST (B) |
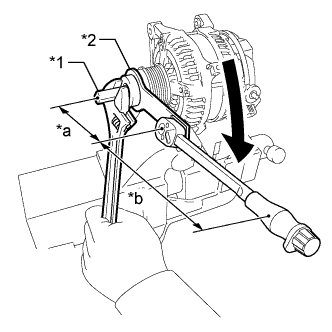 |
Using a wrench to hold SST (A), turn SST (B) clockwise to tighten the generator pulley.
| *1 | SST (A) |
| *2 | SST (B) |
| *a | Fulcrum Length 100 mm (3.94 in.) |
| *b | Fulcrum Length 255 mm (10.04 in.) |
Check that the generator pulley rotates smoothly.
| 7. INSTALL GENERATOR PULLEY CAP |
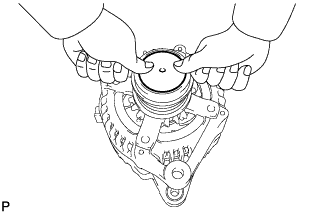 |
Install a new generator pulley cap to the pulley.