 |
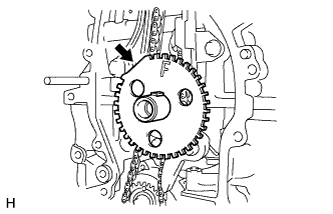
Remove the No. 1 crankshaft position sensor plate.
CYLINDER HEAD GASKET > REMOVAL |
| 1. REMOVE TIMING CHAIN COVER SUB-ASSEMBLY |
| 2. REMOVE NO. 1 CRANKSHAFT POSITION SENSOR PLATE |
|
Remove the No. 1 crankshaft position sensor plate.
| 3. REMOVE TIMING CHAIN GUIDE |
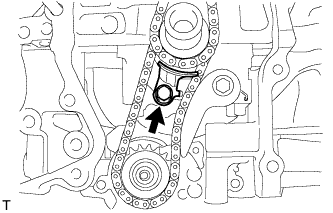 |
Remove the bolt and timing chain guide.
| 4. REMOVE CHAIN TENSIONER SLIPPER |
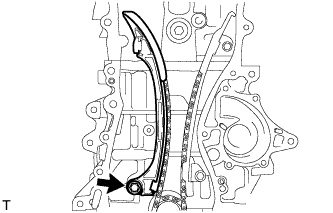 |
Remove the bolt and chain tensioner slipper.
| 5. REMOVE NO. 1 CHAIN VIBRATION DAMPER |
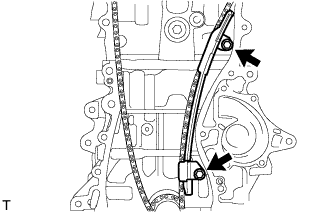 |
Remove the 2 bolts and No. 1 chain vibration damper.
| 6. REMOVE CHAIN SUB-ASSEMBLY |
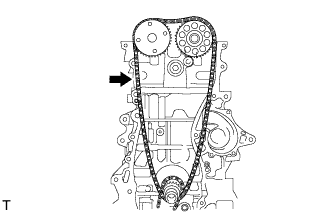 |
Remove the chain sub-assembly.
| 7. REMOVE NO. 2 CAMSHAFT |
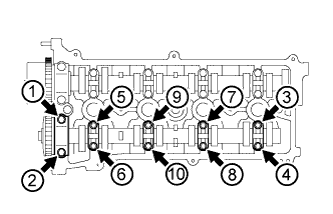 |
Using several steps, uniformly remove the 10 bolts in the order shown in the illustration.
Remove the 5 camshaft bearing caps and No. 2 camshaft.
| 8. REMOVE CAMSHAFT |
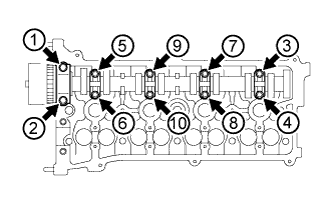 |
Using several steps, uniformly remove the 10 bolts in the order shown in the illustration.
Remove the 5 camshaft bearing caps and camshaft.
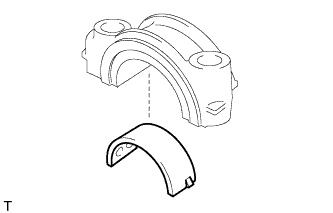 |
Remove the No. 1 camshaft bearing from the No. 1 camshaft bearing cap.
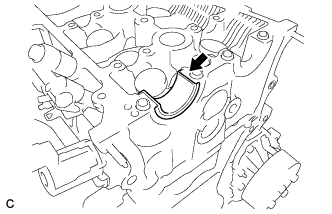 |
Remove the No. 2 camshaft bearing from the cylinder head sub-assembly.
| 9. DISCONNECT ENGINE WIRE |
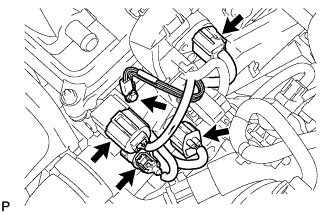 |
Remove the bolt and disconnect the earth wire.
Disconnect the 4 connectors.
| 10. REMOVE THROTTLE WITH MOTOR BODY ASSEMBLY |
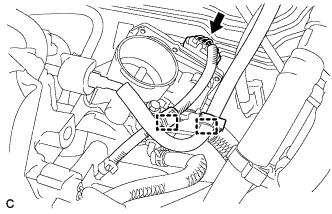 |
Disconnect the wire harness clamp and the throttle with motor body assembly connector.
Separate the fuel tube from the fuel tube bracket.
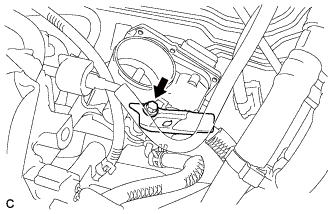 |
Remove the bolt and fuel tube bracket.
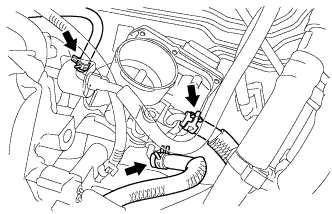 |
Disconnect the 2 water by-pass hoses.
Disconnect the purge line hose.
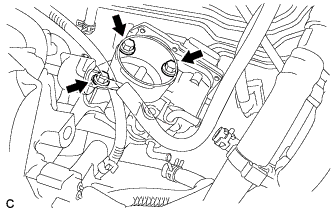 |
Remove the 3 bolts and the throttle with motor body assembly.
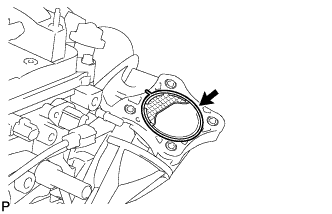 |
Remove the gasket from the intake manifold.
| 11. REMOVE INTAKE MANIFOLD |
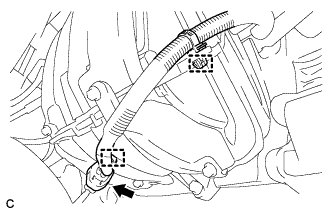 |
Disconnect the oxygen sensor connector and 2 wire harness clamps.
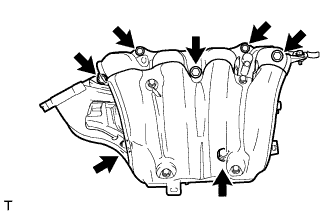 |
Remove the 5 bolts and 2 nuts, and separate the intake manifold.
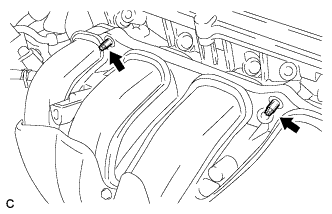 |
Using an E7 "TORX" wrench, remove the 2 stud bolts.
Remove the intake manifold.
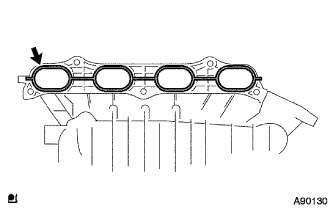 |
Remove the No. 1 intake manifold to head gasket from the intake manifold.
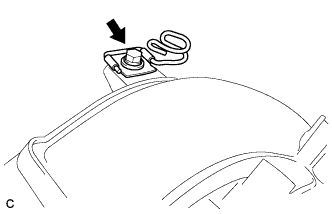 |
Remove the bolt and vacuum hose clamp.
| 12. REMOVE NO. 1 INTAKE MANIFOLD INSULATOR |
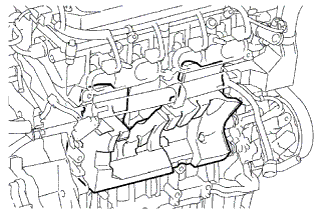 |
Remove the No. 1 intake manifold insulator from the cylinder block.
| 13. REMOVE NO. 1 EXHAUST MANIFOLD HEAT INSULATOR |
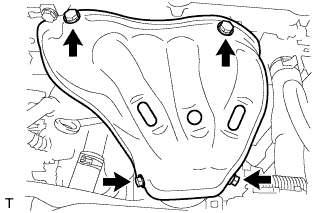 |
Remove the 4 bolts and No. 1 exhaust manifold heat insulator.
| 14. REMOVE MANIFOLD STAY |
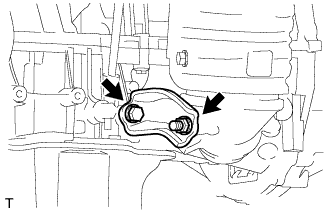 |
Remove the bolt, nut and manifold stay.
| 15. REMOVE NO. 2 MANIFOLD STAY |
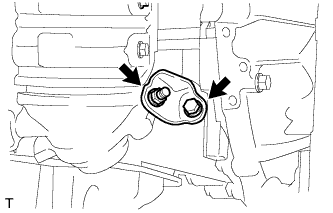 |
Remove the bolt, nut and No. 2 manifold stay.
| 16. REMOVE EXHAUST MANIFOLD CONVERTER SUB-ASSEMBLY |
Disconnect the air fuel ratio sensor connector.
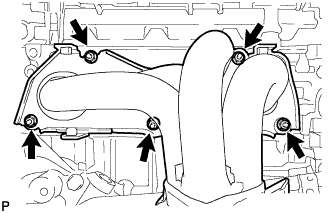 |
Using a 12 mm deep socket wrench, remove the 5 nuts and exhaust manifold converter sub-assembly.
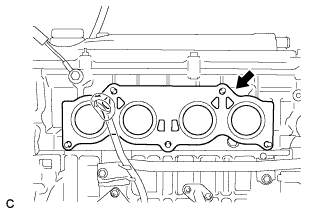 |
Remove the exhaust manifold to head gasket.
| 17. REMOVE CYLINDER HEAD SUB-ASSEMBLY |
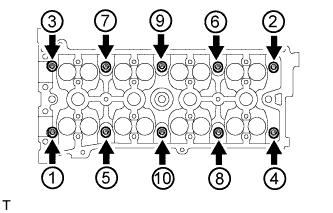 |
Using a 10 mm bi-hexagon wrench, uniformly loosen the 10 cylinder head set bolts in the order shown in the illustration.
Remove the 10 cylinder head set bolts and 10 plate washers.
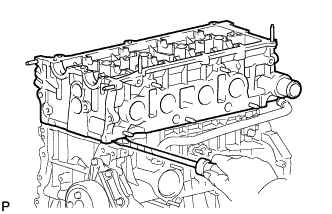 |
Using a screwdriver with its tip wrapped with tape, pry between the cylinder head sub-assembly and cylinder block, and remove the cylinder head sub-assembly.
| 18. REMOVE CYLINDER HEAD GASKET |
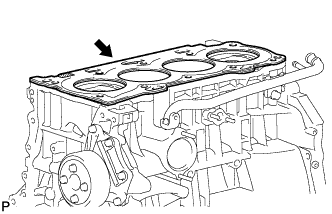 |
Remove the cylinder head gasket.