 |
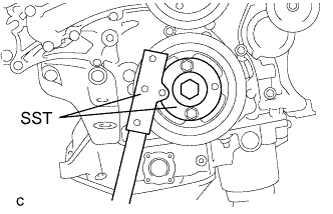
Using SST, hold the crankshaft pulley.
- SST
- 09213-70011
(09213-70020)
09330-00021
OIL PUMP > REMOVAL |
| 1. REMOVE AUTOMATIC TRANSAXLE ASSEMBLY |
| 2. REMOVE DRIVE PLATE AND RING GEAR SUB-ASSEMBLY |
|
Using SST, hold the crankshaft pulley.
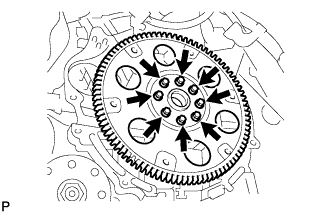 |
Remove the 8 bolts, front drive plate spacer, drive plate and ring gear sub-assembly and rear drive plate spacer.
| 3. INSTALL ENGINE ON ENGINE STAND |
Install the engine onto an engine stand with the bolts.
| 4. REMOVE ENGINE HANGERS |
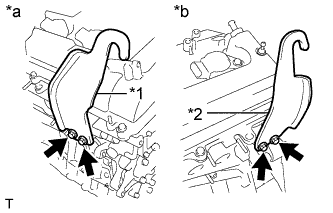 |
Remove the 4 bolts and 2 engine hangers.
| *1 | No. 1 engine hanger |
| *2 | No. 2 engine hanger |
| *a | Bank 1 |
| *b | Bank 2 |
| 5. REMOVE INTAKE AIR SURGE TANK ASSEMBLY |
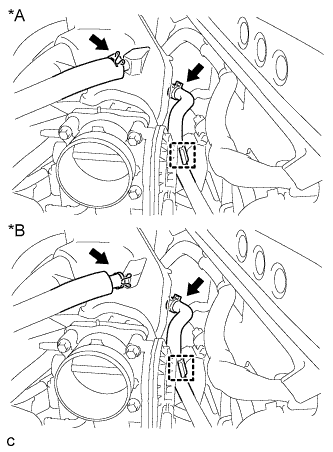 |
Disconnect the ventilation hose.
| *A | Type A |
| *B | Type B |
Disconnect the hose clamp and union to check valve hose.
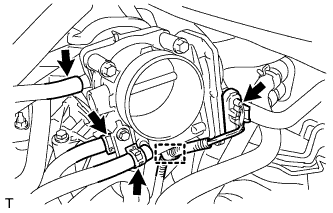 |
Disconnect the connector and wire harness clamp.
Disconnect the 2 water by-pass hoses and fuel vapor feed hose.
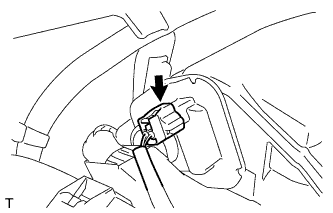 |
Disconnect the connector from the intake air control valve assembly.
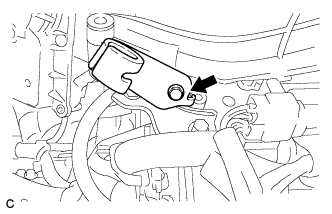 |
Remove the bolt and vacuum hose clamp.
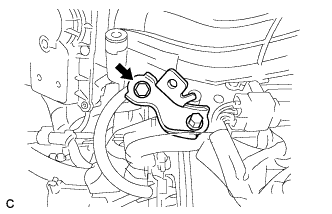 |
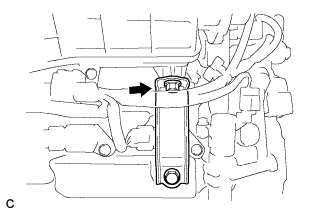
Remove the bolt and separate the throttle body bracket from the intake air surge tank assembly.
 |
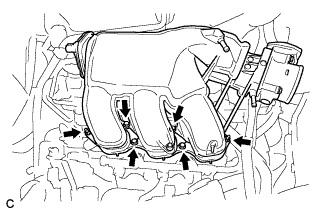
Remove the bolt and separate the No. 1 surge tank stay from the intake air surge tank assembly.
 |
Remove the 2 nuts from the intake air surge tank assembly.
Using a 5 mm socket hexagon wrench, remove the 4 bolts.
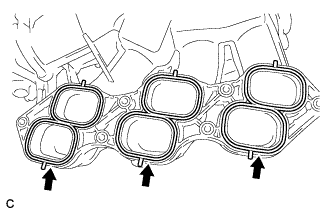 |
Remove the intake air surge tank assembly and 3 gaskets.
| 6. REMOVE NO. 1 SURGE TANK STAY |
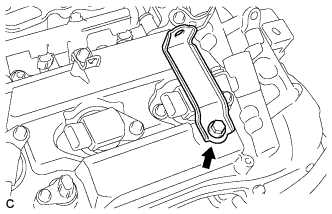 |
Remove the bolt and No. 1 surge tank stay.
| 7. REMOVE THROTTLE BODY BRACKET |
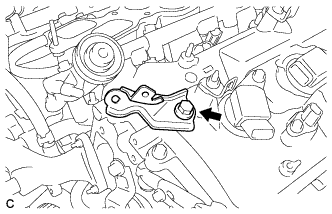 |
Remove the bolt and throttle body bracket.
| 8. REMOVE IGNITION COIL ASSEMBLY |
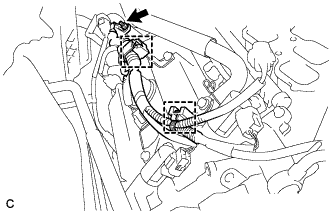 |
Remove the nut.
Disconnect the 2 harness clamps.
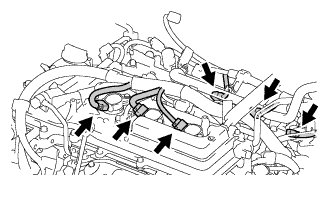 |
Disconnect the 6 ignition coil connectors.
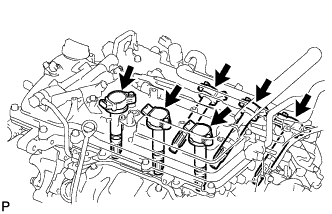 |
Remove the 6 bolts and 6 ignition coils.
| 9. REMOVE EXHAUST MANIFOLD SUB-ASSEMBLY RH |
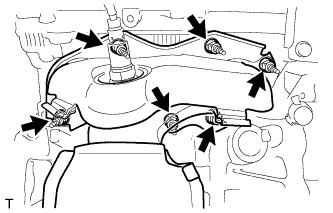 |
Uniformly loosen and remove the 6 nuts.
Remove the exhaust manifold sub-assembly RH and gasket.
| 10. REMOVE NO. 2 ENGINE OIL LEVEL DIPSTICK GUIDE |
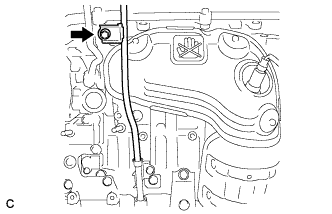 |
Remove the oil level dipstick.
Remove the bolt and No. 2 engine oil level dipstick guide.
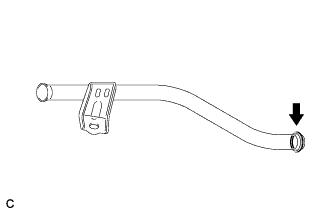 |
Remove the O-ring from the No. 2 engine oil level dipstick guide.
| 11. REMOVE NO. 2 MANIFOLD STAY |
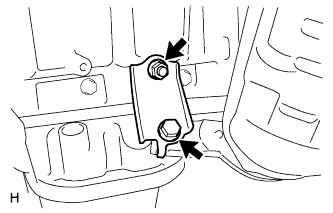 |
Remove the bolt, nut and No. 2 manifold stay.
| 12. REMOVE NO. 2 EXHAUST MANIFOLD HEAT INSULATOR |
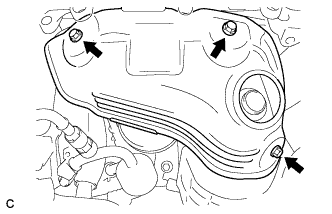 |
Remove the 3 bolts and No. 2 exhaust manifold heat insulator.
| 13. REMOVE EXHAUST MANIFOLD SUB-ASSEMBLY LH |
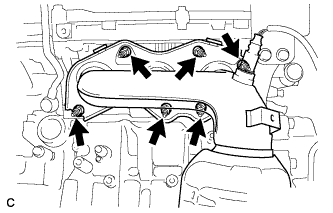 |
Uniformly loosen and remove the 6 nuts.
Remove the exhaust manifold assembly LH and gasket.
| 14. REMOVE V-RIBBED BELT TENSIONER ASSEMBLY |
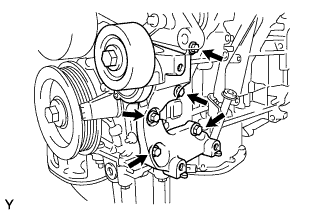 |
Remove the 5 bolts and V-ribbed belt tensioner assembly.
| 15. REMOVE ENGINE OIL LEVEL DIPSTICK GUIDE |
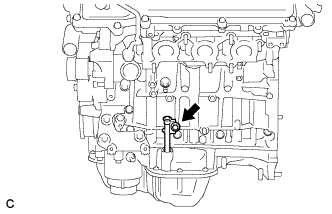 |
Remove the bolt and engine oil level dipstick guide.
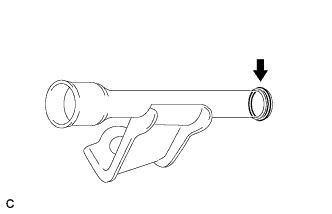 |
Remove the O-ring.
| 16. REMOVE NO. 2 TIMING GEAR COVER |
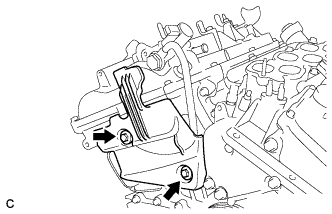 |
Remove the 2 bolts and No. 2 timing gear cover.
| 17. REMOVE WATER PUMP PULLEY |
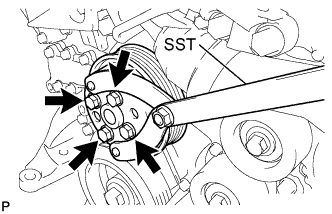 |
Using SST, hold the water pump pulley.
Remove the 4 bolts and water pump pulley.
| 18. REMOVE NO. 2 IDLER PULLEY SUB-ASSEMBLY |
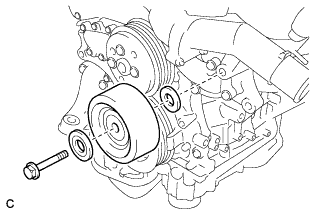 |
Remove the bolt, No. 2 idler pulley cover plate, No. 2 idler pulley sub-assembly and idler pulley cover plate.
| 19. REMOVE NO. 1 VACUUM SWITCHING VALVE |
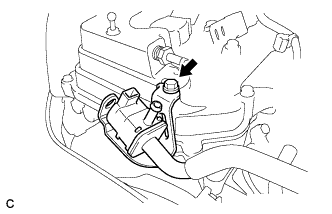 |
Remove the bolt and No. 1 vacuum switching valve.
| 20. REMOVE CRANK POSITION SENSOR |
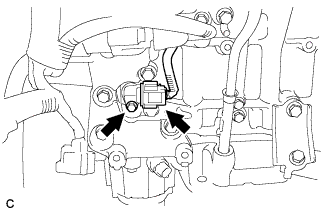 |
Disconnect the crank position sensor connector.
Remove the bolt and crank position sensor.
| 21. REMOVE NO. 1 OIL PIPE |
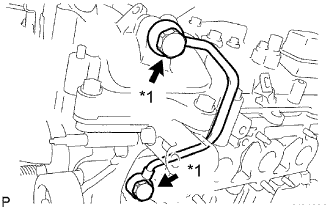 |
Remove the 2 oil pipe unions, gaskets and No. 1 oil pipe.
| *1 | Oil Pipe Union |
Remove the oil control valve filter LH and gaskets.
| 22. REMOVE OIL PIPE |
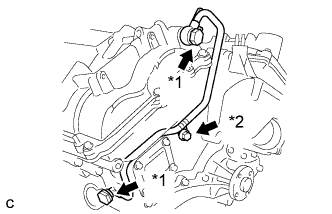 |
Remove the bolt.
| *1 | Oil Pipe Union |
| *2 | Bolt |
Remove the 2 oil pipe unions and oil pipe.
Remove the oil control valve filter RH and gaskets.
| 23. REMOVE CRANKSHAFT PULLEY |
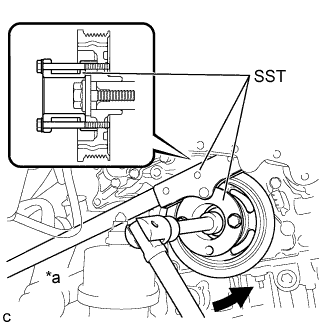 |
Using SST, loosen the crankshaft pulley bolt.
| *a | Hold |
 | Turn |
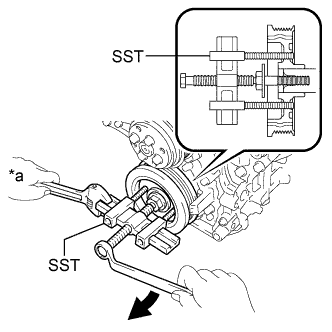 |
Using SST, remove the crankshaft pulley bolt and crankshaft pulley.
| *a | Hold |
| Turn |
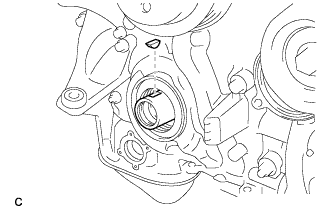 |
Remove the pulley set key from the crankshaft.
| 24. REMOVE NO. 1 FRONT ENGINE MOUNTING BRACKET LH |
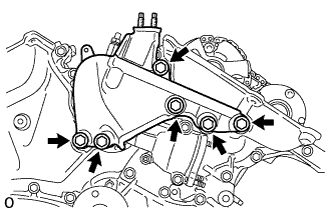 |
Remove the 6 bolts and No. 1 front engine mounting bracket LH.
Using an E8 "TORX" socket wrench, remove the 2 stud bolts.
| 25. REMOVE WATER INLET HOUSING |
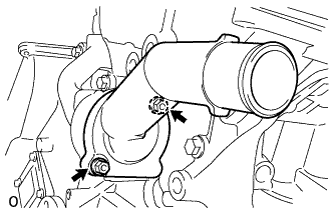 |
Remove the 2 nuts, water inlet and thermostat.
Remove the gasket.
Remove the 2 stud bolts.
Separate the No. 1 water by-pass hose from the water inlet housing.
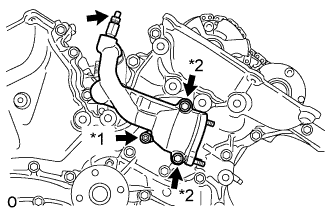 |
Remove the drain cock plug.
| *1 | Nut |
| *2 | Bolt |
Remove the drain cock assembly.
Remove the 2 bolts, nut, and water inlet housing.
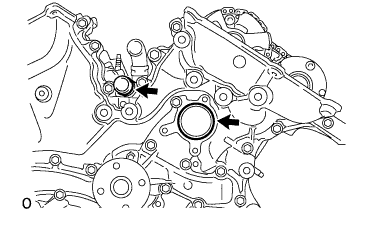 |
Remove the 2 O-rings.
| 26. REMOVE CYLINDER HEAD COVER SUB-ASSEMBLY |
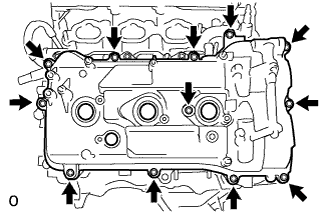 |
Remove the 12 bolts, seal washer, cylinder head cover sub-assembly and cylinder head cover gasket.
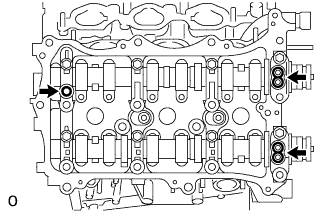 |
Remove the 3 gaskets.
| 27. REMOVE CYLINDER HEAD COVER SUB-ASSEMBLY LH |
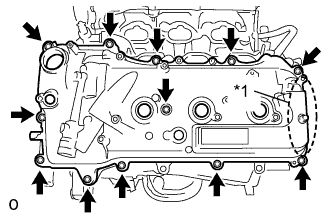 |
Remove the 12 bolts, seal washer, cylinder head cover sub-assembly LH and No. 2 cylinder head cover gasket.
| *1 | Baffle Plate |
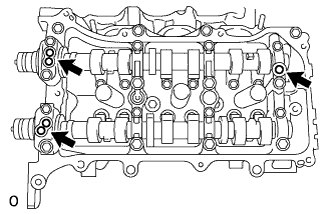 |
Remove the 3 gaskets.
| 28. REMOVE NO. 2 OIL PAN SUB-ASSEMBLY |
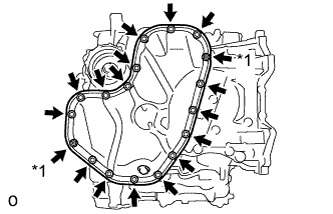 |
Remove the 16 bolts and 2 nuts.
| *1 | Nut |
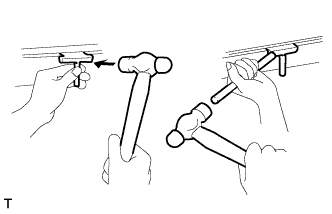 |
Insert the blade of the oil pan seal cutter between the oil pans. Cut through the applied sealer and remove the No. 2 oil pan sub-assembly.
Using an E6 "TORX" socket wrench, remove the 2 stud bolts.
| 29. REMOVE OIL STRAINER SUB-ASSEMBLY |
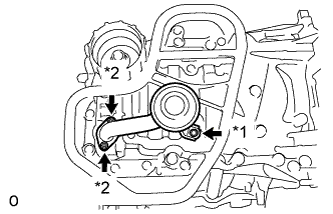 |
Remove the bolt, 2 nuts, oil strainer sub-assembly and gasket.
| *1 | Bolt |
| *2 | Nut |
Using an E6 "TORX" socket wrench, remove the 2 stud bolts.
| 30. REMOVE OIL PAN SUB-ASSEMBLY |
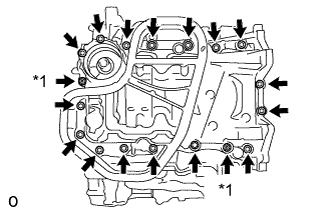 |
Remove the 16 bolts and 2 nuts.
| *1 | Nut |
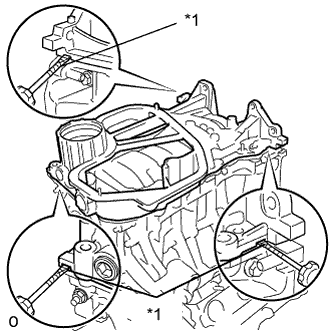 |
Remove the oil pan sub-assembly by prying between the oil pan sub-assembly and cylinder block sub-assembly with a screwdriver.
| *1 | Protective Tape |
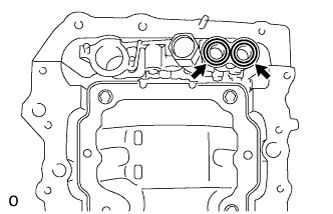 |
Remove the 2 O-rings.
Using an E8 "TORX" socket wrench, remove the 2 stud bolts.
| 31. REMOVE TIMING CHAIN COVER SUB-ASSEMBLY |
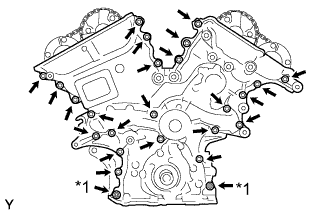 |
Remove the 23 bolts and 2 nuts shown in the illustration.
| *1 | Nut |
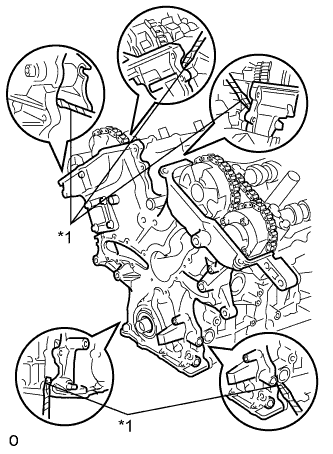 |
Remove the timing chain cover by prying between the timing chain cover and cylinder head or cylinder block with a screwdriver.
| *1 | Protective Tape |
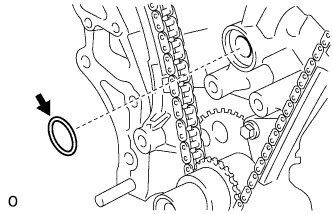 |
Remove the gasket.
| 32. REMOVE TIMING CHAIN CASE OIL SEAL |
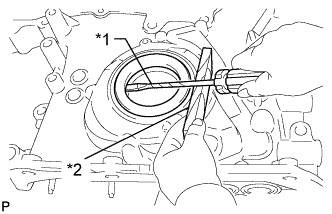 |
Using a screwdriver and wooden block, pry out the oil seal.
| *1 | Protective Tape |
| *2 | Wooden Block |