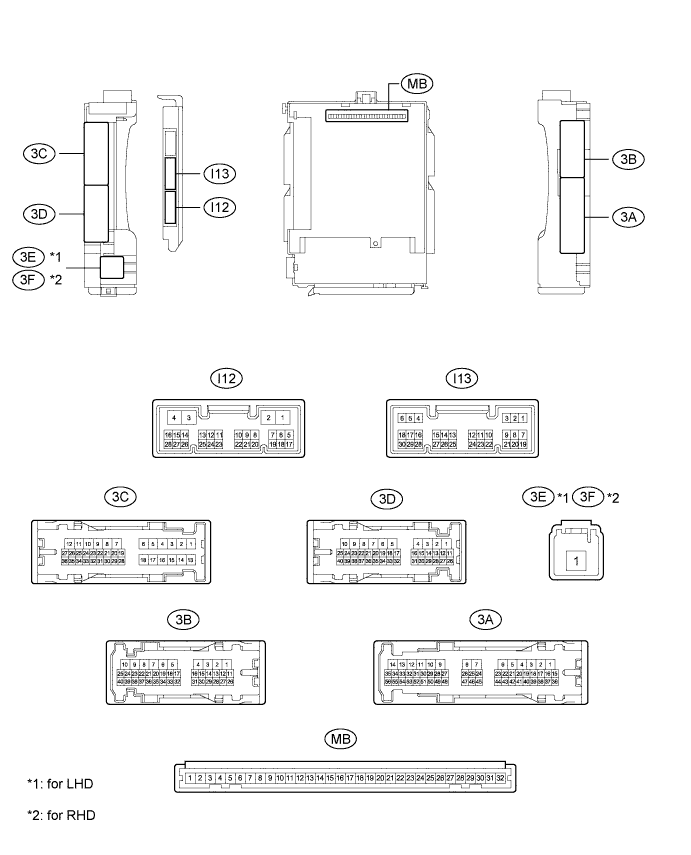
Disconnect the T6 connector from the rear television camera assembly.

Measure the voltage of each terminal of the wire harness side connector.
| Terminal No. (Symbol) | Wiring Color | Terminal Description | Condition | Specified Condition |
| T6-6 (CB+) - Body ground | B - Body ground | Power source | Engine switch on (IG) Shift lever in R | 5.5 to 7.05 V |
Measure the resistance according to the value(s) in the table below.
| Terminal No. (Symbol) | Wiring Color | Terminal Description | Condition | Specified Condition |
| T6-1 (CURT) - Body ground | BR - Body ground | Ground | Always | 10 kΩ or higher |
Reconnect the T6 connector to the rear television camera assembly.
Check for pulses between each terminal of the connector.
| Terminal No. (Symbol) | Wiring Color | Terminal Description | Condition | Specified Condition |
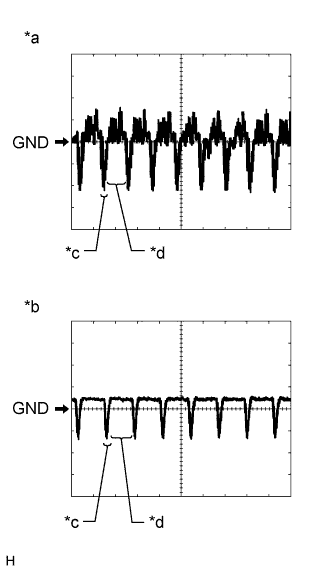
| T6-3 (CV+) - T6-2 (CV-) | W - R | Video signal | Engine switch on (IG) Shift lever in R Camera lens not covered, displaying an image | Pulse generation (See waveform 1) |
| Engine switch on (IG) Shift lever in R Camera lens covered, blacking out screen | Pulse generation (See waveform 2) |
- HINT:
- A waterproof connector is used for the rear television camera assembly. Therefore, inspect the waveform at the navigation ECU sub-assembly with the connector connected.
 |
Reference (Oscilloscope waveform):
- HINT:
- A waterproof connector is used for the rear television camera assembly. Therefore, inspect the waveform at the navigation ECU sub-assembly with the connector connected.
Waveform 1 (camera lens is not covered, displaying an image)
Item Content Terminal No. (Symbol) T6-3 (CV+) - T6-2 (CV-) Tool Setting 200 mV/DIV., 50 μsec./DIV. Condition Engine switch on (IG), shift lever in R - HINT:
- The video waveform changes according to the image sent by the rear television camera assembly.
Waveform 2 (camera lens is covered, blacking out the screen)
Item Content Terminal No. (Symbol) T6-3 (CV+) - T6-2 (CV-) Tool Setting 200 mV/DIV., 50 μsec./DIV. Condition Engine switch on (IG), shift lever in R - HINT:
- The video waveform changes according to the image sent by the rear television camera assembly.
Text in Illustration *a Waveform 1 (camera lens not covered, displaying an image) *b Waveform 2 (camera lens covered, blacking out the screen) *c Synchronization Signal *d Video Waveform