 |
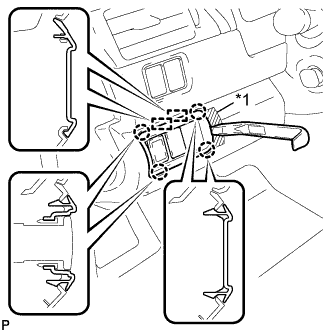
Apply protective tape to the areas shown in the illustration.
| *1 | Protective Tape |
HEADLIGHT CLEANER SWITCH > REMOVAL |
| 1. REMOVE NO. 1 SWITCH HOLE BASE |
|
Apply protective tape to the areas shown in the illustration.
| *1 | Protective Tape |
Using a moulding remover, disengage the 4 claws and 2 guides as shown in the illustration.
Disconnect the connector and remove the No. 1 switch hole base.
| 2. REMOVE HEADLIGHT CLEANER SWITCH ASSEMBLY |
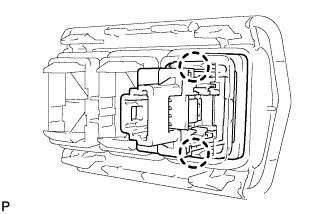 |
Disengage the 2 claws and remove the headlight cleaner switch assembly.