 |
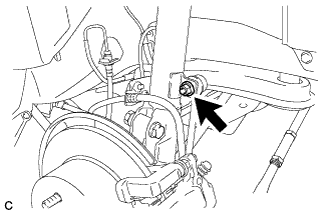
Remove the nut and separate the rear stabilizer link assembly from the rear shock absorber with coil spring.
If the ball joint turns together with the nut, use a hexagon wrench to hold the stud.
REAR SHOCK ABSORBER > REMOVAL |
| 1. REMOVE REAR SIDE SEATBACK ASSEMBLY |
| 2. REMOVE REAR WHEEL |
| 3. SEPARATE REAR STABILIZER LINK ASSEMBLY |
|
Remove the nut and separate the rear stabilizer link assembly from the rear shock absorber with coil spring.
If the ball joint turns together with the nut, use a hexagon wrench to hold the stud.
| 4. SEPARATE SKID CONTROL SENSOR WIRE |
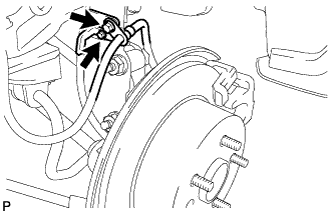 |
Remove the 2 bolts, and disconnect the rear flexible hose and skid control sensor wire from the rear shock absorber with coil spring.
| 5. REMOVE REAR NO. 1 SUSPENSION SUPPORT COVER |
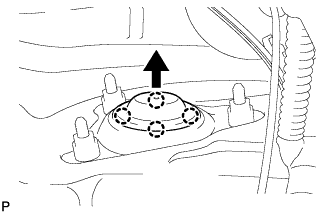 |
Using a screwdriver, disengage the 4 claws and remove the rear No. 1 suspension support cover.
| 6. REMOVE REAR SHOCK ABSORBER WITH COIL SPRING |
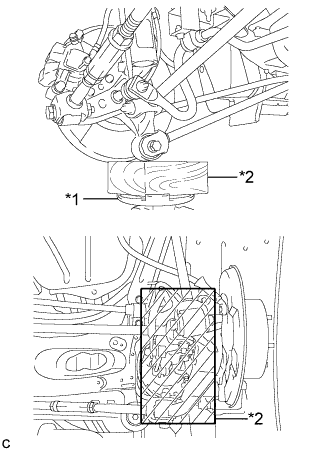 |
Support the rear axle carrier sub-assembly with a jack using a wooden block.
| *1 | Jack |
| *2 | Wooden Block |
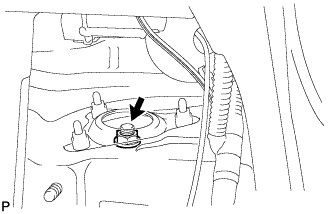 |
Loosen the rear support to rear shock absorber nut of the rear shock absorber with coil spring.
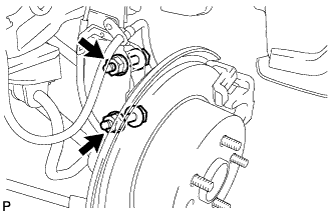 |
Remove the 2 bolts and 2 nuts, and separate the rear shock absorber with coil spring from the rear axle carrier sub-assembly.
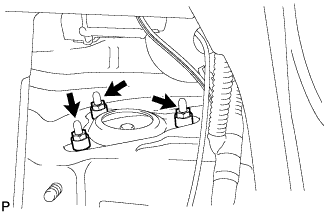 |
Remove the 3 nuts and rear shock absorber with coil spring.
| 7. SECURE REAR SHOCK ABSORBER WITH COIL SPRING |
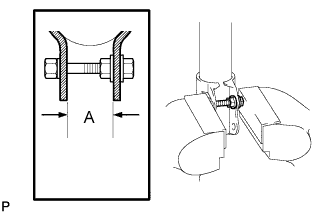 |
Install the bolt and nut to the rear shock absorber assembly as shown in the illustration and secure the rear shock absorber assembly in a vise using aluminum plates.
| 8. REMOVE REAR SUPPORT TO REAR SHOCK ABSORBER NUT |
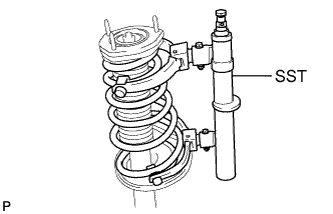 |
Using SST, compress the rear coil spring.
Remove the rear support to rear shock absorber nut to the rear shock absorber assembly.
| 9. REMOVE REAR SUPPORT TO REAR SHOCK ABSORBER COLLAR |
| 10. REMOVE REAR SUSPENSION SUPPORT ASSEMBLY |
| 11. REMOVE REAR COIL SPRING |
| 12. REMOVE REAR NO. 1 SPRING BUMPER |
| 13. REMOVE REAR LOWER COIL SPRING INSULATOR |
| 14. REMOVE REAR SHOCK ABSORBER ASSEMBLY |