VALVE BODY ASSEMBLY > INSTALLATION |
| 1. INSTALL MANUAL VALVE |
Coat the manual valve with ATF and install it to the valve body.
| 2. INSTALL TRANSMISSION VALVE BODY ASSEMBLY |
Coat the O-ring of the transmission wire with ATF.
![]() |
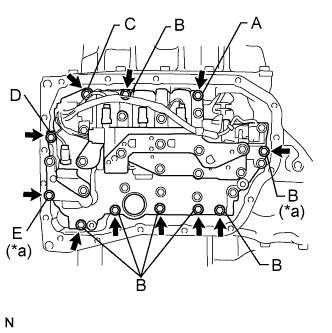
Confirm that the manual valve lever is positioned as shown in the illustration and install the valve body assembly to the transaxle case with the 11 bolts.
| *a | Positioning Bolt |
| 3. INSTALL VALVE BODY OIL STRAINER ASSEMBLY |
Coat a new O-ring with ATF and install it to the oil strainer.
Install the oil strainer to the valve body with the 2 bolts.
| 4. INSTALL AUTOMATIC TRANSAXLE OIL PAN SUB-ASSEMBLY |
![]() |
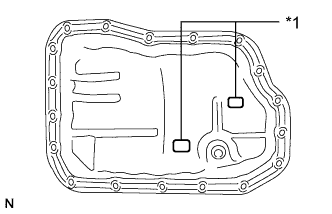
Install the 2 magnets onto the automatic transaxle oil pan as shown in the illustration.
| *1 | Magnet |
Install a new gasket to the oil pan.
![]() |
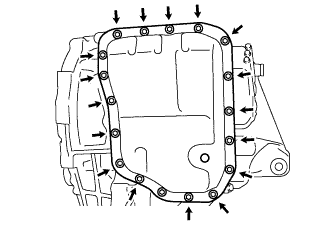
Install the oil pan to the automatic transaxle with the 17 bolts.
![]() |
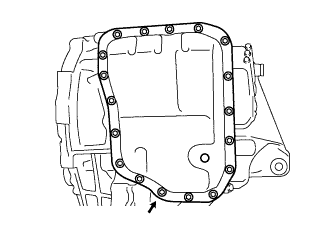
Clean and degrease the bolt and the installation hole in the automatic transaxle.
Apply adhesive to the bolt.
Install the bolt.
| 5. INSTALL TORQUE CONVERTER ASSEMBLY |
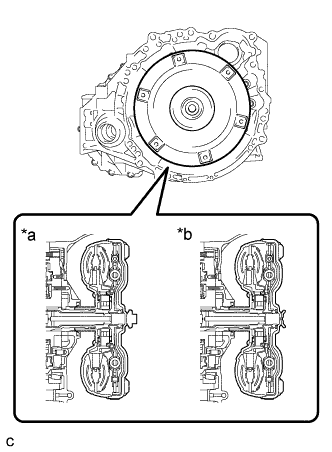
![]() |
Engage the splines of the input shaft and turbine runner.
| *a | Transaxle serial number 2########## |
| *b | Transaxle serial number 3########## |
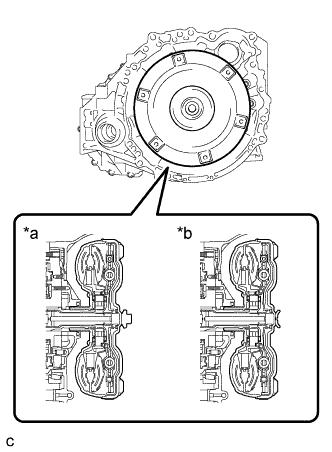
![]() |
Engage the splines of the stator shaft and the stator while turning the torque converter assembly.
| *a | Transaxle serial number 2########## |
| *b | Transaxle serial number 3########## |
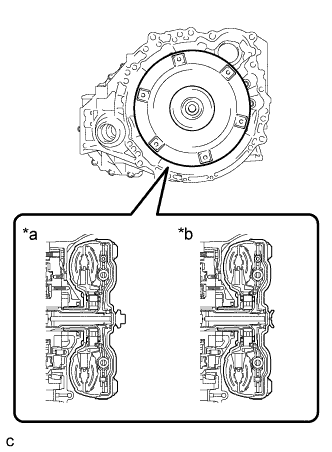
![]() |
Turn the torque converter assembly to insert the key of the oil pump drive gear into the groove of the torque converter assembly.
| *a | Transaxle serial number 2########## |
| *b | Transaxle serial number 3########## |
Clean the torque converter set bolt holes.
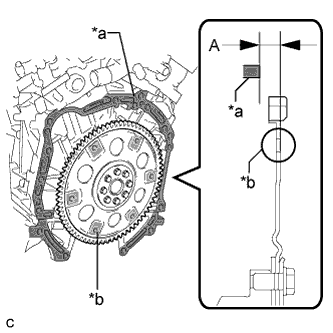
![]() |
Using a vernier caliper and straightedge, measure dimension A between the transaxle contact surface of the engine and the torque converter contact surface of the drive plate.
| *a | Engine Surface |
| *b | Drive Plate Surface |
![]() |
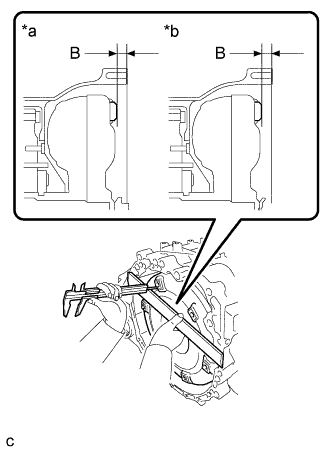
Using a vernier caliper and straightedge, measure dimension B shown in the illustration and check that dimension B is more than dimension A, which was measured in the previous step.
| *a | Transaxle serial number 2########## |
| *b | Transaxle serial number 3########## |
| 6. INSTALL AUTOMATIC TRANSAXLE ASSEMBLY |