 |
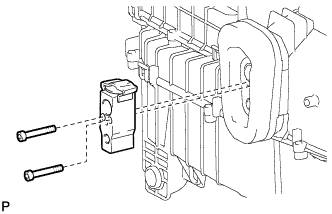
Using a 4 mm hexagon wrench, remove the 2 hexagon bolts and cooler expansion valve.
BLOWER UNIT > DISASSEMBLY |
| 1. REMOVE COOLER EXPANSION VALVE |
|
Using a 4 mm hexagon wrench, remove the 2 hexagon bolts and cooler expansion valve.
| 2. REMOVE NO. 1 COOLER THERMISTOR |
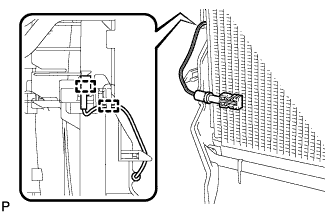 |
Disengage the 2 clamps.
Remove the No. 1 cooler thermistor.
| 3. REMOVE NO. 1 COOLER EVAPORATOR SUB-ASSEMBLY |
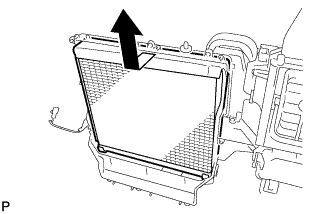 |
Remove the No. 1 cooler evaporator sub-assembly from the blower assembly as shown in the illustration.
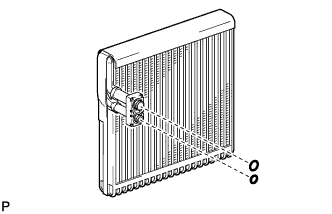 |
Remove the 2 O-rings from the No. 1 cooler evaporator sub-assembly.
| 4. REMOVE DRAIN COOLER HOSE |
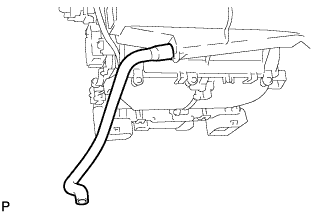 |
Remove the drain cooler hose from the blower case assembly.
| 5. REMOVE AIR DUCT SUB-ASSEMBLY |
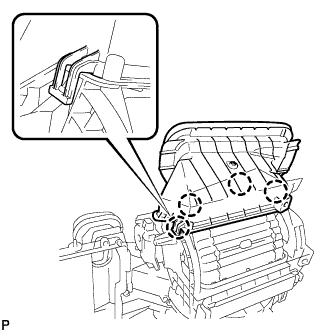 |
Disengage the 4 claws and remove the air duct sub-assembly.
| 6. REMOVE AIR FILTER COVER PLATE |
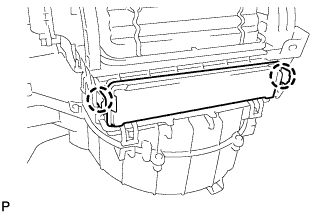 |
Disengage the 2 claws and remove the air filter cover plate.
| 7. REMOVE CLEAN AIR FILTER |
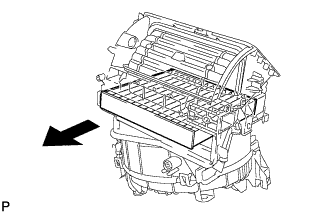 |
Remove the clean air filter as shown in the illustration.
| 8. REMOVE NO. 1 BLOWER DAMPER SERVO SUB-ASSEMBLY |
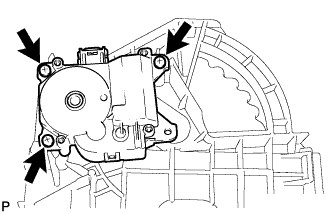 |
Remove the 3 screws and No. 1 blower damper servo sub-assembly.
| 9. REMOVE BLOWER MOTOR WITH FAN SUB-ASSEMBLY |
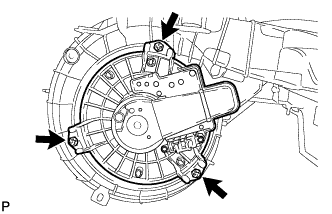 |
Remove the 3 screws and blower motor with fan sub-assembly.