 |
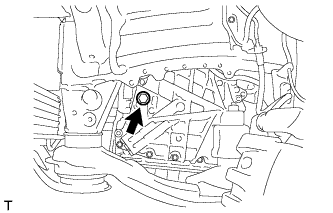
Remove the refill plug and gasket from the automatic transaxle.
OIL COOLER > REMOVAL |
| 1. DRAIN AUTOMATIC TRANSAXLE FLUID |
Remove the front wheel opening extension pad LH, engine under cover LH and front fender apron seal LH.
|
Remove the refill plug and gasket from the automatic transaxle.
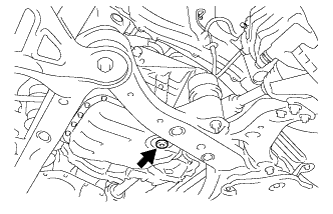 |
Using a 6 mm hexagon socket wrench, remove the overflow plug and gasket from the automatic transaxle.
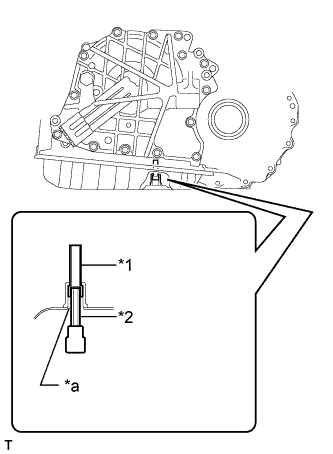 |
Using a 6 mm hexagon socket wrench, remove the No. 1 transmission oil filler tube from the automatic transaxle.
| *1 | No. 1 Transmission Oil Filler Tube |
| *2 | Hexagon Socket Wrench |
| *a | Overflow Plug Hole |
Drain automatic transaxle fluid from the automatic transaxle.
|
Using a 6 mm hexagon socket wrench, install the No. 1 transmission oil filler tube to the automatic transaxle.
| *1 | No. 1 Transmission Oil Filler Tube |
| *2 | Hexagon Socket Wrench |
| *a | Overflow Plug Hole |
|
Using a 6 mm hexagon socket wrench, install a new gasket and the overflow plug to the automatic transaxle.
|
Temporarily install the gasket and refill plug to the automatic transaxle.
| 2. DRAIN ENGINE COOLANT |
Loosen the radiator drain cock plug.
Loosen the 2 cylinder block drain cock plugs.
Remove the radiator cap sub-assembly.
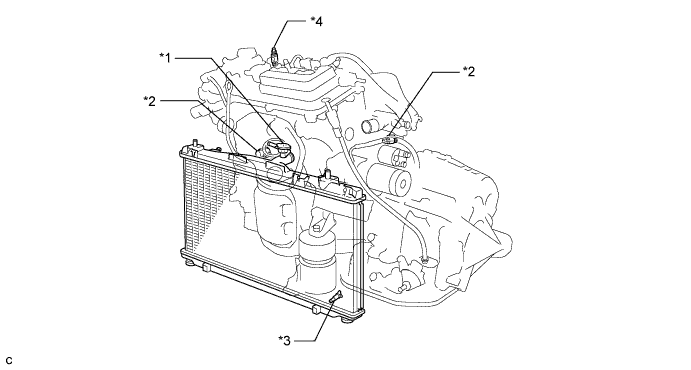
| *1 | Radiator Cap Sub-assembly | *2 | Cylinder Block Drain Cock Plug |
| *3 | Radiator Drain Cock Plug | *4 | Air Drain Cock Plug |
| 3. REMOVE COOL AIR INTAKE DUCT SEAL |
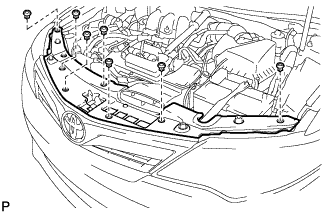 |
Remove the 7 clips and cool air intake duct seal.
| 4. REMOVE INLET NO. 2 AIR CLEANER |
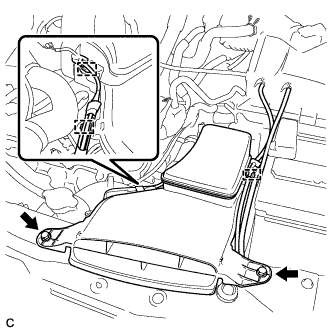 |
Disconnect the 2 wire harness clamps and vacuum hose clamp.
Remove the 2 bolts and inlet No. 2 air cleaner.
| 5. REMOVE AIR CLEANER CAP SUB-ASSEMBLY |
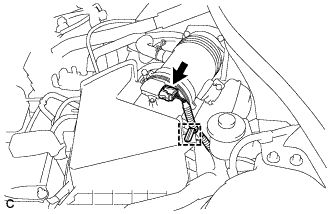 |
Disconnect the mass air flow meter connector and wire harness clamp.
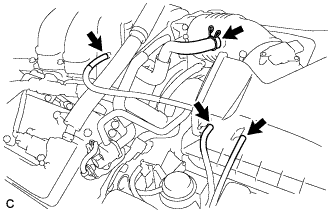 |
Disconnect the 3 hoses.
Separate the ventilation hose.
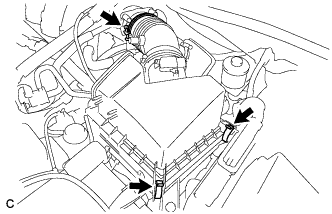 |
Loosen the hose clamp and separate the air cleaner cap sub-assembly from the throttle with motor body assembly.
Release the 2 clamps and remove the air cleaner cap with hose.
| 6. REMOVE AIR CLEANER FILTER ELEMENT SUB-ASSEMBLY |
| 7. REMOVE AIR CLEANER CASE SUB-ASSEMBLY |
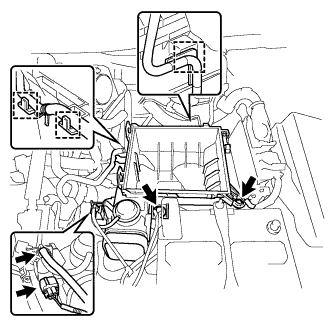 |
Disconnect the wire harness clamp, connector, vacuum hose and No. 1 fuel vapor feed hose.
Remove the 2 bolts and air cleaner case sub-assembly.
| 8. REMOVE INLET NO. 1 AIR CLEANER |
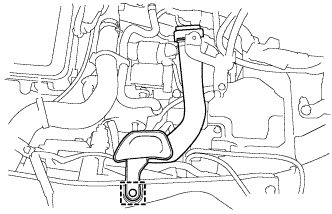 |
Disengage the pin and remove the inlet No. 1 air cleaner.
| 9. REMOVE TRANSMISSION OIL COOLER |
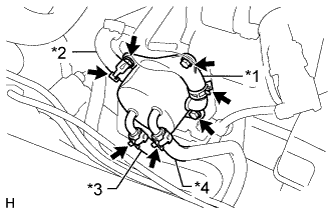 |
Disconnect the No. 3 water by-pass hose, No. 4 water by-pass hose, No. 1 oil cooler outlet hose and No. 1 oil cooler inlet hose from the transmission oil cooler.
| *1 | No. 3 Water By-pass Hose |
| *2 | No. 4 Water By-pass Hose |
| *3 | No. 1 Oil Cooler Outlet Hose |
| *4 | No. 1 Oil Cooler Inlet Hose |
Remove the 3 bolts, transmission oil cooler and transmission oil cooler stay from the front engine mounting bracket.