U660E AUTOMATIC TRANSMISSION / TRANSAXLE AUTOMATIC TRANSAXLE UNIT DISASSEMBLY
PROCEDURE

 35104V
1.REMOVE BREATHER PLUG HOSE
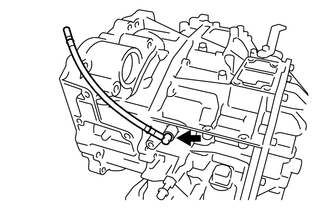
Using a screwdriver, remove the breather plug hose from the transaxle case sub-assembly.
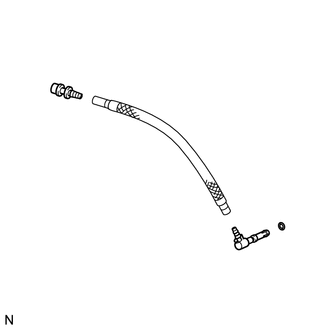
| *1 | No. 1 Breather Plug (ATM) |
| *2 | Breather Plug Hose |
| *3 | No. 2 Breather Plug (ATM) |
| *4 | O-ring |
Using a screwdriver, remove the No. 1 breather plug (ATM) and No. 2 breather plug (ATM) from the breather plug hose.
Using a screwdriver, remove the O-ring from the No. 2 breather plug (ATM).
84540
2.REMOVE PARK/NEUTRAL POSITION SWITCH ASSEMBLY
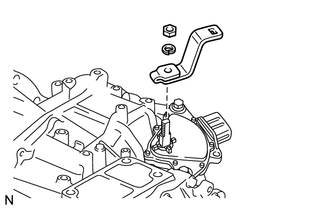
Remove the nut, washer and transmission control shaft lever from the manual valve lever shaft.
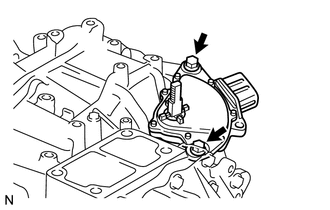
Remove the 2 bolts and park/neutral position switch assembly from the transaxle case sub-assembly.
- NOTICE:
-
Before removing the park/neutral position switch, remove any dirt or rust on the installation portion of the manual valve lever shaft. Be sure to remove the switch straight along the shaft while being careful not to deform the plate spring that supports the shaft. If the plate spring is deformed, the park/neutral position switch cannot be reinstalled correctly.
3.REMOVE OIL COOLER TUBE UNION (OUTLET OIL COOLER UNION)
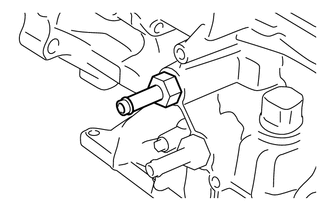
Remove the oil cooler tube union (outlet oil cooler union) from the transaxle case sub-assembly.
Remove the O-ring from the oil cooler tube union (outlet oil cooler union).
32921C
4.REMOVE OIL COOLER TUBE UNION (INLET OIL COOLER UNION)
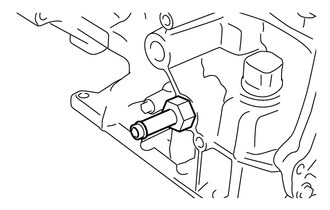
Remove the oil cooler tube union (inlet oil cooler union) from the transaxle case sub-assembly.
Remove the O-ring from the oil cooler tube union (inlet oil cooler union).
35104Q
5.REMOVE NO. 1 TRANSAXLE CASE PLUG
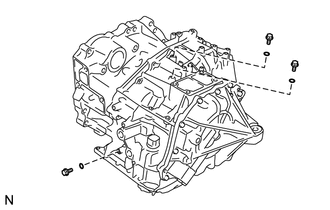
Remove the 3 No. 1 transaxle case plugs from the transaxle case sub-assembly.
Using a screwdriver, remove the 3 O-rings from the 3 No. 1 transaxle case plugs.
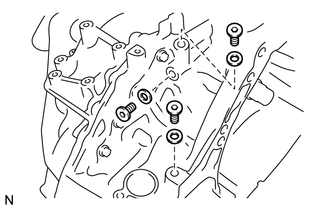
Using a hexagon socket wrench (6 mm), remove the 3 hexagon bolts from the transaxle housing.
Remove the gasket from each of the 3 hexagon bolts.
30500
6.SUPPORT AUTOMATIC TRANSAXLE ASSEMBLY
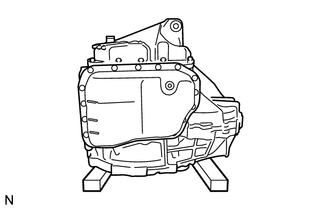
Support the automatic transaxle assembly on wooden blocks.
35106D
7.REMOVE AUTOMATIC TRANSAXLE OIL PAN SUB-ASSEMBLY
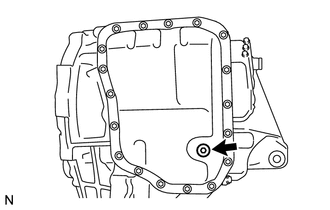
Using a hexagon socket wrench (6 mm), remove the overflow plug from the automatic transaxle oil pan sub-assembly.
Remove the gasket from the overflow plug.
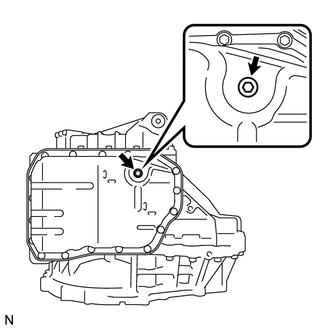
Using a hexagon socket wrench (6 mm), remove the No. 1 transmission oil filler tube from the automatic transaxle oil pan sub-assembly.
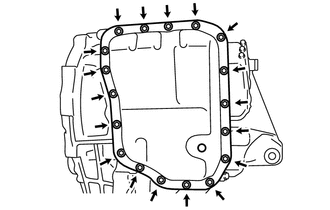
Remove the 18 bolts, automatic transaxle oil pan sub-assembly and automatic transaxle oil pan gasket from the automatic transaxle assembly.
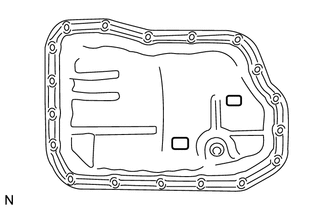
| *1 | Magnet |
Remove the 2 transmission oil cleaner magnets from the automatic transaxle oil pan sub-assembly.
35394
8.INSPECT TRANSMISSION OIL CLEANER MAGNET
35330
9.REMOVE VALVE BODY OIL STRAINER ASSEMBLY
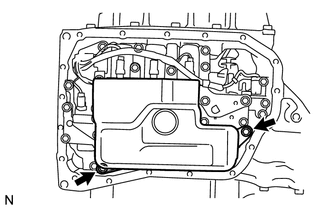
Remove the 2 bolts and valve body oil strainer assembly from the transmission valve body assembly.
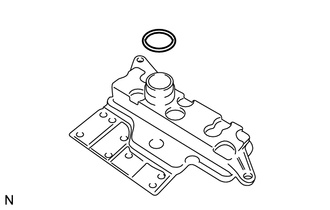
| *1 | O-ring |
Remove the O-ring from the valve body oil strainer assembly.
35410
10.REMOVE TRANSMISSION VALVE BODY ASSEMBLY
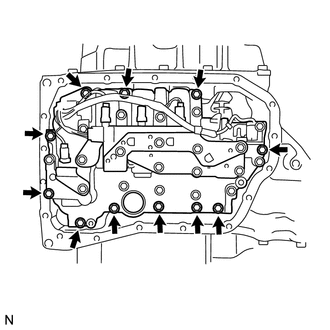
Remove the 11 bolts and transmission valve body assembly from the transaxle case sub-assembly.
- NOTICE:
-
When removing the transmission valve body assembly, be careful not to allow the transmission revolution sensor and the transaxle case sub-assembly to interfere with each other.
35145C
11.REMOVE TRANSAXLE CASE GASKET
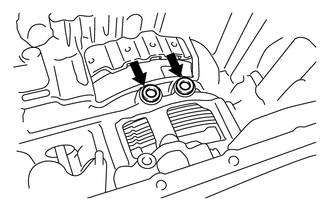
Remove the 2 gaskets from the transaxle case sub-assembly.
35701
12.INSPECT INPUT SHAFT SUB-ASSEMBLY
35102
13.REMOVE REAR TRANSAXLE COVER SUB-ASSEMBLY
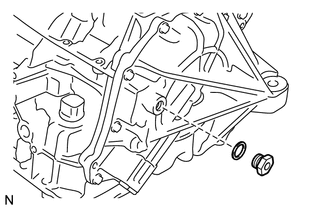
Remove the refill plug from the rear transaxle cover sub-assembly.
Remove the gasket from the refill plug.
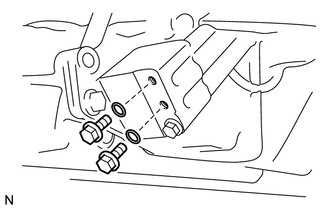
Remove the 2 No. 1 automatic transaxle case plugs from the rear transaxle cover sub-assembly.
Using a screwdriver, remove the 2 O-rings from the 2 No. 1 automatic transaxle case plugs.
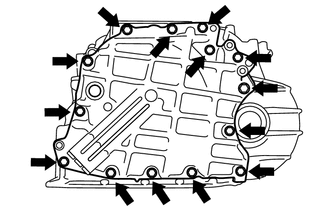
Remove the 14 bolts from the rear transaxle cover sub-assembly.
Using a brass bar and a hammer, tap on the circumference of the rear transaxle cover sub-assembly to remove the rear transaxle cover sub-assembly from the transaxle case sub-assembly.
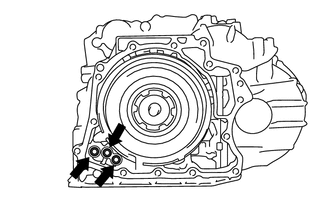
Using a screwdriver, remove the 3 O-rings from the transaxle case sub-assembly.
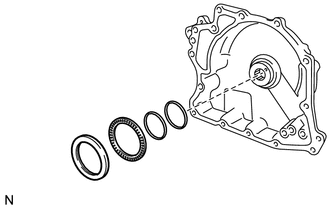
| *1 | Oil Seal Ring |
| *2 | Thrust Needle Roller Bearing |
| *3 | Thrust Needle Roller Race |
Using a screwdriver, remove the 2 oil seal rings from the rear transaxle cover sub-assembly.
Remove the thrust needle roller bearing and thrust needle roller race from the rear transaxle cover sub-assembly.
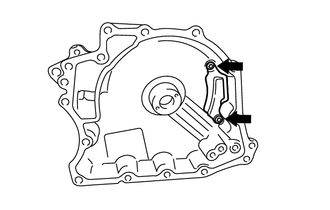
Using a "TORX" socket wrench (T30), remove the 2 "TORX" screws and rear transaxle cover plate from the rear transaxle cover sub-assembly.
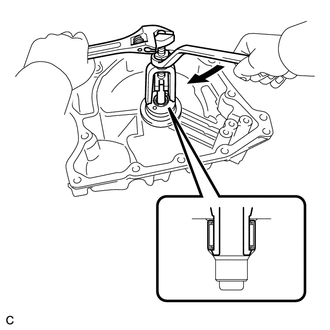
| *a | Turn |
| *b | Hold |
Using SST, remove the needle roller bearing from the rear transaxle cover sub-assembly.
- SST
- 09319-60020
35635C
14.REMOVE DIRECT MULTIPLE DISC CLUTCH ASSEMBLY
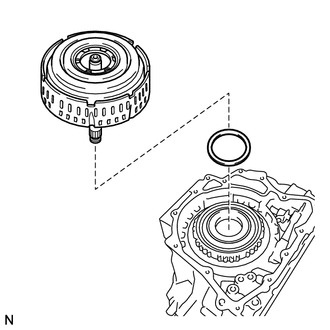
| *1 | Direct Multiple Disc Clutch Assembly |
| *2 | Thrust Needle Roller Bearing |
Remove the direct multiple disc clutch assembly from the transaxle case sub-assembly.
Remove the thrust needle roller bearing from the direct multiple disc clutch assembly.
35635E
15.REMOVE DIRECT MULTIPLE DISC CLUTCH SNAP RING
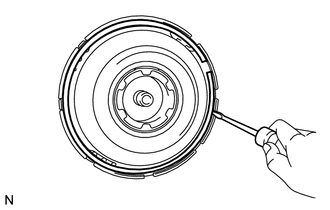
Using a screwdriver, remove the snap ring from the direct multiple disc clutch assembly.
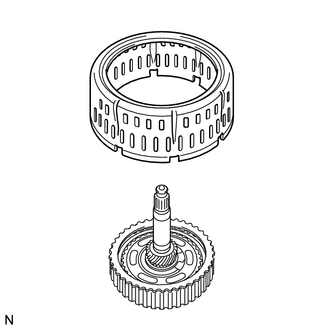
Remove the No. 2 direct clutch piston from the direct multiple disc clutch assembly.
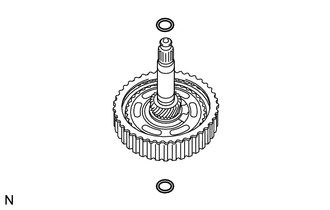
| *1 | Intermediate Shaft Oil Seal |
| *2 | O-ring |
Using a screwdriver, remove the intermediate shaft oil seal from the direct multiple disc clutch assembly.
Using a screwdriver, remove the O-ring from the direct multiple disc clutch assembly.
16.REMOVE NO. 2 CLUTCH DISC
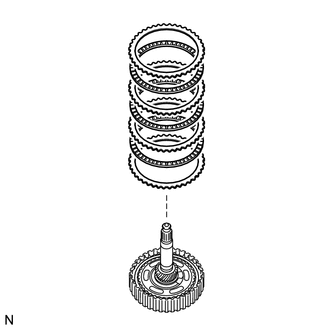
| *1 | Clutch Plate |
| *2 | Clutch Disc |
| *3 | Clutch Flange |
Remove the clutch flange, 3 clutch discs and 3 clutch plates from the direct multiple disc clutch assembly.
17.INSPECT NO. 2 CLUTCH DISC
35730
18.REMOVE REAR PLANETARY SUN GEAR ASSEMBLY
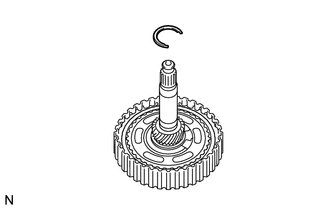
Using a snap ring expander, remove the snap ring from the direct multiple disc clutch assembly.
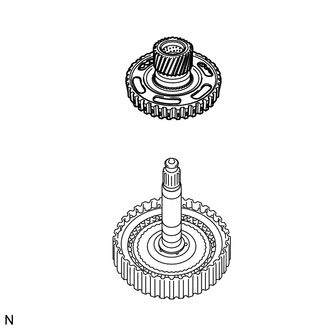
Remove the rear planetary sun gear assembly from the direct multiple disc clutch assembly.
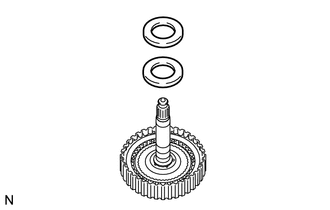
| *1 | Thrust Needle Roller Bearing |
| *2 | Thrust Needle Roller Race |
Remove the thrust needle roller bearing and thrust needle roller race from the direct multiple disc clutch assembly.
35730
19.INSPECT REAR PLANETARY SUN GEAR ASSEMBLY
20.REMOVE NO. 1 CLUTCH DISC
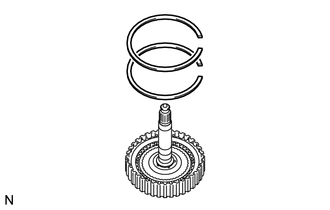
Using 2 screwdrivers, remove the 2 snap rings from the direct multiple disc clutch assembly.
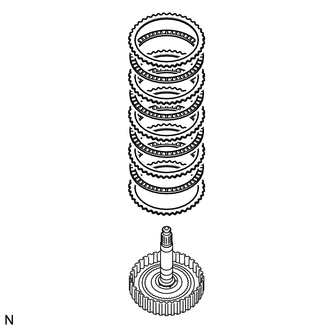
| *1 | Clutch Flange |
| *2 | Clutch Plate |
| *3 | Clutch Disc |
Remove the clutch flange, 4 clutch discs and 4 clutch plates from the direct multiple disc clutch assembly.
21.INSPECT NO. 1 CLUTCH DISC
35111C
22.REMOVE TRANSAXLE HOUSING
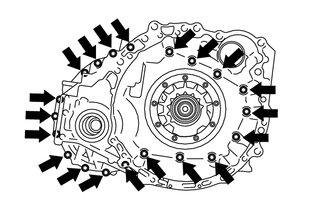
Remove the 20 bolts from the transaxle housing.
Using a brass bar and a hammer, tap on the circumference of the transaxle housing to remove the transaxle housing from the transaxle case sub-assembly.
23.REMOVE COUNTER DRIVEN GEAR FRONT TAPERED ROLLER BEARING OUTER RACE
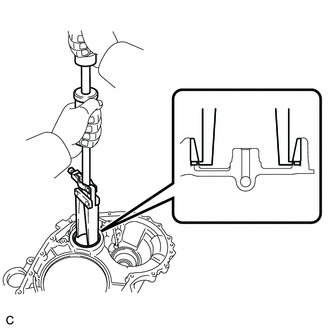
Using SST, remove the counter driven gear front tapered roller bearing outer race and shim from the transaxle housing.
- SST
- 09308-00010
35882A
24.REMOVE DIFFERENTIAL GEAR LUBE APPLY TUBE
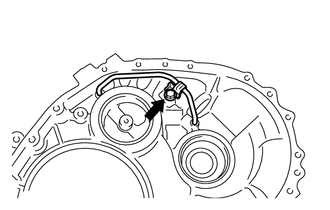
Remove the bolt, clamp and differential gear lube apply tube from the transaxle housing.
35035
25.REMOVE FRONT OIL PUMP ASSEMBLY
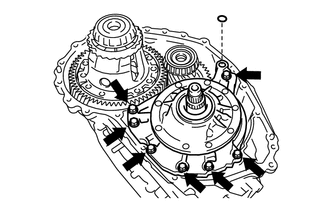
| *1 | O-ring |
Remove the 7 bolts and front oil pump assembly from the transaxle case sub-assembly.
Remove the O-ring from the front oil pump assembly.
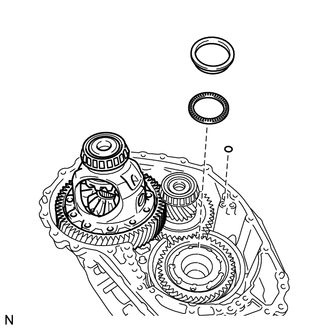
| *1 | Thrust Needle Roller Bearing |
| *2 | Thrust Needle Roller Race |
| *3 | O-ring |
Remove the thrust needle roller bearing and thrust needle roller race from the carrier lock nut.
Remove the O-ring from the transaxle case sub-assembly.
35301B
26.REMOVE FRONT OIL PUMP BODY O-RING
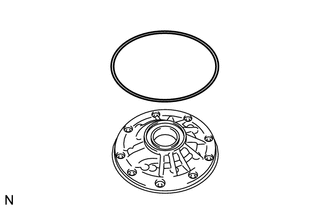
Remove the O-ring from the front oil pump body assembly.
35683B
27.REMOVE NO. 3 BRAKE DISC
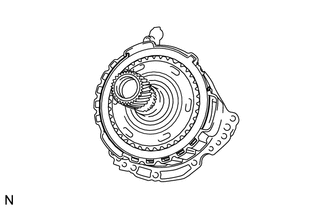
| *1 | Snap Ring |
Using a screwdriver, remove the snap ring from the front oil pump assembly.
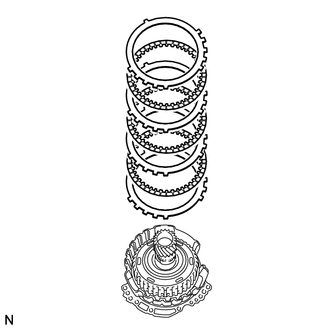
| *1 | No. 3 Brake Flange |
| *2 | No. 3 Brake Plate |
| *3 | No. 3 Brake Disc |
Remove the 2 No. 3 brake flanges, 3 No. 3 brake discs and 2 No. 3 brake plates from the front oil pump assembly.
35683B
28.INSPECT NO. 3 BRAKE DISC
34330
29.REMOVE UNDERDRIVE PLANETARY GEAR ASSEMBLY
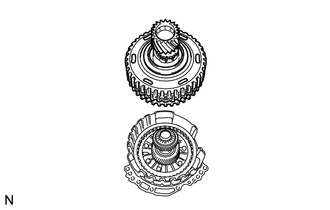
Remove the underdrive planetary gear assembly from the front oil pump assembly.
35663
30.REMOVE NO. 3 BRAKE HUB
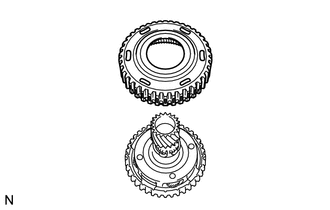
Remove the No. 3 brake hub from the underdrive planetary gear assembly.
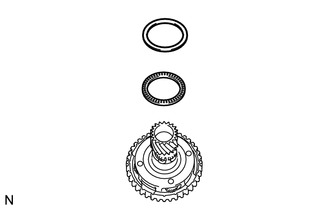
| *1 | Thrust Needle Roller Race |
| *2 | Thrust Needle Roller Bearing |
Remove the thrust needle roller bearing and thrust needle roller race from the underdrive planetary gear assembly.
34341
31.REMOVE UNDERDRIVE PLANETARY RING GEAR
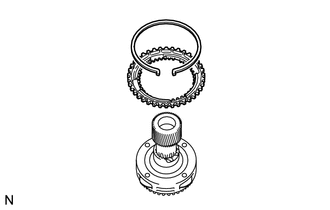
| *1 | Snap Ring |
| *2 | Underdrive Planetary Ring Gear |
Using needle-nose pliers, remove the snap ring from the underdrive planetary ring gear.
Remove the underdrive planetary ring gear from the underdrive planetary gear assembly.
35706V
32.REMOVE PLANETARY SUN GEAR SUB-ASSEMBLY
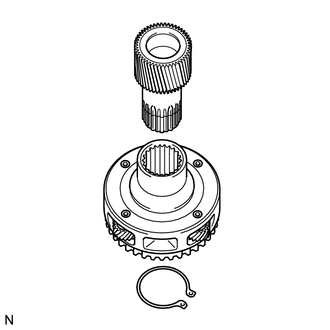
| *1 | Planetary Sun Gear Sub-assembly |
| *2 | Underdrive Planetary Gear Assembly |
| *3 | Snap Ring |
While expanding the snap ring with snap ring pliers, remove the planetary sun gear from the underdrive planetary gear assembly.
Remove the snap ring from the underdrive planetary gear assembly.
34330
33.INSPECT UNDERDRIVE PLANETARY GEAR ASSEMBLY
35706V
34.INSPECT PLANETARY SUN GEAR SUB-ASSEMBLY
35701
35.REMOVE INPUT SHAFT SUB-ASSEMBLY
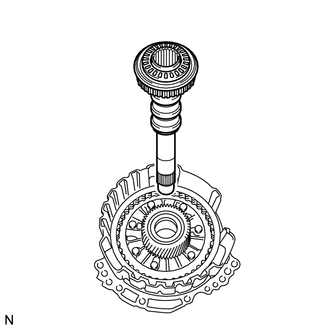
Remove the input shaft sub-assembly from the front oil pump assembly.
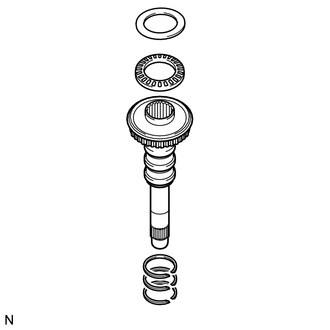
| *1 | Thrust Needle Roller Race |
| *2 | Thrust Needle Roller Bearing |
| *3 | Input Shaft Oil Seal Ring |
| *4 | Input Shaft |
Remove the thrust needle roller bearing and thrust needle roller race from the input shaft.
Using a screwdriver, remove the 3 input shaft oil seal rings from the input shaft.
34321
36.REMOVE UNDERDRIVE PLANETARY SUN GEAR
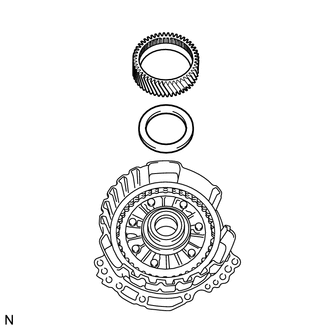
| *1 | Underdrive Planetary Sun Gear |
| *2 | Thrust Needle Roller Bearing |
Remove the underdrive planetary sun gear from the oil pump assembly.
Remove the thrust needle roller bearing from the oil pump assembly.
37.REMOVE NO. 1 BRAKE DISC
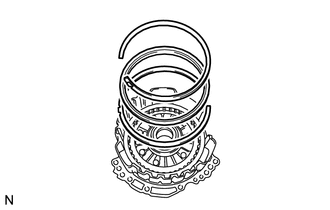
| *1 | Snap Ring |
| *2 | Brake Snap Ring Stopper |
Using a screwdriver, remove the 2 snap rings and brake snap ring stopper from the front oil pump assembly.
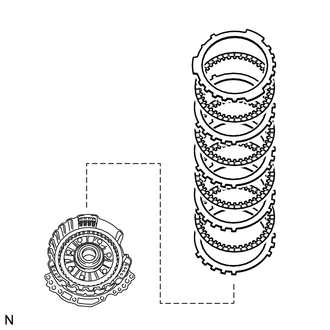
| *1 | No. 1 Brake Flange |
| *2 | No. 1 Brake Plate |
| *3 | No. 1 Brake Disc |
Remove the No. 1 brake flange, 4 No. 1 brake discs and 4 No. 1 brake plates from the front oil pump assembly.
38.INSPECT NO. 1 BRAKE DISC
35608L
39.REMOVE 2ND BRAKE PISTON RETURN SPRING SUB-ASSEMBLY
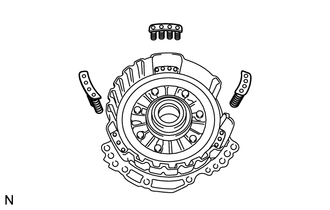
Remove the 3 2nd brake piston return springs from the front oil pump assembly.
35608L
40.INSPECT 2ND BRAKE PISTON RETURN SPRING SUB-ASSEMBLY
35621F
41.REMOVE NO. 1 BRAKE PISTON
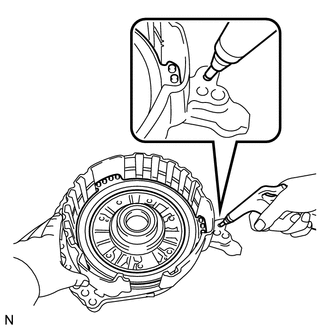
Holding the oil pump assembly by hand, apply compressed air (392 kPa, 4.0 kgf/cm2, 57 psi) to the oil pump assembly to remove the No. 1 brake piston.
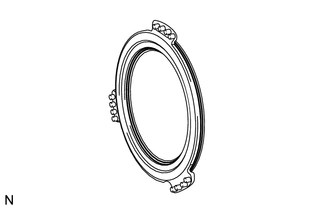
| *1 | O-ring |
Using a screwdriver, remove the 2 O-rings from the No. 1 brake piston.
41311
42.REMOVE FRONT DIFFERENTIAL CASE
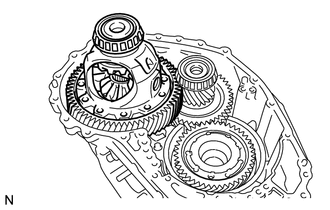
Remove the front differential case from the transaxle case sub-assembly.
35782H
43.REMOVE COUNTER DRIVE GEAR NUT
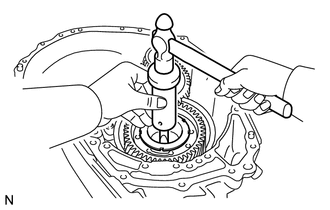
Using SST and a hammer, unstake the counter drive gear nut.
- SST
- 09930-00010
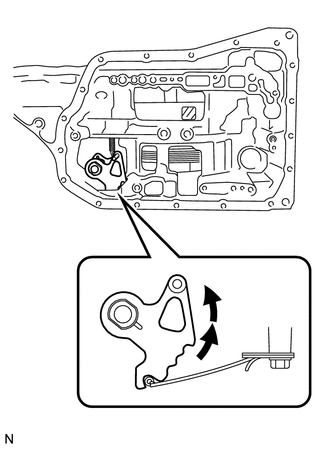
Turn the manual valve lever 2 notches counterclockwise to set it to the P position as shown in the illustration.
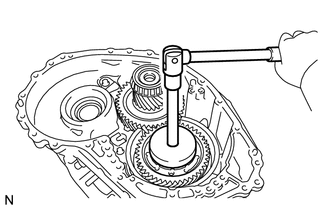
Using SST, remove the counter drive gear nut from the planetary gear assembly.
- SST
- 09387-00130
35783R
44.REMOVE COUNTER DRIVEN GEAR
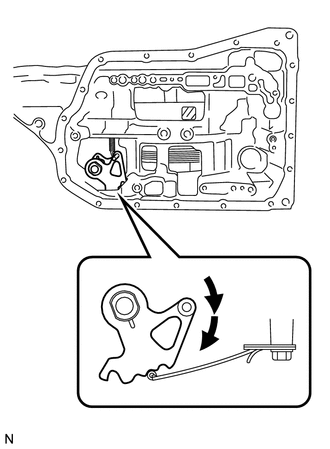
Turn the manual valve lever 2 notches clockwise to set it to the N position as shown in the illustration.
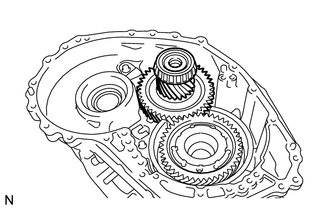
Remove the counter driven gear from the transaxle case sub-assembly.
45.REMOVE COUNTER DRIVEN GEAR FRONT TAPERED ROLLER BEARING
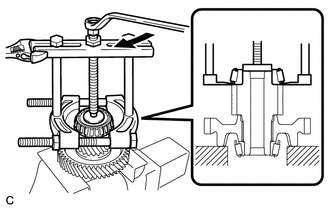
| *a | Turn |
| *b | Hold |
Using SST, remove the counter driven gear front tapered roller bearing from the counter driven gear.
- SST
- 09950-00020
09950-00030
09950-60010 (09951-00400)
46.REMOVE COUNTER DRIVEN GEAR REAR TAPERED ROLLER BEARING
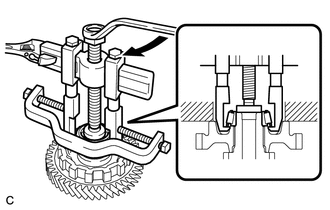
| *a | Turn |
| *b | Hold |
Using SST, remove the counter driven gear rear tapered roller bearing and differential drive pinion from the counter driven gear.
- SST
- 09950-40011 (09951-04010, 09952-04010, 09953-04020, 09954-04010, 09955-04071, 09957-04010, 09958-04011)
09950-60010 (09951-00320)
35558
47.REMOVE PAWL SHAFT CLAMP
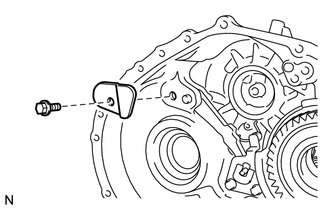
Remove the bolt and pawl shaft clamp from the transaxle case sub-assembly.
35596
48.REMOVE PAWL STOPPER PLATE
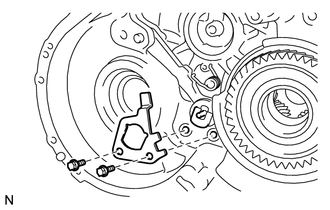
Remove the 2 bolts and pawl stopper plate from the transaxle case sub-assembly.
35598
49.REMOVE PARKING LOCK SLEEVE
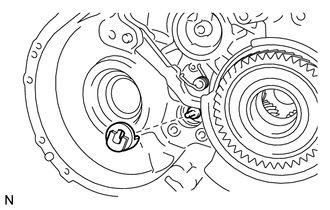
Remove the parking lock sleeve from the transaxle case sub-assembly.
35557
50.REMOVE PARKING LOCK PAWL
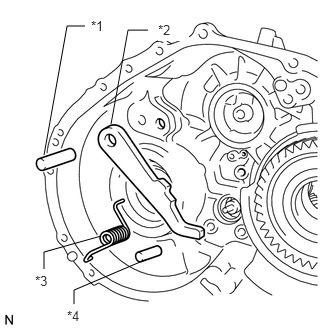
| *1 | Parking Lock Pawl Shaft |
| *2 | Parking Lock Pawl |
| *3 | Spring |
| *4 | Parking Lock Pawl Pin |
Remove the spring, parking lock pawl pin, parking lock pawl shaft and parking lock pawl from the transaxle case sub-assembly.
51.REMOVE COUNTER DRIVEN GEAR REAR TAPERED ROLLER BEARING OUTER RACE
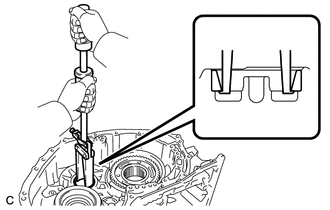
Using SST, remove the counter driven gear rear tapered roller bearing outer race from the transaxle case sub-assembly.
- SST
- 09308-00010
35790
52.REMOVE ONE-WAY CLUTCH ASSEMBLY
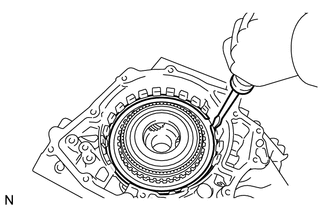
Using a screwdriver, remove the snap ring from the transaxle case sub-assembly.
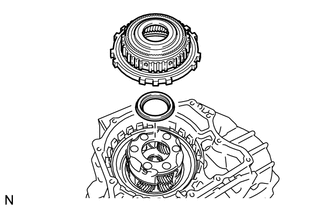
| *1 | One-way Clutch Assembly |
| *2 | Thrust Needle Roller Bearing |
Remove the one-way clutch assembly with the planetary ring gear from the transaxle case sub-assembly.
Remove the thrust needle roller bearing from the planetary gear assembly.
35790
53.INSPECT ONE-WAY CLUTCH ASSEMBLY
35743K
54.REMOVE PLANETARY RING GEAR
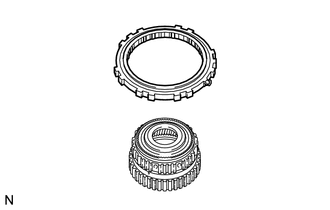
| *1 | One-way Clutch Assembly |
| *2 | Planetary Ring Gear |
Remove the planetary ring gear from the one-way clutch assembly.
35762E
55.REMOVE PLANETARY RING GEAR FLANGE
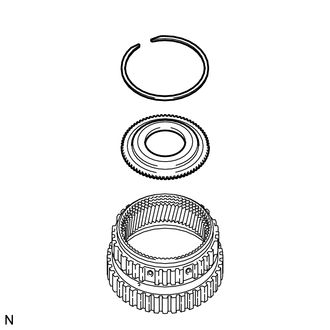
| *1 | Snap Ring |
| *2 | Planetary Ring Gear Flange |
| *3 | Planetary Ring Gear |
Using a screwdriver, remove the snap ring from the planetary ring gear.
Remove the planetary ring gear flange from the planetary ring gear.
35682A
56.REMOVE NO. 2 BRAKE DISC
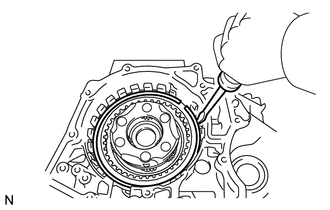
Using a screwdriver, remove the snap ring from the transaxle case sub-assembly.
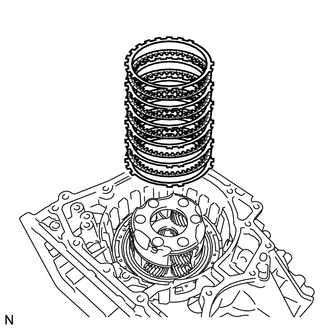
| *1 | Brake Flange |
| *2 | Brake Plate |
| *3 | Brake Disc |
Remove the brake flange, 5 brake discs and 5 brake plates from the transaxle case sub-assembly.
35682A
57.INSPECT NO. 2 BRAKE DISC
35068C
58.REMOVE 1ST AND REVERSE BRAKE RETURN SPRING SUB-ASSEMBLY
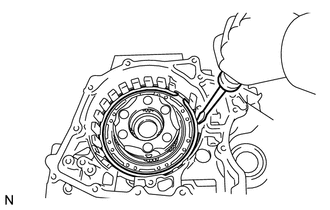
Using a screwdriver, remove the snap ring from the transaxle case sub-assembly.
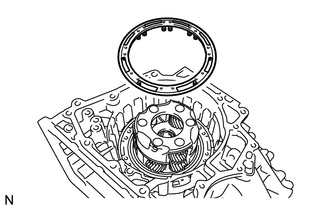
Remove the 1st and reverse brake return spring from the transaxle case sub-assembly.
35068C
59.INSPECT 1ST AND REVERSE BRAKE RETURN SPRING SUB-ASSEMBLY
35622G
60.REMOVE NO. 2 BRAKE PISTON
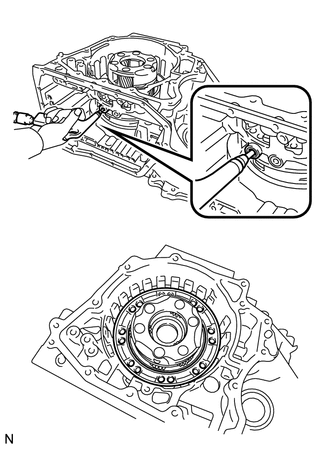
Apply compressed air (392 kPa, 4.0 kgf/cm2, 57 psi) to the ATF hole to remove the No. 2 brake piston from the transaxle case sub-assembly.
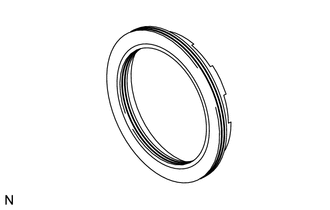
| *1 | O-ring |
Using a screwdriver, remove the 2 O-rings from the No. 2 brake piston.
35720
61.REMOVE FRONT PLANETARY GEAR ASSEMBLY
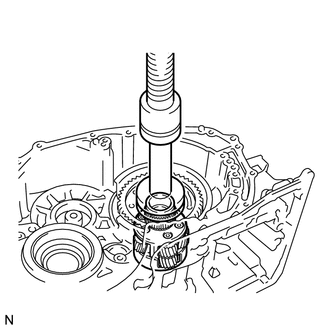
Using SST and a press, remove the planetary gear assembly from the transaxle case sub-assembly.
- SST
- 09950-60010 (09951-00580)
09950-70010 (09951-07100)
35782C
62.REMOVE COUNTER DRIVE GEAR
- NOTICE:
-
Perform this procedure only when the counter drive gear bearing or transaxle case sub-assembly is replaced.
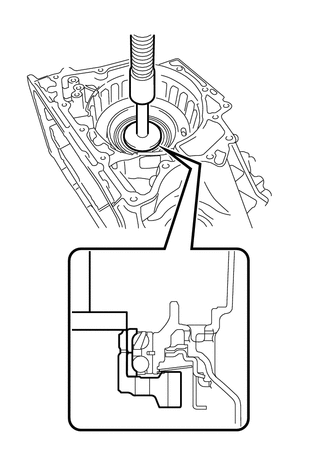
Using SST and a press, remove the counter drive gear and bearing inner race (rear side) from the transaxle case sub-assembly.
- SST
- 09950-60020 (09951-00710)
09950-70010 (09951-07100)
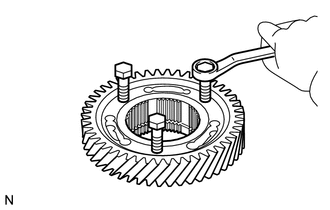
As shown in the illustration, tighten the 3 bolts evenly and leave a clearance of approximately 20.0 mm (0.787 in.) between the counter drive gear and bearing inner race (front side).
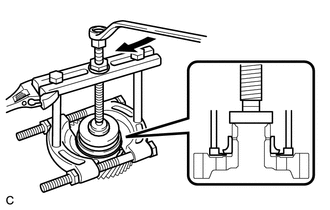
| *a | Turn |
| *b | Hold |
Using SST, remove the bearing inner race (front side) from the counter drive gear.
- SST
- 09950-00020
09950-00030
09950-60020 (09951-00710)
35623
63.REMOVE NO. 3 BRAKE PISTON
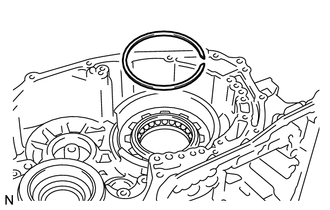
Using a screwdriver, remove the snap ring from the transaxle case sub-assembly.
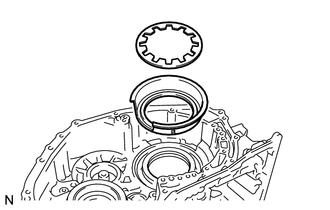
| *1 | Brake Piston Return Spring |
| *2 | No. 3 Brake Piston |
Remove the brake piston return spring from the transaxle case sub-assembly.
Remove the No. 3 brake piston from the transaxle case sub-assembly.
35409
64.REMOVE MANUAL DETENT SPRING SUB-ASSEMBLY
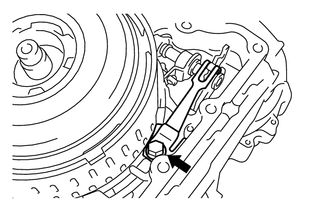
Remove the bolt, cover and manual detent spring sub-assembly from the transaxle case sub-assembly.
35501
65.REMOVE PARKING LOCK ROD SUB-ASSEMBLY
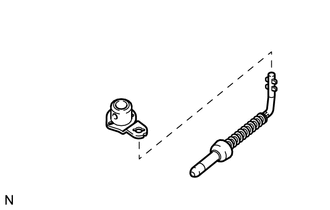
Remove the parking lock rod sub-assembly from the parking lock lever sub-assembly.
- HINT:
-
Align the slot with the notches on the parking lock lever sub-assembly to remove the parking lock rod sub-assembly.
35561
66.REMOVE MANUAL VALVE LEVER SHAFT
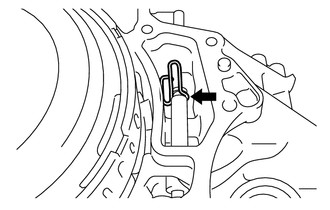
Using needle-nose pliers, remove the manual valve lever shaft retainer spring from the transaxle case sub-assembly.
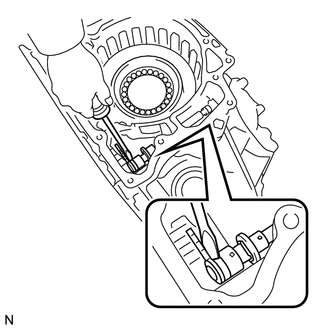
Using a screwdriver, slide the spacer of the manual valve lever sub-assembly.
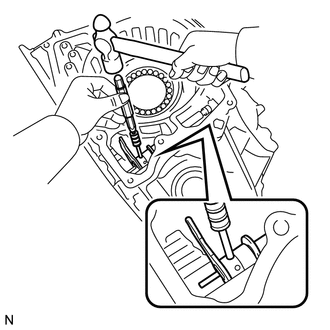
Using a pin punch (3 mm) and hammer, drive out the slotted spring pin from the manual valve lever sub-assembly.
- HINT:
-
To prevent the pin from falling into the case, drive the pin until it has cleared the manual valve lever shaft.
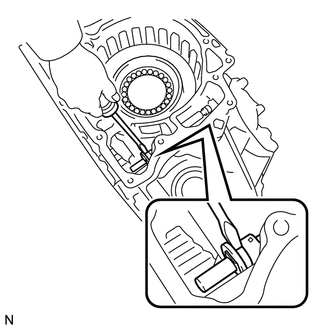
Using a screwdriver, slide the spacer of the parking lock lever sub-assembly.
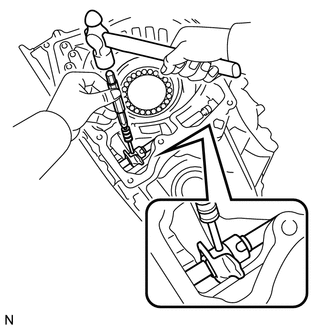
Using a pin punch (3 mm) and hammer, drive out the slotted spring pin from the parking lock lever sub-assembly.
- HINT:
-
To prevent the pin from falling into the case, drive the pin until it has cleared the manual valve lever shaft.
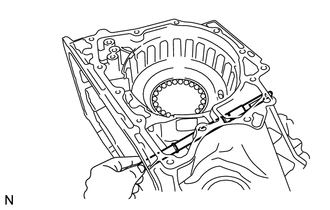
Remove the manual valve lever shaft, manual valve lever sub-assembly, parking lock lever sub-assembly and 2 spacers from the transaxle case sub-assembly.
35506F
67.REMOVE MANUAL VALVE LEVER SHAFT OIL SEAL
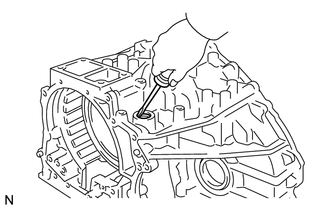
Using a screwdriver, remove the manual valve lever shaft oil seal from the transaxle case sub-assembly.