CRUISE CONTROL LANE RECOGNITION CAMERA SENSOR INSTALLATION
CAUTION / NOTICE / HINT
- NOTICE:
- ·
If the lane departure warning camera bracket is deformed or damaged, replace it together with the windshield glass.
·When replacing the windshield glass of a vehicle equipped with a lane departure warning camera, make sure to use a Toyota genuine part. If a non-Toyota genuine part is used, the lane departure warning camera may not be able to be installed due to a missing bracket or the lane departure alert system may not operate properly due to a difference in the transmissivity or black ceramic border.
·If the lane departure warning camera is dropped, replace it with a new one.
PROCEDURE

 86468
1.INSTALL LANE DEPARTURE WARNING CAMERA
When using a new lane departure warning camera:
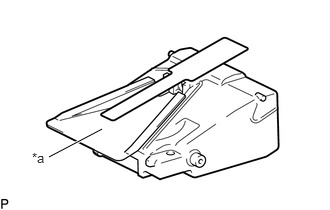
| *a | Camera Hood |
Remove the protective film.
- NOTICE:
- ·
Do not touch the camera lens after removing the protective film.
·Do not touch the camera hood.
Slide the lane departure warning camera in the direction indicated by the arrow (1) shown in the illustration to engage the 2 guides.
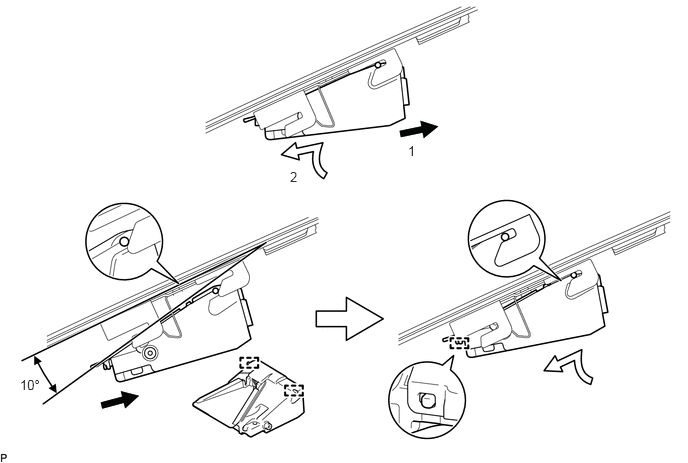
- NOTICE:
-
Do not touch the camera lens and camera hood.
Slide the lane departure warning camera in the direction indicated by the arrow (2) shown in the illustration to engage the guide.
Connect the connector to install the lane departure warning camera.
86466
2.INSTALL NO. 1 LANE DEPARTURE WARNING CAMERA COVER
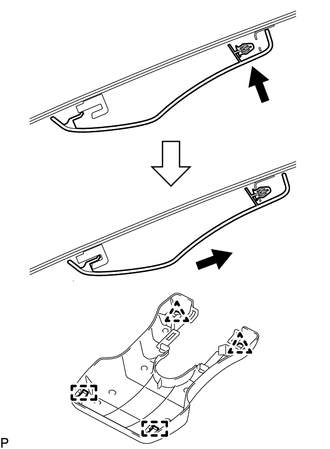
Engage the 2 guides and 2 clips as shown in the illustration to install the No. 1 lane departure warning camera cover.
86466C
3.INSTALL NO. 2 LANE DEPARTURE WARNING CAMERA COVER
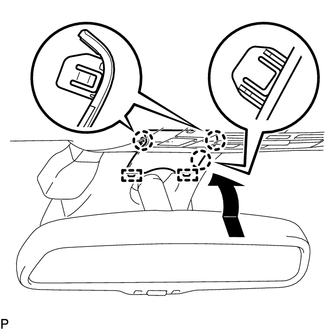
Engage the 2 guides and 3 claws as shown in the illustration to install the No. 2 lane departure warning camera cover.
86468
4.ADJUST LANE DEPARTURE WARNING CAMERA